Another day, more coolant. I’m quickly running out of time to get Effie ready for the show this weekend, but I needed to fix the leaking coolant first.
The British Car Day show is in 5 days, Effie is leaking coolant and doesn’t have a Warrant. Time is running out, and I still have some work to do on Tess too. I’ll at least have Tess there, but I would love to have both Rovers in the show.
So in my last post I detailed the issues I was having with a leaking under intake pipe. I couldn’t drive the car far as I didn’t want to risk an overheat, so I haven’t been able to get a WOF for it yet.
The other day I put the urgent call out on the OldSchool forum for someone to weld my steel pipe to the threaded boss. This was a crucial step towards fixing Effie, but not having the tools to weld it myself, I was stuck. Thankfully a member on the forum came to the rescue, and yesterday he did an awesome job of machining down the boss, and welding the pipe into it.

It was good timing, because today was a public holiday (hey Kiwi’s, happy Waitangi Day!) and this gave me a whole day to work on Effie, so there might be a chance of getting a WOF this week.
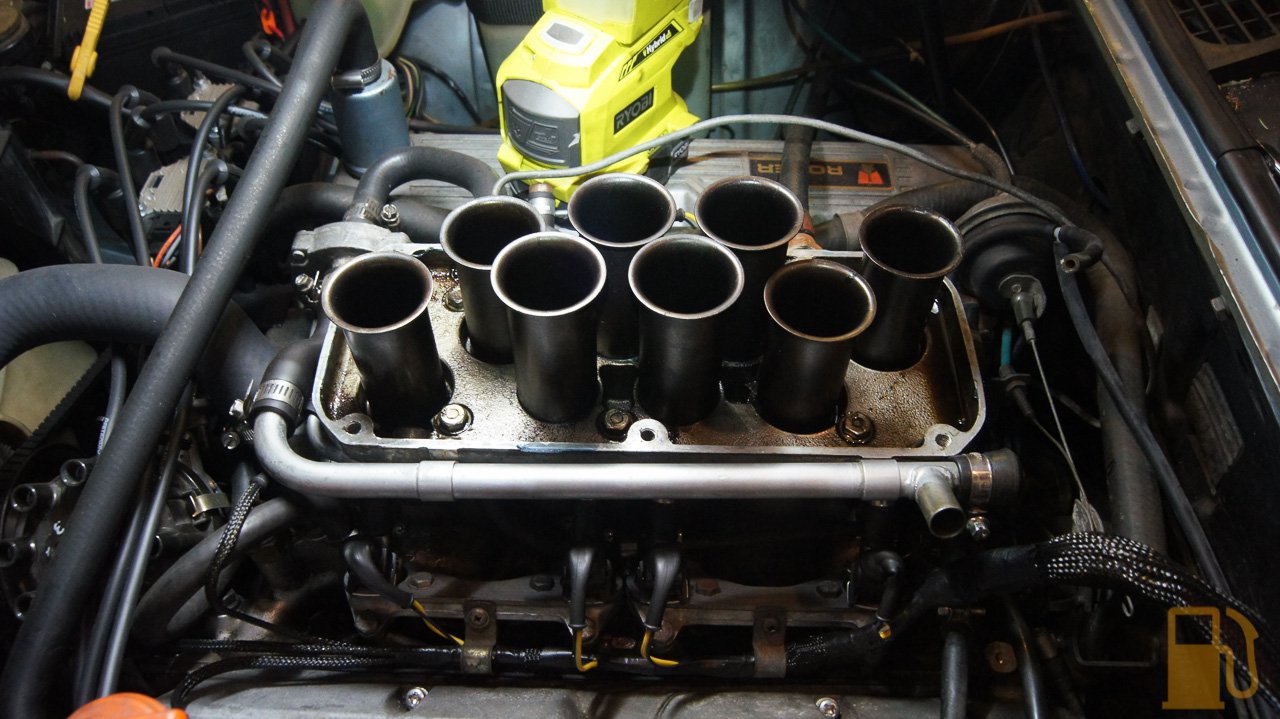
This is the engine, in all its wasted spark coil glory

The first step is to dump all the coolant, and like usual, still no drain plug so it goes everywhere.

With the coolant everywhere but your drain pan, its time to start ripping everything to bits. This isn’t a small job by any stretch of the imagination, in fact, it’s a bigger job than the “big injection hose” job I did this time last year.
Off comes the intake piping, and the plenum. I’m getting pretty good at this particular part of the job

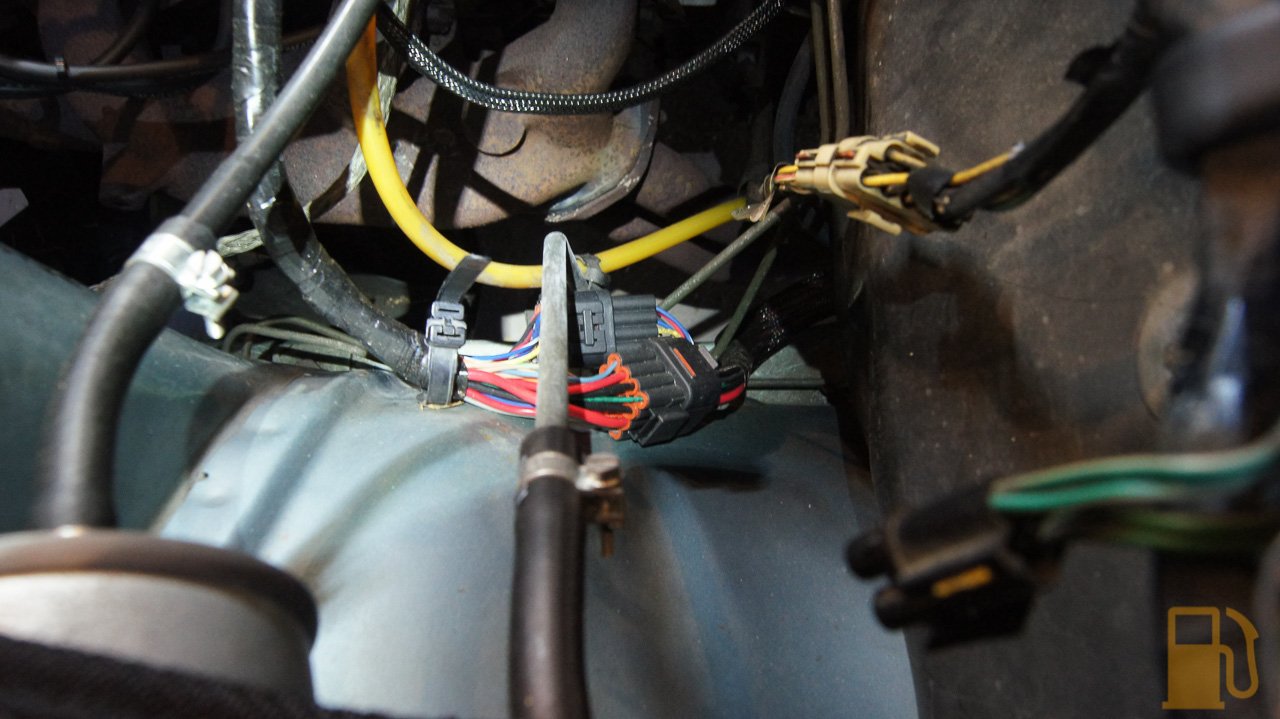
The smart person I am, made this job easier for myself by putting plugs in the main engine loom, so that it can be disconnected from the section that runs into the car. The engine harness has to be completely removed to make life easier, otherwise it will get in the way.
My plenum base had some oil residue in it. This appears to be normal for injected SD1s, and despite having drain holes in the bottom of the plenum base (at the bottom of the trumpets) this little pool of oil just chills out at the back.
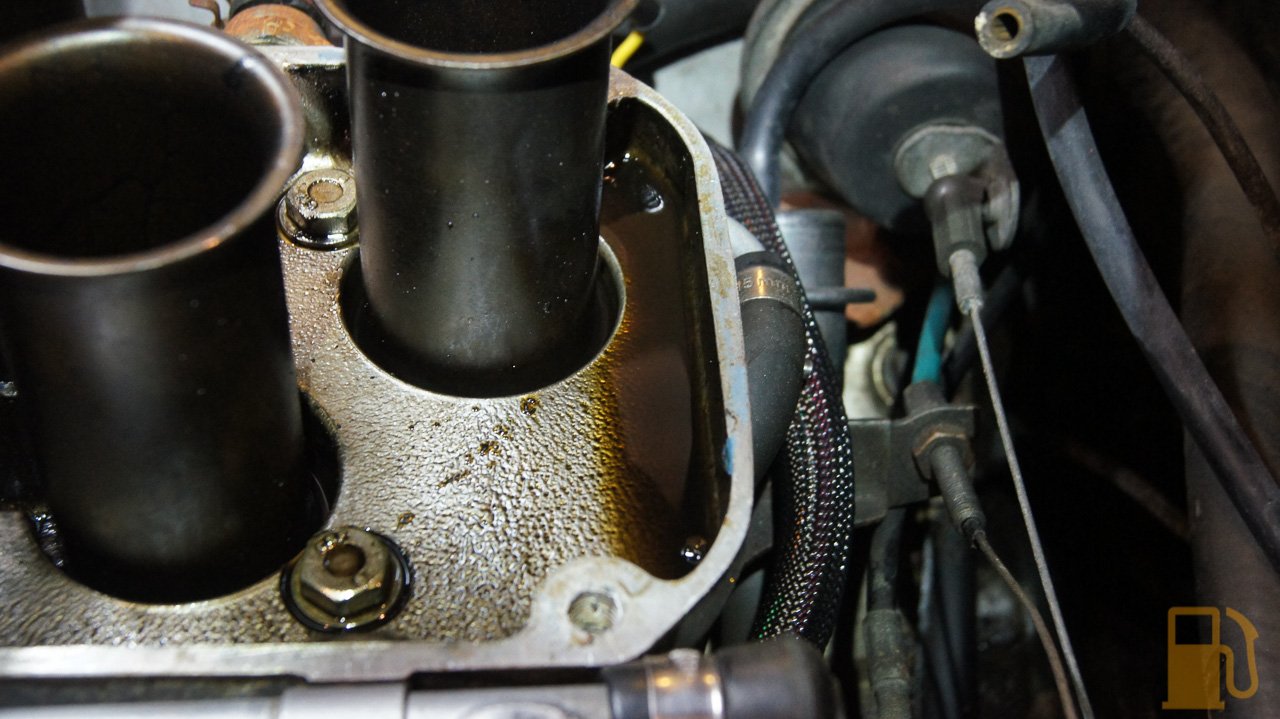
This is the whole reason for this job. Coolant on the valley gasket. It builds up until it overflows the black clamp, and then spills over the bellhousing.

Six bolts, and off comes the trumpet base, leaving just the inlet manifold and injector setup. The loom is still fitted here, but it was removed, along with the injectors. The injectors and rails have to be removed to gain access to the manifold bolts under them. I was hoping to leave the injectors attached, but it wouldn’t be worth the hassle. I also chose to remove the whole throttle cable bracket from the head, which was easier than removing the two cables from it.

Before I could remove the inlet manifold I had to remove the leaking coolant hose. Yeah, the end of the pipe is FUBAR. I had been slipping the hose further and further forward to get it to clamp on good metal, but eventually the rust just poked its way through another part of the pipe anyway.

The inlet manifold is held on with 12 bolts. The two at the front are longer than the others, but the manual recommends keeping the bolts in order (which is why they are lined up on the valve covers). The manifold isn’t actually heavy with all the rest of the bits removed.

This is the pipe in question. Nowhere near as bad as the donor in my last post, but the end was stuffed and coolant was weeping out through one spot where it had rusted through


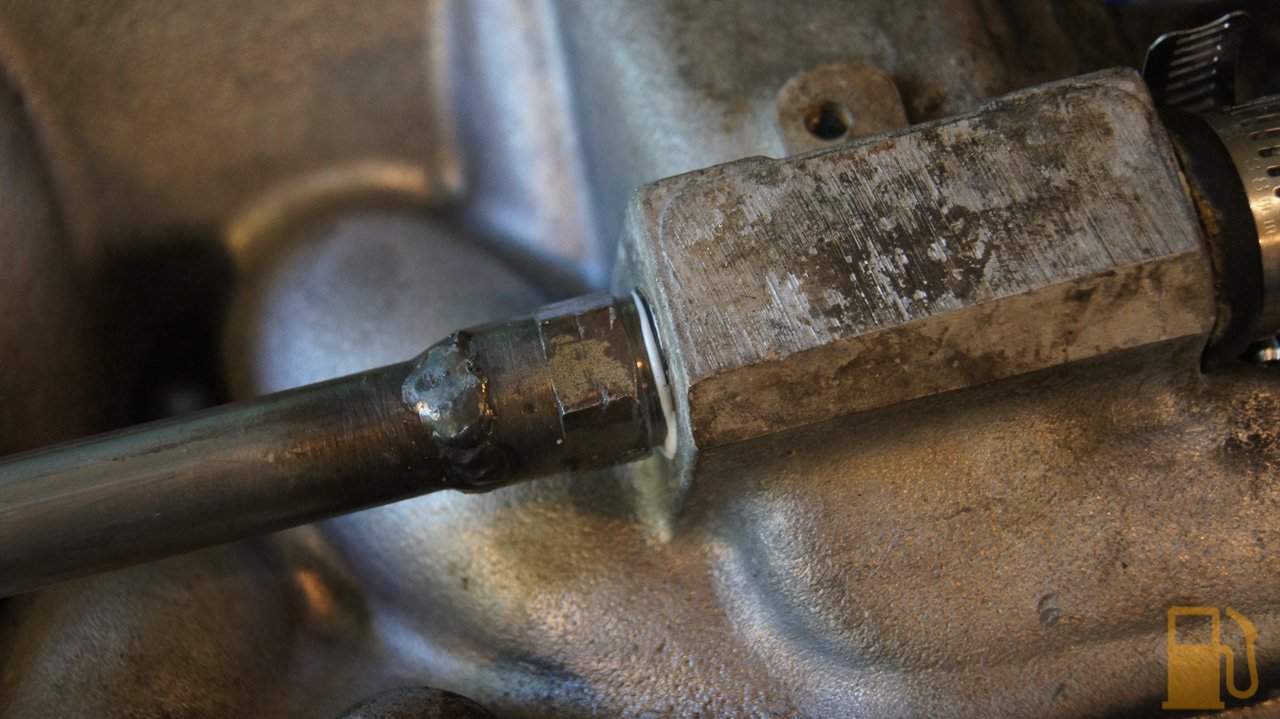
The same process as the donor worked on this too. Cut the pipe as close to the threaded boss as possible, and then using some Ugga Duggas, spin that thing out. Easy. I’ll be using the parts from this pipe to try to work out how to completely replicate the pipes.
Another thing I noticed, and another reason i’m glad I did this work, was that the connection from the waterpump to the manifold (which I think feeds this pipe) was 95% blocked with rust and crud. I shone a light in from the back of it, and this was how much shone through. One small spot.
Compared to after I had cleared it

I took the manifold outside and gave all the coolant passages a real good blast out with the hose. A few big chunks came out, but over all the cooling system is actually very clean in this car. Its possible the breaking down pipe was just circulating rust. I also took this time to give the manifold a quick degrease. It came up a lot better.

Quality parts

Next I removed the valley gasket. The old tin one had lasted well really, with no damage or rust. I guess the coating of oil from the old leaks helped that. With the gasket removed I got to have a good look at the cam and lifters.

The cam looked really good with minimal visible wear. I didn’t rotate the engine to check the cam lobes, but I have no reason to suspect cam issues anyway (and it was replaced not long ago).


I noticed one of the coolant ports was completely blocked. This is a blind hole anyway, as its blocked by the intake manifold, but it was ugly, so I cleaned it out.

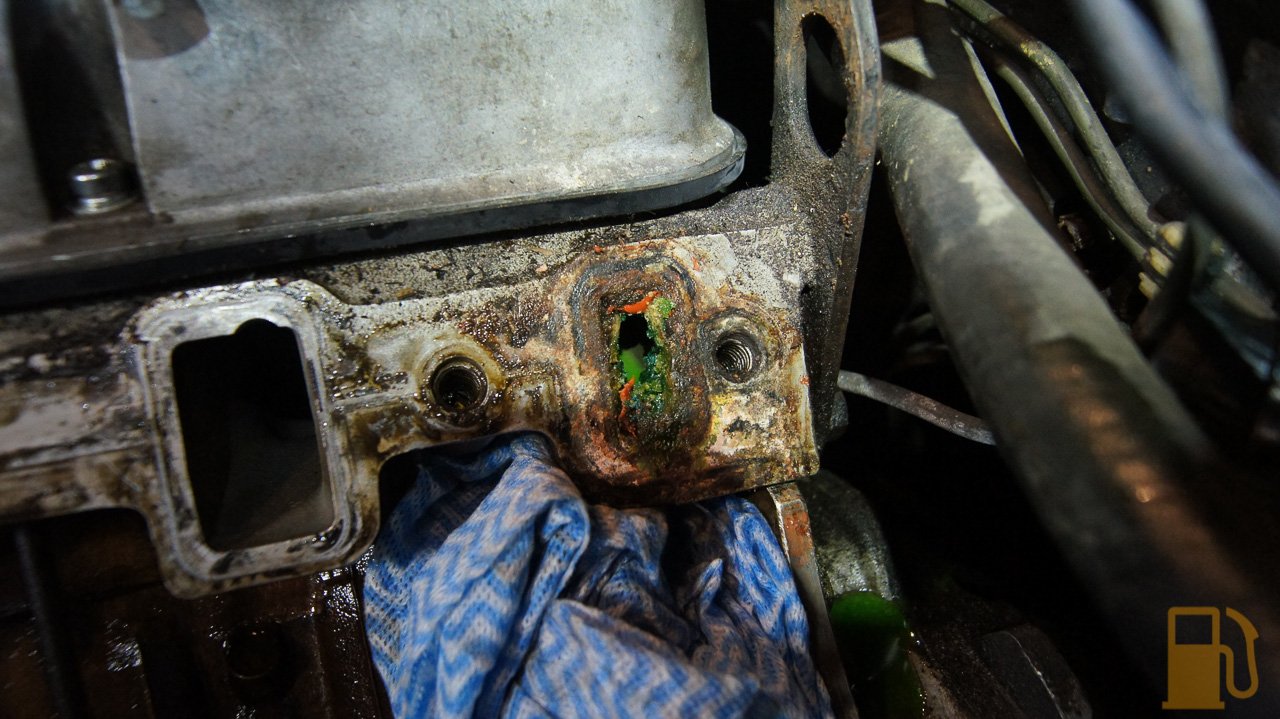
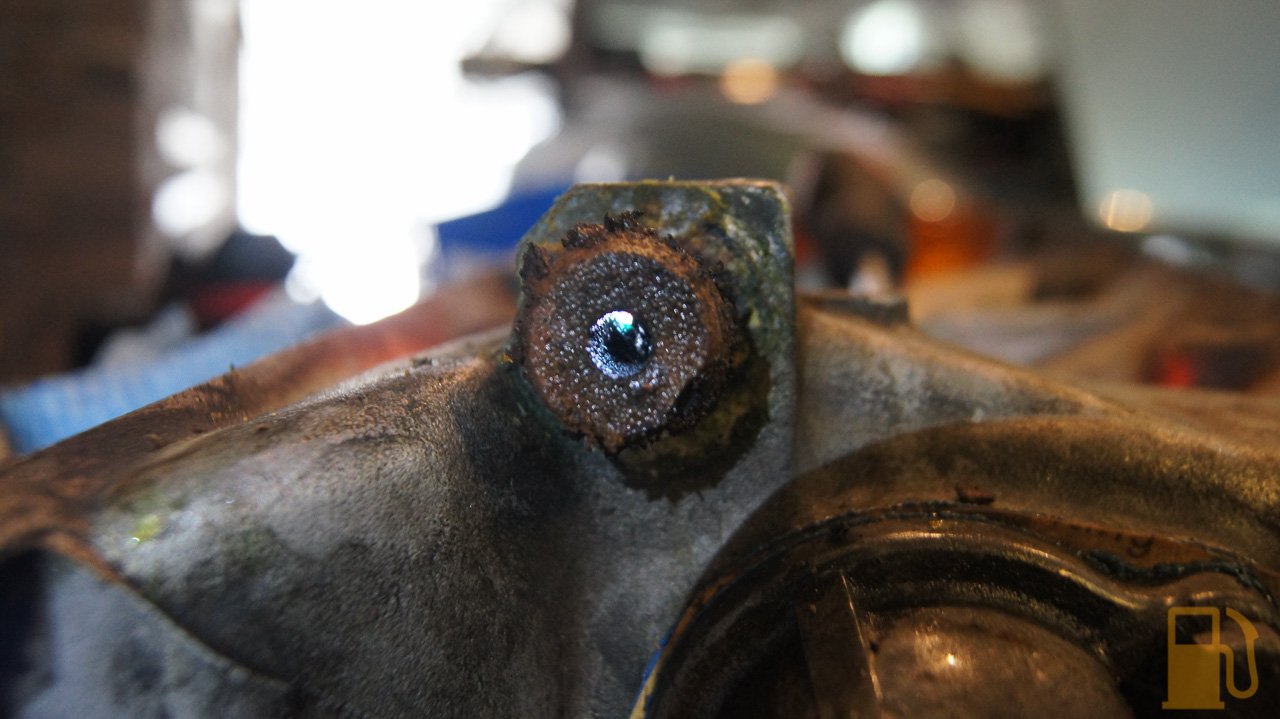
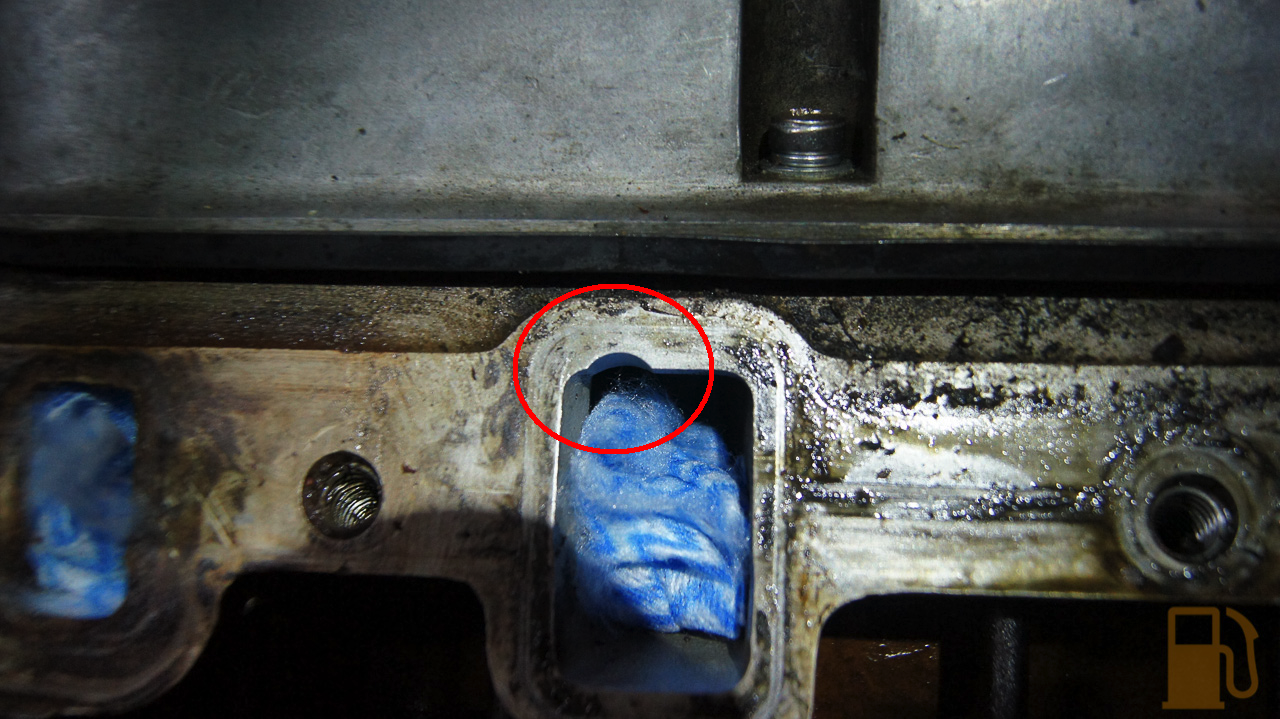
I had often heard talk of the injected engines having a cutout in the port for the injector to spray the back of the valve, but until now had not really seen it. This little notch, circled, indicates original EFI heads. Carb engines don’t have this.
This is the replacement pipe. Fits like a glove, with some thread sealer on it to make sure it doesn’t even think about leaking again.

A new valley gasket, of the black coated type, went on with some new seals and clamps. The clamps were bit of a prick to fit as the seals sat slightly proud in the corners. Got there in the end though, and on went the inlet manifold. All bolts were torqued up in stages to 30NM, working outwards from the center.

I was about to refit the injectors and rail, when I chose to check the hoses, and this is what I found. FML.


More severely cracked fake R9 injector hose. Its been a constant battle against this stuff, but damn i’m glad I caught it now as those cracks are the worst I have had. Two hoses on the fuel regulator, and the main fuel feed hose all got replaced with the good Codan stuff I picked up a while ago. I gave ALL the other hoses a real good, close up inspection and they are all in good condition still. The issue seems to be when the hose is bent.

With the hoses replaced I refit all the injectors, and reassembled the rest of the engine. With it all back together, i gave the fuel system a decent prime to check it was sealed, and then filled the cooling system

A trusty 50:50 mix of Nulon Long Life green coolant, as used in almost everything, because it’s good stuff. Effie would know, she’s gone through bucket loads of it. So has my garage floor. See? At least I tried to catch it.

After bleeding the cooling system, so far she has been keeping her coolant where it should be. The heater is hotter than before too, so obviously it’s getting better coolant flow now. I took her for a quick drive, and gosh she is lovely to cruise around in. So smooth, refined, comfortable, and grunty.
I’ll need to monitor the coolant for a bit to be sure we are all good now, but tomorrow i’ll be calling up and asking for a huge favour… a warrant inspection this week. And then we can go to the show. Hopefully.
Hi I need to do this on my 3.9 but my pipe has completely rusted through I was hoping to unscrew it without removing the inlet manifold just wondered what the hex size was on the the pipe mine appears to be around 13/16″ is that correct.
Thanks Tom
Hi, I didn’t think the 3.9 manifold had the under intake pipe, have you confirmed whats under the manifold? The manifold isn’t hard to remove and is a good time to check hoses and gaskets. You are correct, I used a 13/16″ spark plug socket to remove the cut down stub as per this post, https://tasteslikepetrol.net/2018/01/rover-sd1-bloody-coolant/
Greetings. Your pics and description are great. Here in California, no one knows what a Rover is. Instead of fix the threaded pipe, I thought a threaded barb fitting and just running hose out of the V would be simpler. I haven’t figured out what thread to order yet. Any suggestions?
John
Hi John. You are very lucky to own a Rover in the US and its always good to hear of NAS cars being maintained.
I did consider fitting a hose instead of the pipe, by cutting down the rusty pipe and using that as a stub to attach the hose to, but was concerned that if anything happened to the hose it would be an intake off job to fix. I believe the fitting was some sort of British standard plumbing thread, but not sure exactly what. There was a lot of discussion on the SD1 club forum about it, so the answer might be found there.
Kev Clark in the UK has had the pipes remade in stainless and although they aren’t cheap, it should last forever and they are very high quality. You can find them on ebay by searching the part number ERC9123.
Thanks so much. I’ll look into the stainless part. I use to be able to make my own, but don’t have access to a shop currently. My Rover engine is in my Mantula. Even rarer here.