Well, I’m not kidding, I’m all over the place with the Mini at the moment.
Most of the work I’m doing now is waiting on parts, so I start a job, get to needing parts and then move onto the next job. Rinse and repeat.
I was about to say “but wait, there was one job I completed!” but then I realised I didn’t. Sad face. This job was the first one I did yesterday; greasing my nipples.
I started with the best of intentions, having purchased a fancy new “brand name” grease gun and watching some YouTube videos on the task. There are four grease points per side, three in the front, one at the rear. I started with the rear one as it’s really easy to get to. I gave it a quick clean

On went the grease hose, and after a few pumps I spotted grease coming out the other end of the arm (this is good, it’s your indicator to stop)


Unfortunately this is about where the fancy pants grease gun gave up and I had to go exchange it for a “store brand” gun, which by the way, worked perfect.
The front ones require the car to be jacked up at the front, but you don’t need to remove the wheels. These are the grease nipples, handily pointed at by the nozzle of my brake clean can


Much more obvious after a clean


Once again, pump in grease until you can start to see it coming out. Here it is coming out of the lower joint boot

Unfortunately as you can notice in the above photos, the top ball joint grease nipple on both sides of damaged, and just leaks grease. I’ll order new nipples and fit them. So that was the first job that is half done.
Moving on, the next thing on the list was to redo the sump plug, which was leaking a fairly significant amount of oil since I replaced it. I knew this was a risk, but its kinda my own fault for using the original copper washer and liquid thread sealer when the thread wasn’t perfectly clean. Argh.
I drained the oil again. There goes $60 of oil with less than 5KM on it.

This time I used proper thread tape, and a genuine Rover copper crush washer. This type of washer is standard for what is used on my SD1, it’s a copper washer but is designed to crush and seal when tightened. This type of washer can account for slight variations in the surface (ie: tapping the thread on an angle >_< ). I also made sure that the threads in the gearbox were 100% clean and dry before fitting

I don’t have much spare oil, so used the left over 400ML I had. So far there has been no sign of any weeping. I left it overnight with a white rag under it, and it was still clean the next day.

I can’t fill the engine with oil until I have done the selector oil seal, which is currently leaking. The parts are on the way for that.
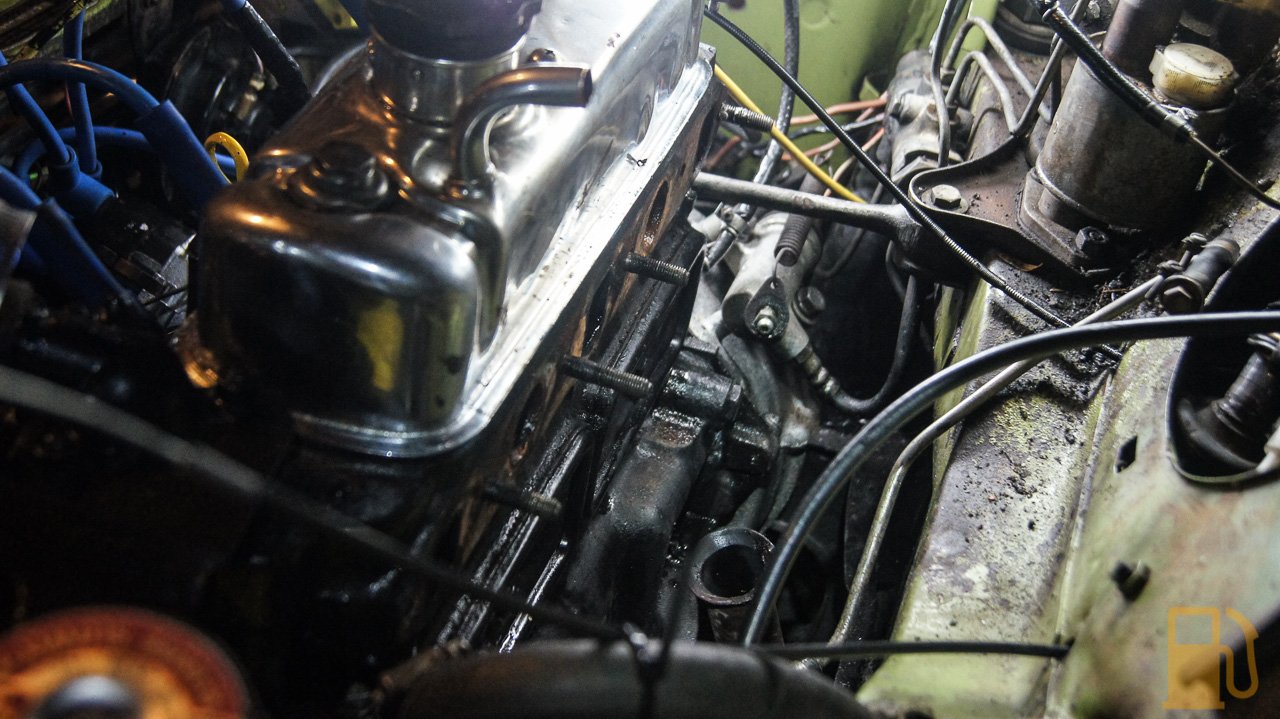
Next on the hit list was another serious oil leak that I had noticed. It was from the back of the engine, so either fuel pump gaskets or timing chest gaskets. Both of these gaskets are on order, but in the mean time I needed to gain access to the back of the engine. Access is blocked from the underside by the diff, and blocked by the manifold/exhaust/carb on the top. I needed to remove the manifold and carb as the exhaust was leaking and the carb needed a clean, so off it came.

The carb is easy to remove, just two nuts and various hoses and cables

Whilst there I couldn’t help but pull as much of that matting out from behind the master cylinders. It had soaked up various fluids and gone really gross

The manifold it self comes out as one unit. The clamp from the manifold to downpipe was a real pain to get off. For some reason it was seized on one side and required a lot of BFH percussive persuasion.


Plenty of space down the back now.
The carb was dirty but didn’t appear too bad. I wanted to strip it down and inspect/clean just to know what I had.

I don’t know what oil was in the dashpot, but jeez it was hard to raise the piston by hand. It was super thick.

The breather inlet on the carb was blocked, but the hose clamp was loose. Wouldn’t be helping. I’ll be reinstating the proper breather setup upon reassembly.

I removed the dashpot and piston. There was a bit of filth inside the carb and on the piston. Not much wear though


The float bowl had some muck in the bottom, but the fuel in it was clean

I gave the carb a thorough clean inside and out. The needle came out to check what needle was fitted, ADE, and give it and its fittings a good clean. Someone had been here before, and overtightened the screw that holds the needle in place and cracked the holder. It’s OK for now, but will try to source a replacement when I uprate the needle.

Whilst poking around and cleaning the body of the carb I found the piston lift pin. This is what you use to lift the piston and check the mixture

Piston UP and DOWN


I started to reassemble, and gave the dashpot cover a quick clean and polish. I don’t want it too shiny but a rub down with a scuffing pad made it look OK


I had to stop there though as I need my float chamber gasket to arrive. Next on the bench was the manifold. I needed to clean the gasket goop off the flange and downpipe connection. Of note, there was no exhaust paste on the manifold or downpipe.


The gasket was well past its best, no wonder so much sealant was used

Some good scraping and wire brushing got the flange looking nice

It’s so tiny! I look forward to fitting the much bigger Long Center Branch headers in the future

Now I need to wait for all my gaskets to arrive, and then I can fit all that back together.
In the mean time, I had a fiddle under the bonnet. I have an overhaul kit coming for the carb, with new cap, rotor, points and condenser, but in the mean time I wanted to see what the gap was like on the old points. The gap was a lot smaller than the required 0.30-0.40mm gap. I adjusted them to the correct gap just to test that I still remember how to do it, after so many years.

But hey, I’m not done there either! So, next was to move inside and the car and make a mess there.
I wanted to know what the random wires, and random button on the steering column was. So I went on the hunt.

A couple of screws, and here’s what its connected to.

Nothing.
So where does the green wire hanging under the dash go?


Turns out its wired direct to the ignition switch. Switched live then I guess. That got removed.
I also removed a large speaker wire that runs from the boot to the front of the car, and connects to nothing. I think its connected to the reverse lights, so that might have something to do with my next weird find….

Lots of tape, a hose clamp, and a microswitch.

Not hooked up to anything mind you. I removed the shifter to remove all that rubbish, and also lubricated the moving parts.
Whilst in the interior, out came the seats

This wasn’t just random. Both of the seats have busted diaphragms under them, so you fall through the passenger’s seat and the driver’s seat is reinforced with a couple of slabs of wood

I have new, updated sprung mesh diaphragms on their way from Minispares, so have to have the seats out for that. The other major issue I needed them out for was to weld the floor.
Weld the floor? No, not because of rust, because of someone using too much brute force on the hand brake.


I noticed this the other day because I need to adjust the hand brake, as it barely holds the car (and wouldn’t pass inspection). Unfortunately someone had known this, so had been there and wound the adjuster full to its stop. After some more BFH work, and careful levering I had the mounts back roughly where they should be. You can see how far away the clevis under the mount is from the hole it should attach to

I placed the lever where it should sit and then wound out the adjuster. Well I guess I have my adjustment back!

Now I need to crack out my new welder and zap some metal back into the front mount to attach it to the floor.
Speaking of floor, look at that lovely untouched metal.

Since I couldn’t be bothered getting the welder out at this very moment, I moved onto removing the dash gauges. I need access to the back of the oil pressure gauge, as I have a replacement oil supply hose on the way, since the old one leaked badly and the seller crimped it off. I needed to remove the badly warped dash cover first. Two screws got the whole lot out. Not sure what to do here, the old one is so warped I don’t really want to fit it again. Will look at options.

I found these two gems stuck behind the dash cover. A card from the Canterbury Morris Minor Club, and an old ice scraper card.

The central gauges are easy to get out, with just a few screws to remove

Since the gauges were out, and I felt like I needed something else to do, I removed and cleaned the oil pressure gauge.


The same scuffing pad I used on the dashpot cover was used on the chrome ring with good results. I also thoroughly cleaned the glass


The temperature gauge had a weird hazing on the inside of the glass, around the edge

I chose to strip this gauge and clean the inside of the glass. Using some brute force I twisted the bezel to line up the tabs and allow it to be removed


A thorough polish and clean, and BAM, mint (well, kinda, this photo was before I polished the bezel)

The speedo was next in the hit list. Heres a half-half shot of polishing the chrome

and all reassembled. Blingin’

But wait, there’s more!
I found a weird random wire chilling in the engine bay. Turns out it was the purple/orange wire I was looking for (I thought it was brown/orange, but couldn’t find it on the wiring diagram). Its meant to connect to the inline fuse behind the gauge cluster (the black thing to the left of the wire)

Unfortunately there was no spare wire on the other side of the fuse holder for me to join to, so I chose to replace the holder with a more modern blade fuse holder. Not my neatest work, I may tidy it up later, but it should do the job.

Just a quick note, when replacing a glass fuse with a blade fuse the rule of thumb is to halve the rating of the glass fuse. It’s a long story, but something to do with slow and fast blow.
So what does it do? Well, this!

Which I changed to a warm white LED

Oh, and this. Hazard lights!


Great success. I guess that’s one job I actually finished. Nope, damn, I need a spare flasher relay.
So yeah, lots of unfinished jobs. Lots of bits everywhere. Lots of waiting on parts. Thankfully the parts will be here this week. I also need to weld the hand brake mount, so will get onto that soon.
Then jeez, I might almost be ready for the rego inspection. Maybe.