Following on from the first days work, I jumped back in and started putting it all back together again.
WARNING – PLEASE READ THIS BEFORE PURCHASING HOSE
I left off having removed all of the injection system, and painting some parts that were a little worse for wear.
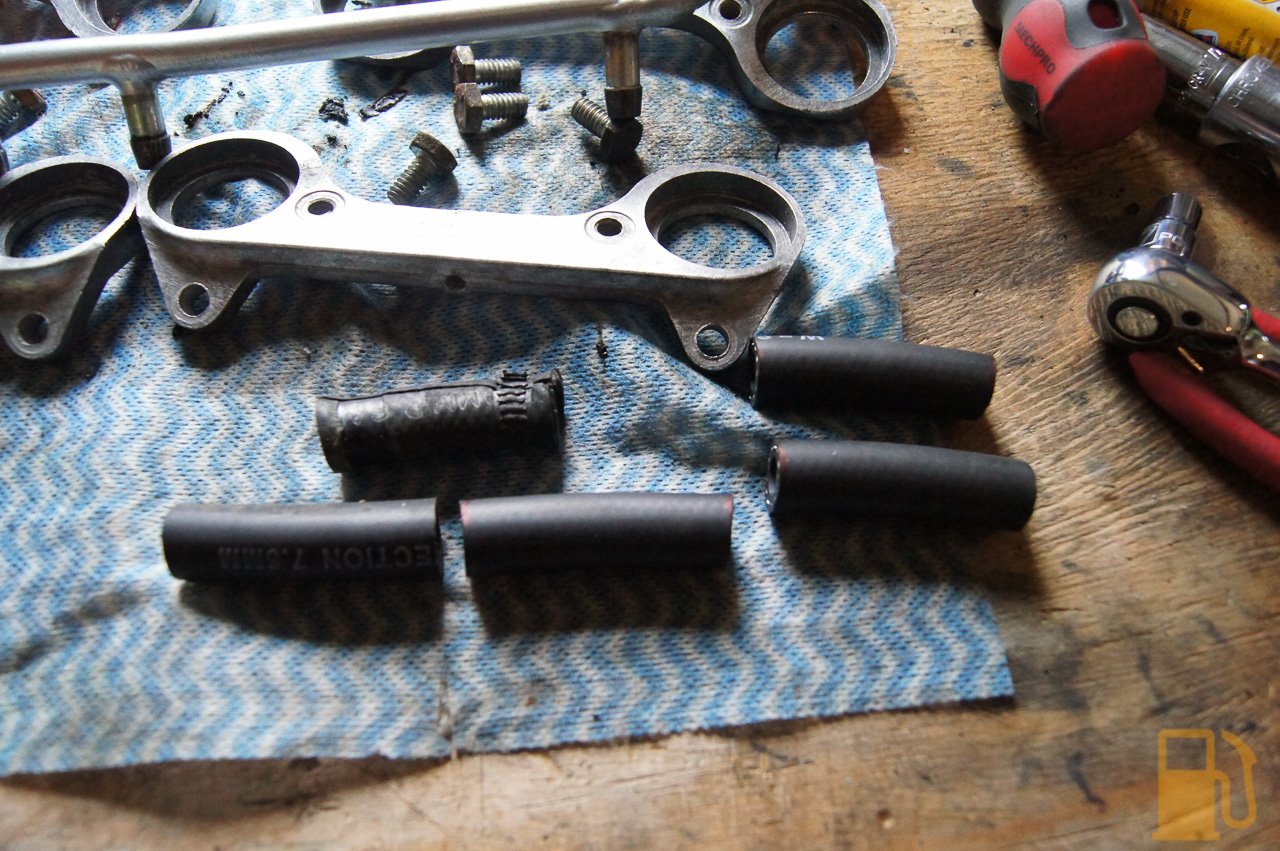
With the retaining plates and fuel rails looking a bit nicer, and all the corrosion removed from the injector seal recesses, I cut the new injector hoses to length and began fitting them. In hindsight, I would make the hoses slightly shorter as it’s a very tight fit with the plenum base now (the hoses set the height of the rails). I made them slightly longer presuming that the old hoses would have shrunk. They obviously didnt.
You can really see the difference between the correct 7.6MM hose, and the 8MM hose that everyone in NZ tried to sell me. No matter what they say at Supercheap or Repco, no, 8MM is not “close enough” to 7.6MM to work well. The hose clamps require a lot more force to clamp the pipes correctly, crushing and biting into the hose. 7.6MM doesn’t have this issue.

And with lots of pushing and twisting, all the hoses and clamps went on the injectors. The injectors were then fitted into the retainers, with new seals. Don’t do what i did and fit the upper seals to the injectors before the top plate in on, as it doesnt fit over the seals, you will find yourself removing all 8 upper seals and doing it all again.


Which then went onto the rails, which had new hoses too.


With a bit more wiggling and jiggling, the whole lot went onto the intake manifold and the bolts were torqued to 11NM as per the manual.


I took a quick break from the injection system to change out the thermostat. The old one was causing the engine to warm up really slowly, and the “operating temperature” was too low.
Easy enough to change. Top radiator hose off, two bolts and the housing pops off. There should be a paper gasket on the housing which is a bit of a pain to scrape off the housing, and my old thermostat was stuck in the housing and required some persuasion to get out. The old one was stuck partially open, as shown by it weeping coolant when cold. The old thermostat was 84c, and the new one is the correct 88c.


Its bit of a fiddle to keep the new thermostat in the recess whilst putting the housing back on. My new thermostat also came with a rubber seal ring around it, which is not needed.
Moving back along to the injection system again, I started working on the plenum base, getting it ready to refit. It needed a really good clean to get the oil residue out, and all the old remnants of the liquid gasket removed from both the top and bottom. I dont know what sealant was used last time, but it had turned to a sticky gel in places.

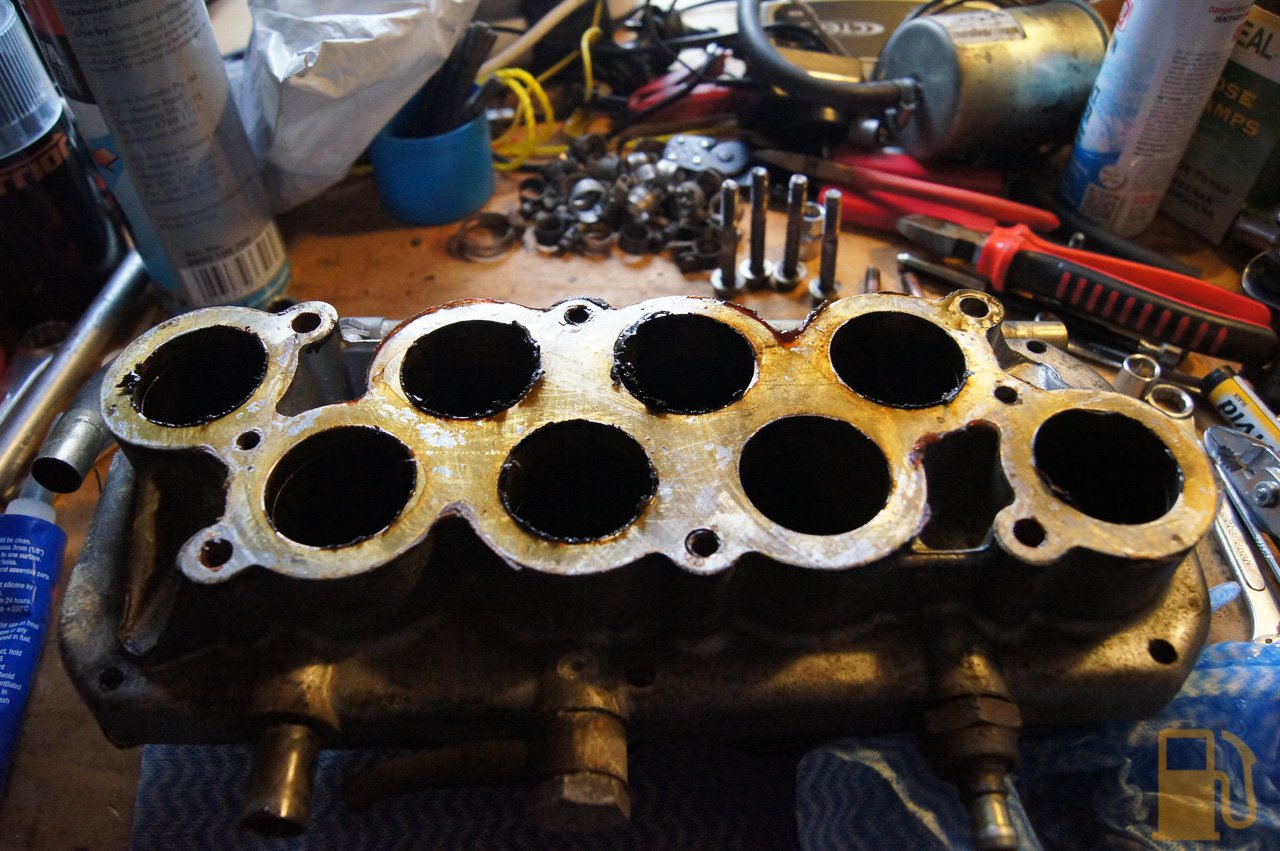
I also removed and repainted the extra air pipe that runs around the plenum base, as it was badly oxidised and ugly.
Once that was in a condition I was happy with, I refit it to the intake manifold. As I mentioned earlier it took some fiddling to get in due to the tight clearances with the fuel rail. I also made sure to use a thin smear of sealant on the face of the base where it meets the intake. I chose to use sensor safe sealant, as standard RTV sealant can cause issues with wideband O2 sensors (which I will be fitting for the Speeduino).
The plenum chamber was a bit more work, as there are a couple of things that need work before fitting. The first one was to remove the over run valve, and to correctly set it as per Ramon’s detailed information. 5 turns from fully home. Mine was a lot further out than that. The old gasket was split in a couple of places too, so a new gasket with a smear of sealant went in.


After refitting the over run valve, I cleaned the breather inlet on the plenum. It’s notorious for getting blocked up with gunk from the breather system, and not working correctly. it’s a large diameter pipe which goes into a small right angle passage in the underside of the throttle body. I used a stiff wire, and LOTS of brake clean to blast the passage clear, and sure enough I got a lot of gritty black rubbish out of mine. Initially it was hard for the brake clean to pass through the passage, so it must have been partially blocked. The breather system is fairly simple, but it requires all parts to work correctly. In my case the inlet filter on the valve cover was missing too, so that wouldn’t be helping. A new one has been fitted.

The plenum was refitted, with all new hoses (except the over run valve to air rail hose, as the one supplied by Rimmers was wrong; far too small diameter to ever fit) and a smear of sealant on the face.


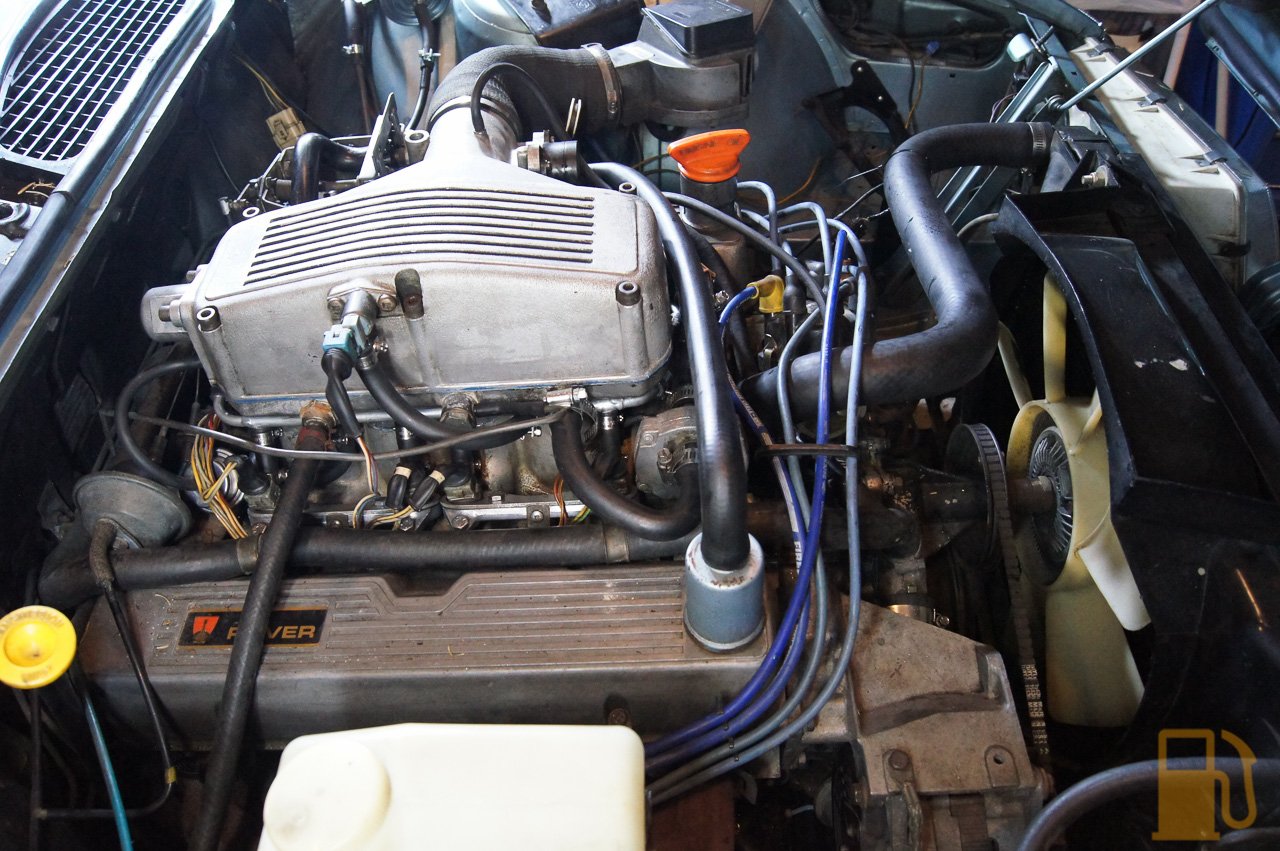
New hoses and fuel filter went on next. Much better than the old dodgy looking one. All up I used about 35 efi hose clamps. Glad I got some spares as I originally planned on less than 30!

Once it was all back together the only thing left to do was to bleed the cooling system. This was bit of a prick to do, and I think it might be because my heater core is blocked with gunk. I will try to flush and clean the heater core at some point, but in the meantime just having the cooling system working is OK (coming into summer anyway).
My issue seemed to be that even though the system was full and no longer burping air, it wouldn’t come fully up to temperature and even when the needle did rise up the gauge it would randomly decrease back down to stone cold. I suspect this was as a pocket of air surrounded the sensor, isolating it from the coolant.
I tried a few things, including using a hose and funnel to raise the highest point of the system, which did actually help and it burped a bit more air, but still wasnt enough. Note my sweet self catching overflow system 😄


I got sick of messing with it, and moved the car outside into the driveway. The driveway is on an incline, so I parked it nose up. I decided that I would over fill the coolant tank in the hopes it would burp some more air and take in more coolant as it cooled.
Sure enough I checked it this evening and it had taken more coolant, and seems to have bled the system. The temp gauge is stable, but now it looks like it’s over cooling the system as it will not go over the first white mark (which is 80c or so), when it should be running closer to the 100c mark. The viscous coupling and fan are incorrect for the EFI as it should have an 11 blade fan, but appears to be fitted with a 7 blade fan from a Carb car. The coupling also seems to be playing up, as it engages and locks when the engine is revved when cold and doesn’t freewheel. I can hold it stationary when starting the car, but cannot stop it when the engine is running. Replacing the fan and viscous coupling with correct (well, as correct as they can be when the original units are NLA) parts is next on my list, but I’ll settle for running a bit colder as long as it is sealed and doesn’t leak anything or overheat for now.


All in all its a win. The injection system is sealed and doesn’t leak, which is fantastic. The car also runs and drives well (although some room for improvement, likely with a service). With this out of the way I can now drive the car again, and get around to the other work I need to do (speakers, door handle gaskets, leather conditioning, fixing the oil leaks, and then Speeduino). Love the rumble of the V8 engine though, I look forward to driving this more.
I know what you mean about the tight fit around the plenum. Scrapped a few knuckles there…
Hi, what sealant would you recommend?
Hi, I used Permatex Sensor-Safe RTV for everything. Need to use sensor safe sealant when using a wideband O2 sensor for an aftermarket ECU like I am. https://www.permatex.com/products/gasketing/gasket-makers/permatex-sensor-safe-blue-rtv-silicone-gasket-maker/