The time has finally come, I need to put on my big boy pants and see if all the blood, sweat, tears and money actually worked.
I started with a big milestone – I filled the engine with the startup oil. The temporary filter got binned, and a new, prefilled filter was fitted.


I also poured 10 litres of the finest 98 octane fuel into the tank and flushed the lines.
The final thing that needed to be assembled was the cooling system. The radiator that came with the car was from when it was auto, and unknown to me until a few weeks ago, the auto and manual radiators differ in one critical area; the lower hose fitting is on the wrong side between them
The auto radiator that came with the car

And the new Manual radiator

The lower hose on the auto goes under the transmission up to the back of the engine, and crosses close to the bellhousing

This is the absolutely wild coolant pipe used on the autos

The previous owner butchered that pipe on my car to make it work with the manual setup. This meant he could retain the auto radiator.
The manual cars have the coolant hose from the radiator go straight up over the gearbox and into the coolant pipe I mentioned in one of my previous updates

Anyway, so once I found out that my radiator was wrong for my whole convert-to-OEM-MT parts thing, I frantically scrambled to see if I could source a manual radiator locally.
Allegedly, one of the local radiator places could order one in for me, at a reasonable price, but I had this niggling worry at the back of my mind where putting a cheap knockoff radiator into the car was asking for trouble. Was it suitable for a turbo car? Would it cause overheating issues? Would it handle a track day or two? Not something I wanted to deal with.
So, I spent a shocking amount of money to import the correct Manual Transmission Turbo spec Koyorad radiator from Japan

After a quick clean and test, I transferred the fan to the new radiator

Much time was spent wrangling the hoses into place. There is very little room between the radiator fan and the gearbox

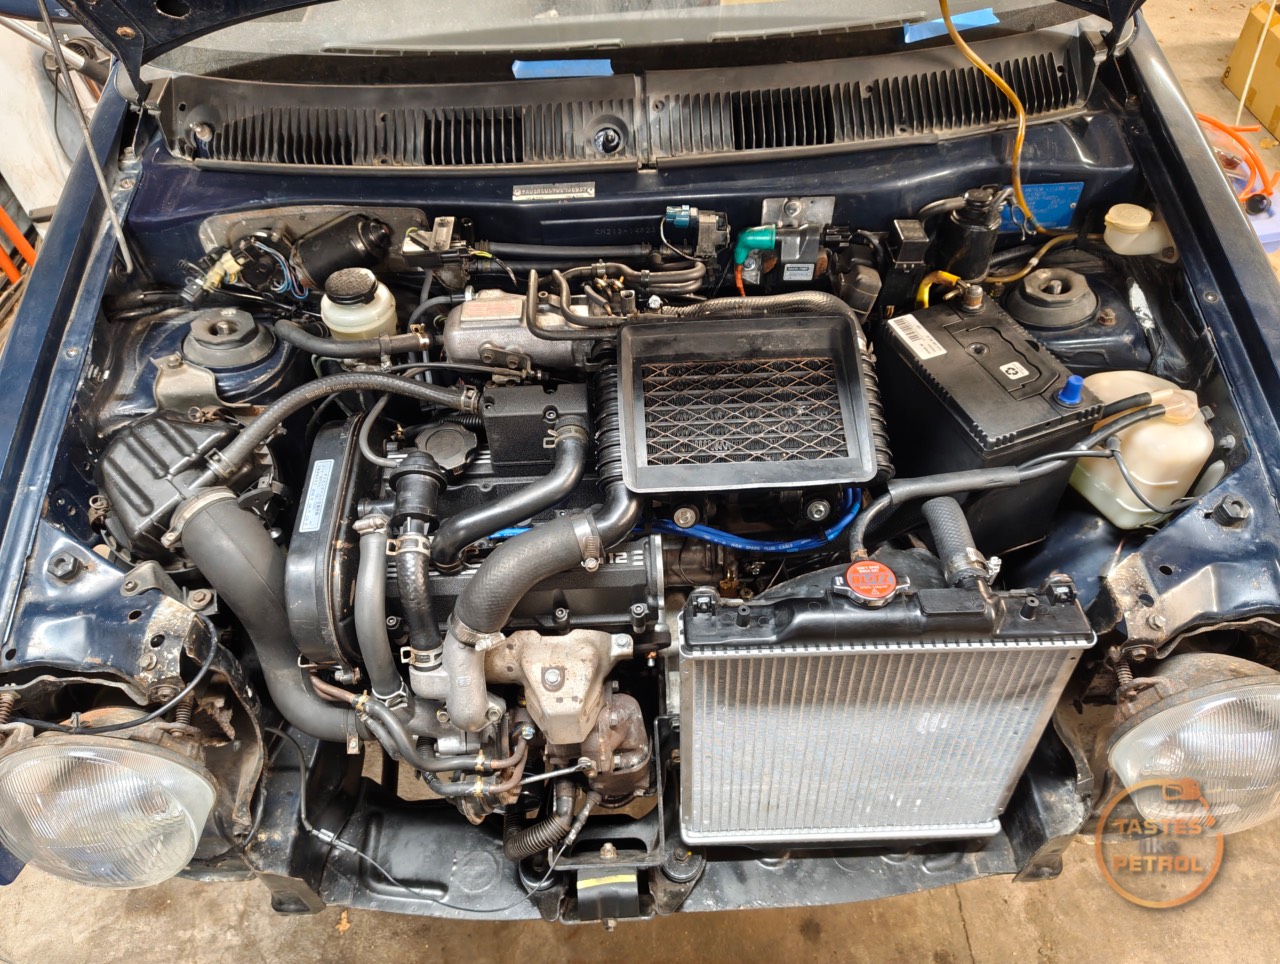
But finally, the radiator was installed and filled with demineralised water

Wanting to be able to monitor the oil pressure in an actual figure and not just the idiot light, I quickly wired up the gauge and mounted it. I tied into the power feed for the 12v socket above it.

It’s pretty bright. I’m going to need to wire in the illumination, I think. It’s one of the reasons I removed it from the BRZ

Finally, it was time.
I had disconnected the ignition coil and removed the fuel pump relay. I needed to crank the engine to prime the oil system and build oil pressure. I jumped in and turned the key for the very first time.
Yes, the oil pressure gauge was useless since it turned off when cranking… but on the third go of cranking, the oil pressure light went out, so we were ready. I was getting a little worried with how long it was taking for the light to go out, but thankfully, the pump primed itself, and it wasn’t an issue.
Now it was time to connect the coil up and refit the fuel pump relay, and go for real. The first start of this engine after a complete end-to-end rebuild, and the first time I have ever heard an engine run in this car.
It started like a champ!
I had to cut it off earlier than I wanted as the revs were too high, but after some tweaking, I managed to get that to come down, and it idled fine. There was some lifter tick, which is obvious on the video, but nothing to worry about.
Oil pressure was very good when running, dropping to about 20PSI when idling at operating temperature

By some miracle, even all the gauges work, including the fuel gauge. I’ll need to pull the bulb for the cat temp light, since I removed that wire and don’t have a cat anymore.

It didn’t half smoke though, burning off all the various oils, paints etc
After running it up to temp, I drained the engine oil and the water from the cooling system


I filled the engine with proper run-in oil this time, and a 50:50 mix of coolant, which I spent time properly bleeding

I checked and set the timing to the required 5 degrees, with advance locked by shorting the B and C terminals on the diagnostic connector

After the oil change, the lifter tick got a lot better, and with the other tweaks I made, the engine ran and idled quite nicely
There’s still some setting up to do with things like the TPS and the weird idle valves, but for now, it’ll do enough to get it driving.
Speaking off, I need to reassemble the front of the car, get the wheels on, and give it a string alignment, but I’m pretty keen to take it for a closed road drive as soon as I can. I really need to start bedding in those rings.
A huge milestone. The engine runs, and runs well. It seems to do everything it should, with no odd noises and no real leaks (only a small weep from the oil drain on the turbo).

Great progress.
I hope it proves to be a enjoyable track car.