Much to the relief of my wife, I finally got around to fixing the hand brake.
Way back when I got my last warrant for the Rover the car rewarded me by breaking the hand brake cable when I got home. Ever since, I have been parking using just the auto transmission parking pawl to hold the car in place.
A parking pawl is a physical lock on the output shaft in the transmission. When you place the car into “Park” it triggers a mechanism that locks into a ring, stopping it from spinning.

They are pretty strong and will happily hold the weight of the car as long as they aren’t abused. Usually the output shaft will need to rotate slightly for the pawl to line up, which means the car will roll or rock until the pawl locks up. Obviously if you are parked on a hill, and just let it slam into place over and over there is a chance that it will break, so I would carefully ease off the brake to slowly let the car roll until it locked.
They also make a horrible noise if you engage the pawl in a car being towed along the road. Oh to be young and dumb again.
My wife wasn’t a big fan of the car moving when I parked, as it was a bit unnerving.
I ordered a replacement cable and fittings from Rimmers on the day it broke, so I have had it here for a few weeks now just waiting to fit. My Wife went overseas for work shortly after the parts arrived, and I didn’t want to be under the car with no one home, so I chose to wait for her to return. Now that she is back, I tackled the broken cable.
The SD1 hand brake, like most things on the car, was a bit less than conventional compared to other cars. A lot of cars have the hand brake lever pull on a pair of cables, one to each rear wheel. Not the Rover, the Rover has one cable running from the lever to the RH rear wheel, and then a “Compensator” on the rear axle housing which pulls on another cable that goes to the LH rear wheel. This cable from the compensator to the LH rear wheel is what had broken, but it knocks the whole system out when it breaks.
I had used some zip ties to hold the broken cable up against the axle housing as it hung down otherwise


You can clearly see the broken strands of wire in the above photo. It appears the plastic sleeve that is meant to be present on the wire is long gone, and the wire has just rusted through. It probably didn’t help that everything under the car is coated in an underseal, including the cable.
I’m used to working on small cars recently, so had to shuffle my garage mess around to fit the Rover in, and then I had to get it high. Real high. I actually ended up moving the axle stands from the rear axle to the rear lifting points in front of the wheels as this gave me more height and it was easier to run the handbrake cable with the axle hanging down.


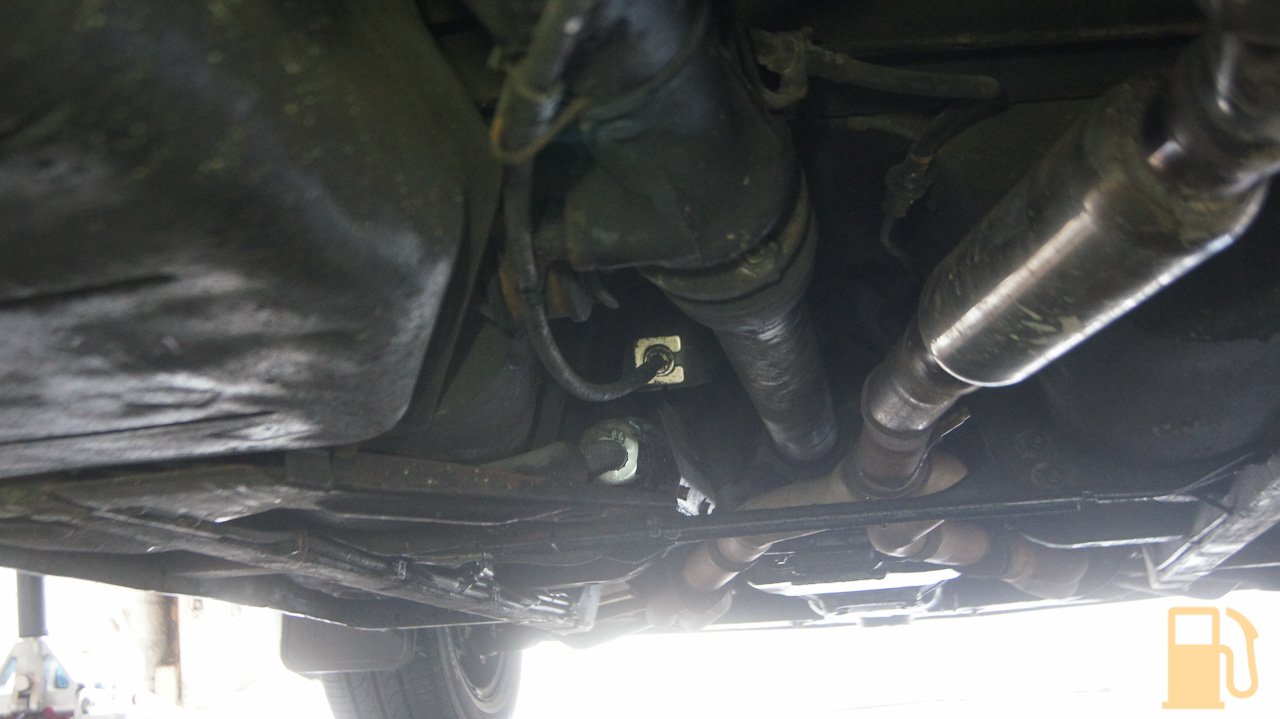
This is the compensator. It should be pointing to the left, not right

The cable shoots off up under the car to the front, where it meets the hand brake lever

The cables are held to the rear drum levers with a pin and washer. A split pin holds it in place. I forgot to arrange new split pins so had to reuse mine, but I’ll replace them next time the car is in the air.


Typically the left side was missing its washer, and the split pin is undersized for the job. The right hand has a split boot, which I replaced.
Remove the split pins and the metal pin will push out, allowing you to remove the cables from the levers


The compensator needs to be removed from the axle housing. It’s a nut and bolt setup, with the nut hidden behind the bracket. A spanner is needed to hold the nut in place.


To completely remove the cable for replacement you also need to disconnect it from the hand brake lever up the front. I don’t have photos of this because it was a super messy and tight job to do, but there is a large rubber boot that needs to be removed. I found it’s easiest to work your fingers in under the boot near where the cable enters it, and then work your way around. The boot has a lip that goes over a metal frame on the body.
Once the boot is off it’s just another metal pin with a split pin holding it in place. Remove those and the cable will be free. There should be two clips holding the cable to the axle housing, and then you can remove it.
With the cable off the car the boot and compensator need to be swapped over to the new cable. The boot just pulls free, it has a grommet in the end that stays on the cable. The compensator has a 10mm nut/bolt setup that you need to remove to split the two halves.


Mine was rusted together, so needed some persuasion with a chisel to split. My fulcrum pin and bushes are looking a tad flogged too, but I had already ordered replacements of both when I ordered the cable


I slathered the compensator in copper grease, and the bushes in rubber grease and refit to the new cable


I backed the adjusters right off, and refit the cable. The trick to setting this up correctly is to follow the workshop manual exactly.
Start by reconnecting the front of the cable to the hand brake lever, with all the adjusters backed right off. Run the cable, and then mount the compensator to the axle.

Do not attach the RH side of the cable to the drum, start with the LH side cable. Run it over the axle housing

Connect the left hand fork end to the lever, and adjust the cable (which can be done with the fork attached) so that the lever is in the off position and the compensator is 30 degrees from vertical when viewed from the rear of the car. This is a critical setting to having the cable in adjustment.


Now connect the right hand fork to the lever, and “take up the slack in the inner cable by pulling the outer cable rearward until the lever just moves”. Screw the rearmost adjustment nut (up by the front hand brake lever) up to the bracket (and remember there should be a metal plate between the nut and bracket) and then one complete turn. Wind up the lock nuts and tighten.

According to the manual the wheels should be just free from binding on the first notch, and locked solid with the lever on the third notch when pulled. Mine might be a little tight, I can feel some drag on the first notch, but it locks hard on the third. I presume the cable will stretch a little and will need some more adjustment soon anyway. The old cable must have been an issue for a while as the adjustment on that had been set to take up heaps of slack, whilst the new cable is only at the start of the thread.
So, that is how you replace and adjust an SD1 hand brake cable. It’s a shitty job to do without a hoist, but it can be done and it’s pretty straightforward really.
Now the car holds on hills, both wheels hold, and the hand brake can over power the idle creep of the transmission. Great success, it’s good to have a working hand brake again.