As cool as the standard radio, tape and cd player were, I just couldn’t keep limping along with a volume control that was either turned to eleven, or nothing. I had to replace it.
The criteria was that it had to be cheap, had to have at least AUX if not Bluetooth, and had to have NZ frequencies without a band expander.
After trawling TradeMe and Facebook for a bit, I stumbled across a near new Blaupunkt Hokkaido 100. I watched it for a couple of days, and when the buy now price was dropped, I pounced.
The Hokkaido 100 is a basic, cheap, mechless (no CD player) unit with Aux, USB and… Bluetooth. Nothing that fancy, but does exactly what I need. Not bad for $35.
This is the old unit I’m removing. If the volume knob wasn’t failing and I could have the volume somewhere between off and deafening, I might have kept it for a bit.

It ties into this factory CD player. Yes, single din, single disc, player, not a changer.

Removal of the upper radio housing is quite easy. First, the center dash vents have to be removed. This is done by using a trim removal tool to lever the bottom clips out. The bigger top clips need to be pushed down slightly to completely remove the vents


Once out of the dash the connector for the hazard light switch needs to be disconnected by pressing the little tab and pulling the connector out.
With the vents out there are two bolts in the recess that need to be removed. These are the only things holding the radio housing to the dash. They are 10mm.
Now the housing can be pulled free

Pull it forward enough to access the plugs in the back of the radio and disconnect them. The whole unit can now be removed

Now it was just a case of working out the wiring using this diagram
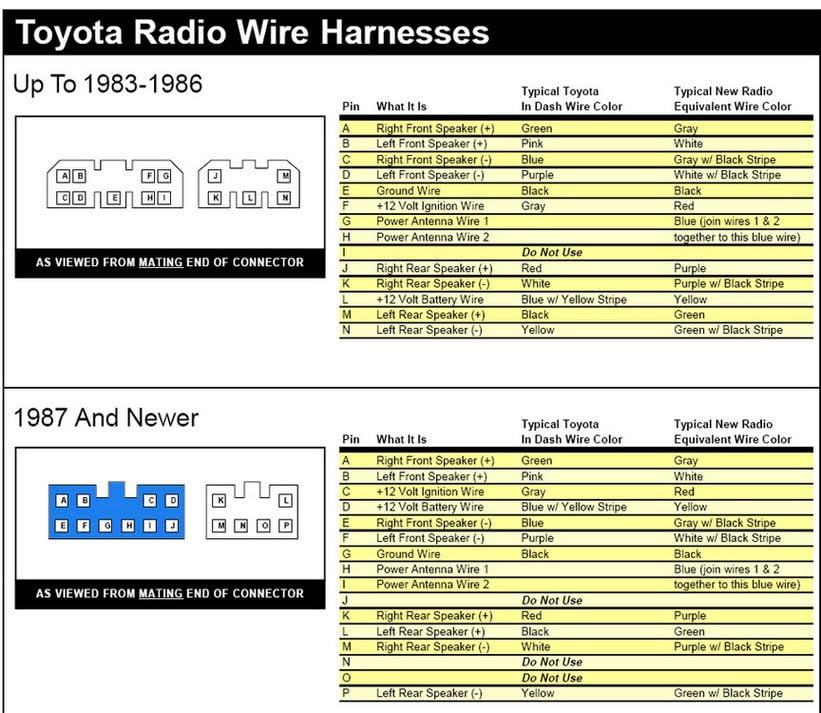
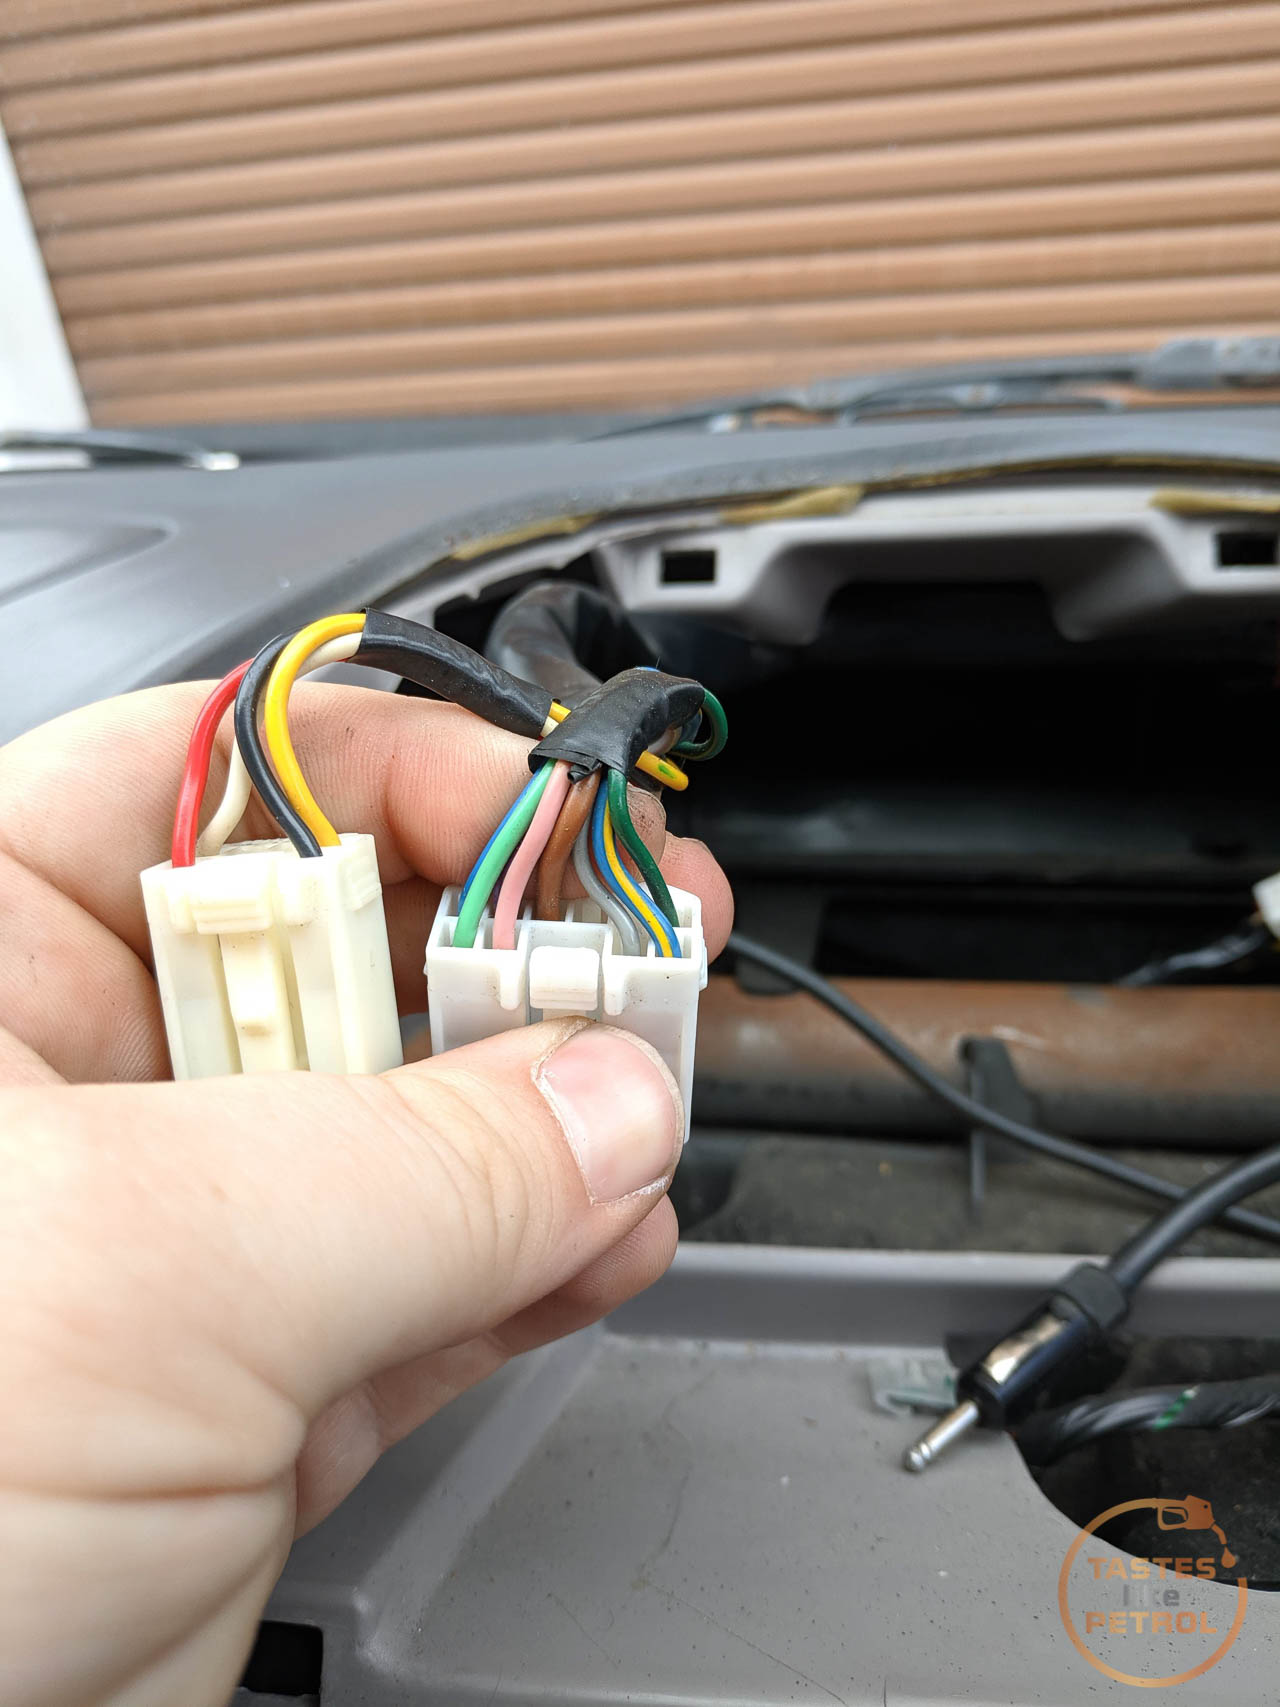
And these wires (which make no sense btw, the red/black/yellow/white are all speaker wires, not power)
To solder the harness on the radio to the relevant harness adaptor for the car. I was given one by a friend recently, so many thanks for that as it came in handy.

The old radio was removed from the housing, and the replacement installed. I had to scrounge some short screws for this as they were different from what the original radio (and most other radios) used.
Before installing the assembly back into the dash it’s always prudent to test the wiring was done right first and everything works as it should

Looking good. Everything works, so it was just a case of tucking the wiring back, refitting the housing and remembering to fit the two screws that hold it together (because if you forget, you will need to take the vents out again to do it).

Sound quality is about as good as you can expect through the standard speakers, which isn’t actually too bad. I’m not an audiophile, so I’m just happy to have Bluetooth and a working volume control

A job well done. Quite easy too. I’ve done other radio installs where you have to remove half the dash to get the radio out, which sucks.