I refurbished the rear drum brake setup today. I almost left it as is, but I’m glad I didn’t as it definitely needed stripping down.
I removed the drums a while back and had a quick visual inspection, and whilst one side looked like it had been under the ocean, there was no brake fluid or axle grease where it shouldn’t be.

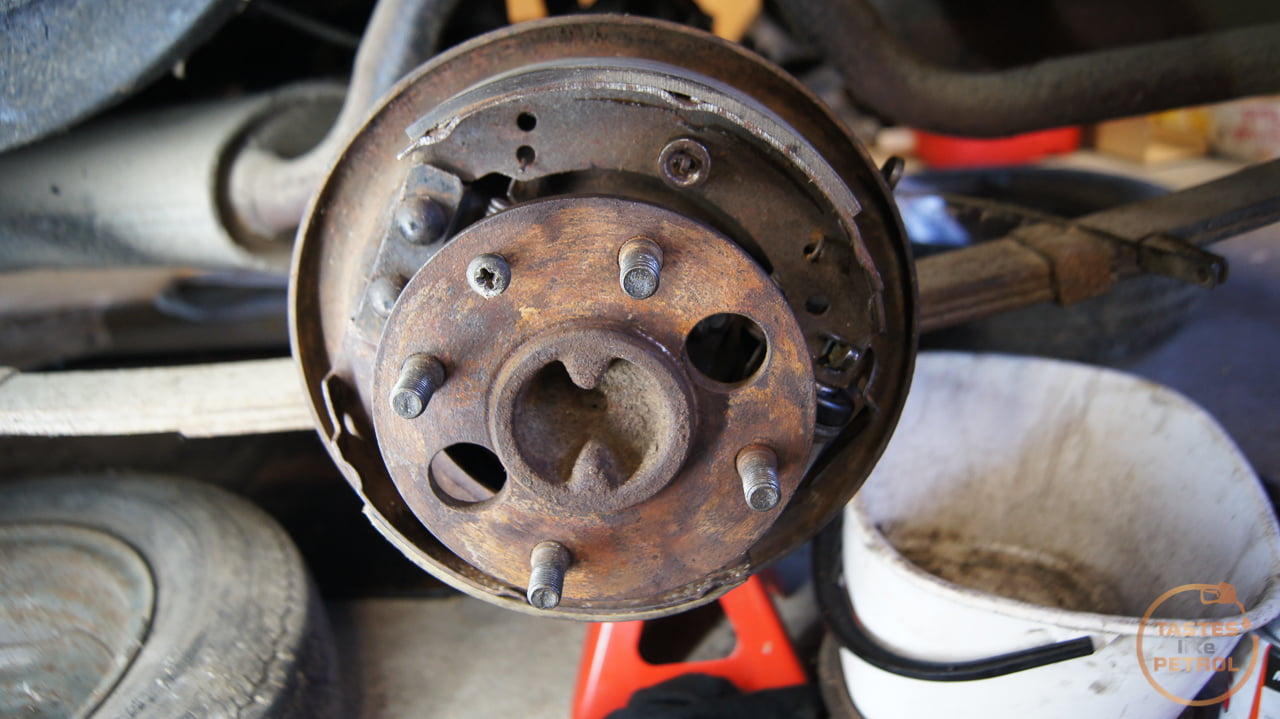
I started on the LH side, which didn’t look like it had been under the sea, but instead had been full of bugs and spiders. The whole drum was packed with cobwebs and took a lot of cleaning and vacuuming to not be grossed out.

The shoes look really good, almost new I’d say, and everything was very dry. Someone had been in here before though as this big, annoying to install, spring should be behind the shoes, not in front of them.
Removing the shoes is a case of removing the little retaining spring pins, removing the big spring and then the pair of shoes can be withdrawn from the backing plate.
With the shoes out the cylinder can be removed by undoing the pipe(s), removing the boot, sliding the U shaped clip downwards and the spring clip upwards. The cylinder should be free to remove.

This one looked OK. The boot was torn, and the piston had some crud built up on it, but the bore was clean. The piston seal looked so good I probably could have reused it, but since I ordered a replacement seal kit anyway, I replaced it. The seal kit for this car is from a Spitfire and has 3/4″ (19.05mm) bore.


With the build up carefully scraped off and polished with some fine sandpaper, the new piston seal goes on.

Now, before installing the piston in the cylinder again, install the boot first. This is a real prick of a job as it needs to stretch over the top, and it’s a very tight fit.

And carefully install back into the cylinder. I chose to lube the cylinder walls and piston/seal with brake fluid for assembly.

Reinstall the clip and you’re done.

There isn’t a heck of a lot to a wheel cylinder on these.
I cleaned up and greased the self-adjuster. This just rests in the bottom of the cylinder but must turn freely.

Now clean the backing plate up, especially at the points where the cylinder and shoes contact it (the six raised bumps on the top and bottom, as well as the anchor where the end of the shoes rest and behind the wheel cylinder). I used a wire brush and brake clean. Once clean, use thin smears of copper or brake grease on those contact points.

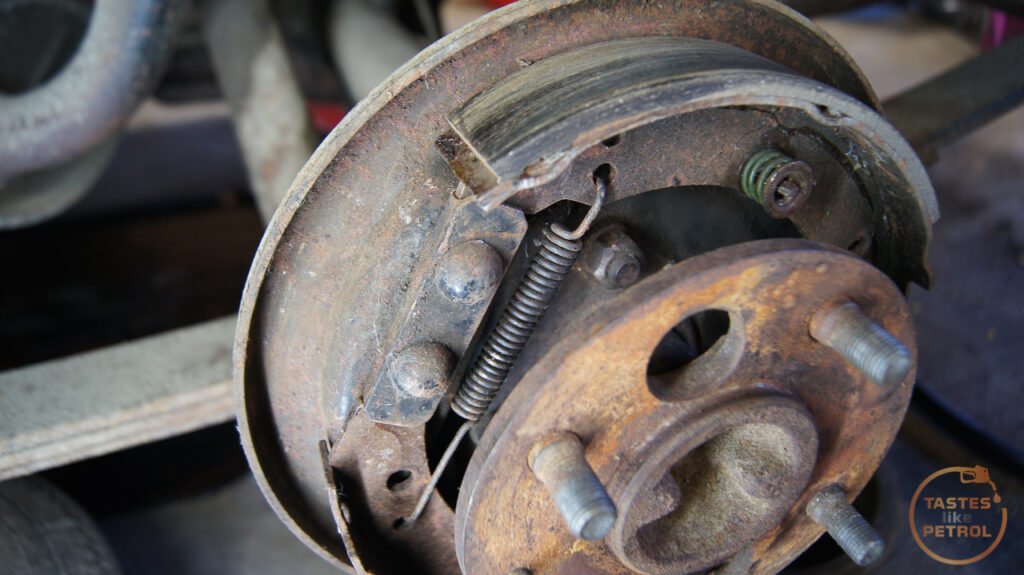
Once the cylinder and hand brake lever is installed, reinstall the shoes. I found this easiest with the double spring in one end (shoe end), rest the top shoe on the hub, whilst inserting the lower shoe into the self-adjuster and then the shoe anchor. Now the top shoe can be installed. Take care not to lose the little metal H piece that sits above the handbrake lever where it goes through the shoe.
Don’t forget to install the retaining pins and the big spring. As mentioned, this should be behind the shoes, and I found levering it in place with a long flat blade screwdriver easiest. It takes a few tries.

Done.

Rebuilt cylinder
So cocky, on went the drum

Now to move onto the other side.
This one was very crusty. Obviously water had gotten into the drum somehow, and couldn’t get out until it dried over time. This drum had plugs in the adjuster holes, whilst the other side didn’t. Explains why the bugs liked that side, and the water got stuck in this side.

The cylinder on this side was looking particularly average.

Removing the shoes shows how crusty it was

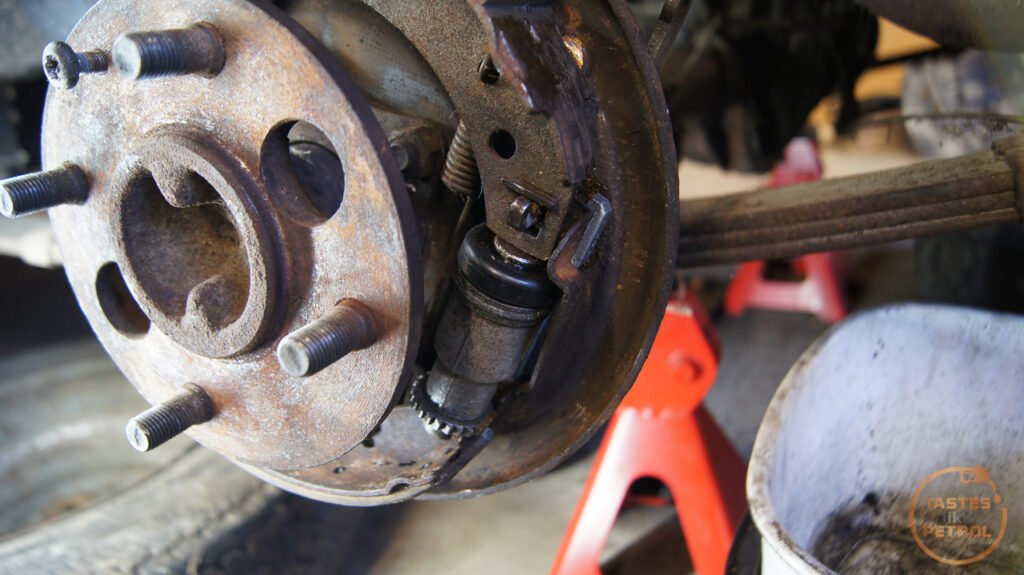
The adjuster was completely seized. No chance of self-adjustment here. Just as an aside, the self-adjustment works by means of pulling on the hand brake. Pulling the hand brake pulls up on the top shoe, creating the friction to stop the car, but the movement of that lever also moves the metal tang in the photo below from left to right. As it heads on over to the right it catches the teeth of the adjuster, which winds the threaded inner section that the lower shoe rests on up and down. The whole cylinder is free to move up and down in its mount, which evens out the braking between the two shoes. Simple.

Removing the cylinder on this side was a little more of a pain as it has the inlet and the link pipe, instead of just the inlet and a bleeder like the other side. Both freed off with some careful force, and out came the cylinder.

The adjuster came off the end after a couple of careful taps with a hammer. It was packed with furry corrosion behind it.

As was the space under the boot on the top. This concerned me a bit as it didn’t bode well for the condition of the bore.

The piston is completely compressed and didn’t move by hand

It did move with some gentle persuasion with a long screwdriver though


I had to get a bit more angry to get it out further. A long spanner was used as the lever for this

And out it popped

The bore looks worse than it is. The cylinder is aluminium, so it’s not really rust, just a build up of gunk stuck to the bore. I suspect the piston is stainless as other than more gunk on it, it was immaculate. The seal on the other hand was rubbish as there is a big tear/cut in it.

Mmm, more crusty fur

I tidied the bore up with some careful scraping, and then some very fine sandpaper. There is some staining on the walls, but there are no marks you can feel. The walls are very smooth.

The rest of the cylinder got scraped and wire brushed before a good clean out and the new seal kit fitted.

Before refitting, the back plate was de-crusted with a wire brush and then brake clean.

The cylinder was refitted. The locking method for these is a bit of a pain, but simple enough. The spring clip goes down from the top first, with the dimples pointing outwards (away from the cylinder). The locking U shaped clip then slides up over top of the spring clip, and locks into the dimples. I used a flat blade screwdriver to press down on the top of the spring clip, and pliers to tap up on the U clip.

And the wheel cylinder is in.

The shoes got a quick scuff with some rough sandpaper to clean the surface up a bit, and then they were fitted. They look fine but had some rust marks where they had been in contact with the drum.

And the completed assembly

The friction surface on the drum was quite rusty too, so that got a wire brush before fitting. It’s good enough that any other rust should be scraped off once the car is on the road and the brakes operate.

Drum fitted

Unfortunately I can’t test them as the master cylinder is off being re-sleeved, and the front brakes also need to go back on, but hopefully it won’t be long.