I had a brainwave, and some good advice, which got me going again.
“It’s just a rubber bush, and there is plenty of space around it. If I knock the arm back, surely I can press it out on the car?”
That’s the thought that got me back on track, surely it can be done without removing the bushing holder. Sure enough, the idea worked.
I cleaned the splines on the torsion arm up and wire brushed it so there was as little resistance as possible for the arm to slide back on the spline. I then used a couple of quite large hammers to gently tap the arm back. I had to be careful to keep it on the spline or I would upset the ride height (which I should have measured or marked, but didn’t).

The goal is as above, to knock the arm back far enough that it disengages the eye bolt, which is going through the bush we need to remove. With this disengaged the torsion bar and lower arm will drop out of the way.

I then cut the shoulders off the front side of the bush so they wouldn’t get in the way of my balljoint press, and using the press and a big socket I proceeded to press the bush out. Quite easily too, I must say.

The extraction went very smoothly

Since the replacement poly bush is one piece, the key to a smooth and painless install is to make sure the inside of the eye bolt holder is clean and smooth. Mine had a lot of rust and pitting on the lower side, so I spent a while chipping rust chunks out and then running a wire death wheel inside it until there was nothing to catch on.
It took a few tries to find the right tool to press the bush in. I first tried some large washers and threaded rod but I just couldn’t get it to go that last few MM and seat properly.

I even tried old mate balljoint press again, which was no help

The final, and best, solution was a pair of appropriately sized sockets and threaded rod. Quick, easy and seated all the way first time.

Freshly pressed

The last part of the bush is to press the steel sleeve through it. I employed the threaded rod and big washers for this, which pressed in very easily.
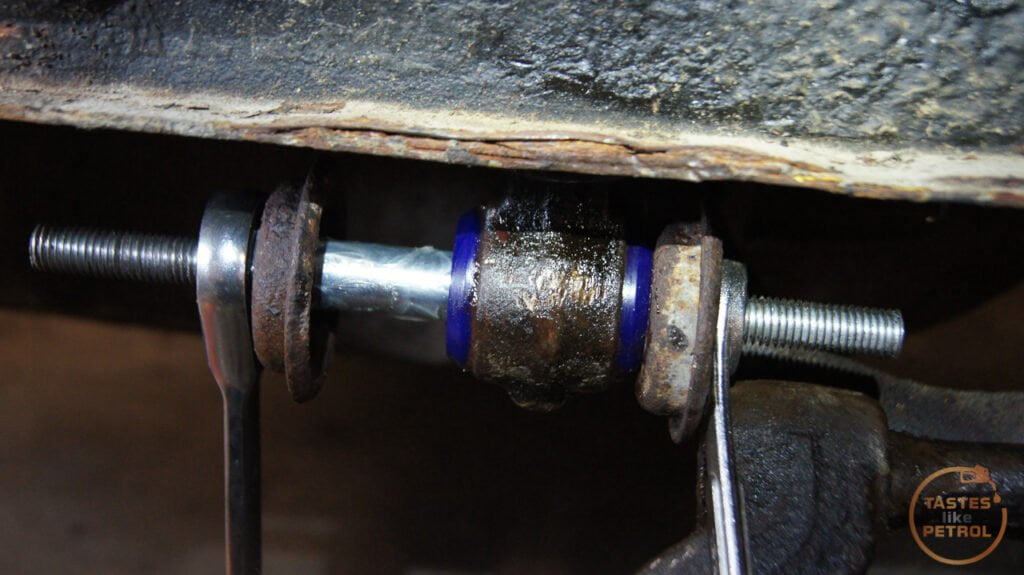
Done.

Now it’s just a case of slipping the eye bolt back through, lining up the lower arm/torsion bar with the spline and knocking the arm forward.

With that success behind me, I moved on to the trunnion. I had been told via the Aus Marina Facebook group that an 11/16 x 13/16 x 2 bronze bush is a perfect replacement for the standard bush, so I ordered a pair from a local bearing supplier.
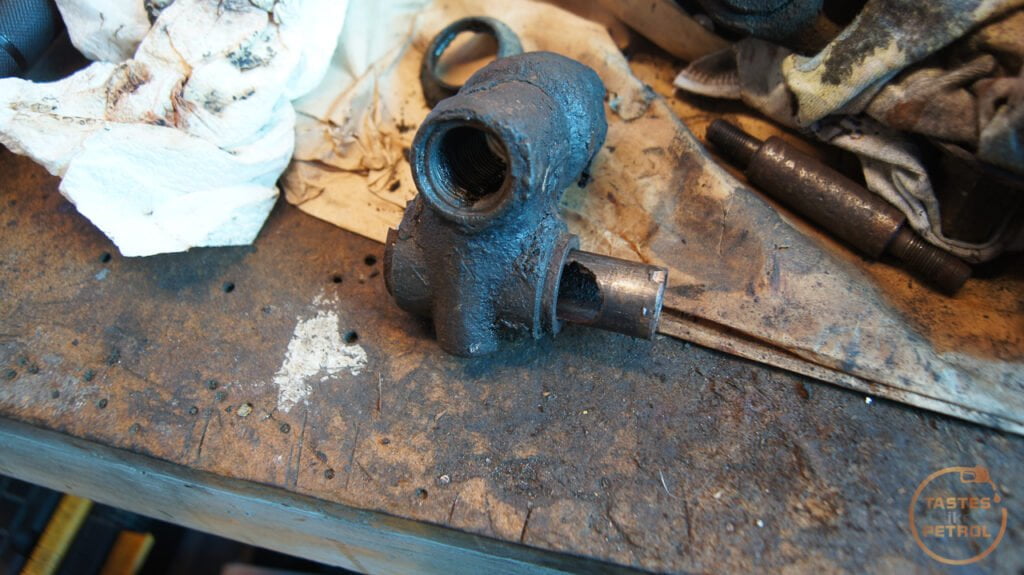
Heck, my trunnions were so filthy I couldn’t even see where the steel stopped and the alleged bush started.

Some quick digging later and I could see the edge

I started by cleaning out the grease passage. It’s no wonder the grease wasn’t getting where it needed to, this was packed solid. I tried pumping grease into this when I first got the car but it just came out the ends of the pin instead, as the seals are missing and the pin is stuffed.


Then using a spare 9/16″ socket, I pressed the old bush out. It took a lot of force to get moving and let go with a mighty pop.

Partway out. I used a cheap extension to push it completely out
I gave the trunnion a good clean with a wire brush. You can see the old and new bushes together. The old bush is also bronze, but had been slotted and a huge area ground out of it where the grease passage is. The old bush, like the new one, is completely smooth inside with no grooving for grease to get around (which the Uk ones have).

I drilled a large hole in the new bush for grease to get in

And then carefully pressed it into place.

I was a little stuck here as I was waiting for a pair of used Uk trunnions to arrive so that I could pinch the pins from them and use them in my trunnions.
To keep myself entertained in the mean time, I did a couple of other small jobs.
The first was to replace the utterly smashed rubber rebound stop. I had read on facebook that someone replaced their one with a pair of Mini ones (as the Mini ones are half as long as the Marina one), so I ordered a pair of the uprated polyurethane ones.

Since these are solid poly, not rubber, I chose to only use the one. I had to bend the flat tab up but otherwise it bolts straight in.

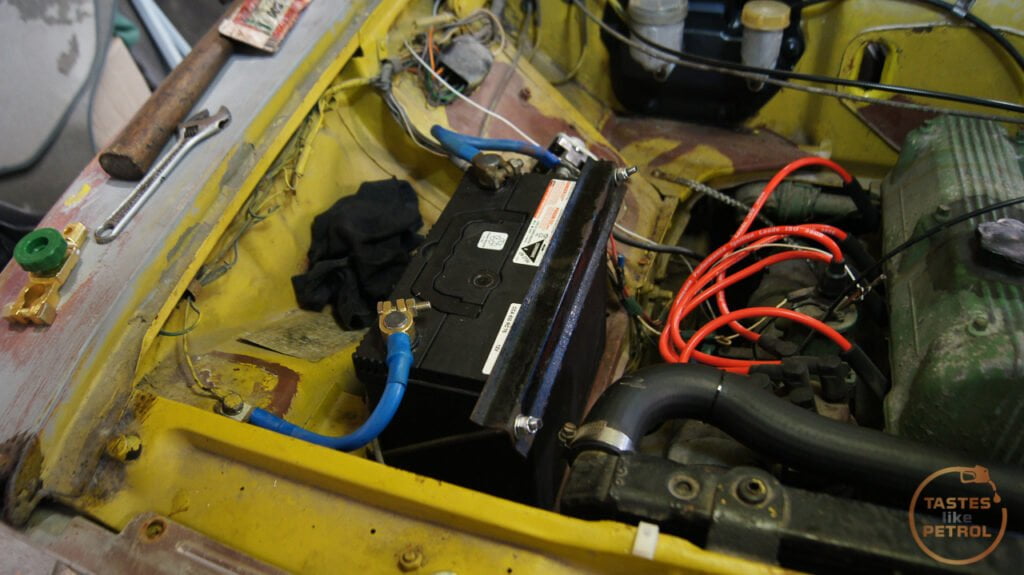
The other quick job was to chase my grounding issue. This car has always been a bastard to start, but adding a jump lead the other day as an additional grounding lead from the engine suddenly woke it up and it cranked over much better, indicating that the one single ground lead from the engine to the body wasn’t up to the job.
This lead goes from the bellhousing to the body. The bolt on the bellhousing was fine, but check out the state of the bolt that was on the body side!

No bleedin wonder. Last I heard, rust wasn’t a great conductor of electricity.

I cleaned out the captive nut in the body as much as possible, and refit the strap using a nice fresh new bolt and lots of copper grease.
To help the cause, I also added a second ground from the starter housing to the body. I initially used the shock mount bolts but since they basically go through painted steel I moved it to an existing hole in the body that I put a rivnut into.


Now the car cranks quickly and starts very easily when cold. No more of this struggling to turn over or having to charge the battery every time I want to start it. Massive improvement.
A few days later a big box of bits arrived. In that box, we had a pair of good early “big hole” shocks, a pair of used but usable UK trunnions and a battery hold down.
Since it’s been bugging me, I started with the battery hold down. Being from a UK car, it’s slightly different. The Aus battery clamp just goes out horizontally and squeezes the battery against the inner guard. The UK clamp goes diagonally and clamps on the edge of the top of the battery.
Aus

UK

The UK threaded hooks go into holes that aren’t present on the Aus cars, and if you use the holes on the Aus car the rods are way too long. A few seconds with a grinder fixed that.

And a date with my nice new die to thread the rod again


And bam, we have a functional battery hold down.

Pretty chuffed with that.
Next was to build up the upright. I removed all traces of the old balljoint, sent the upright to the parts washer to spruce its self up a bit and then following the instructions in the kit, installed and set up the new balljoint.

The replacement shocks got drained (had almost nothing in them anyway, just some black sludge), flushed and then refilled with 30W engine oil


The arms on these are very smooth, and much freer to move.
Being another set of early shocks, these are the “big hole” arms. The later cars had smaller holes in the arms and didn’t need bushes or sleeves for the balljoint. Since these are big hole style like my original shocks they still need the steel sleeve inserted to replace the bushes. This is greased and then tapped into place with a suitable socket and hammer.

Before I could fit the shock and upright I needed to attend to the trunnion. I cleaned and greased the donor pin and it was a perfect fit in the new bush; if a little tight to press through but rotates smoothly and freely. The donor trunnion also gave up some seals that were missing and better end washers than the Aus one had.
I also knocked the end cap (a steel disk) out of the donor trunnion to fit into my original trunnion. The problem was that the original disk is fitted and then the steel is either cast around it or peened over. The lip had been broken away. I’m trying some of this fancy epoxy putty that claims to be as hard as steel, but we’ll see. I’m not convinced it’s bonding to the cast iron housing that well and will probably fall off over time. I’ll keep an eye on it.

The upright and trunnion got thoroughly greased and the trunnion spun on

The replacement shock was fitted and the upright attached to the lower arm

The lower tie rod was a pain to refit with the new solid bushes, but got there with some levering. It was worrying to note both sides were missing the big washer that is meant to sandwich the bushes into place and was relying on the nut alone. I found a large washer and fitted it.

The thread on the end of the tie rod was a bit rough and rusty, so I ran the die over that too.

The refreshed trunnion in all its glory. Everything that could, got new nuts, especially the nyloc nuts. For no reason in particular I used the big weird UK nut on one side. I think it’s meant to be some sort of steering lock stopper?

The upright was then mated up with the shock and the top pad tightened. All that was left was to refit the backing plate and hub

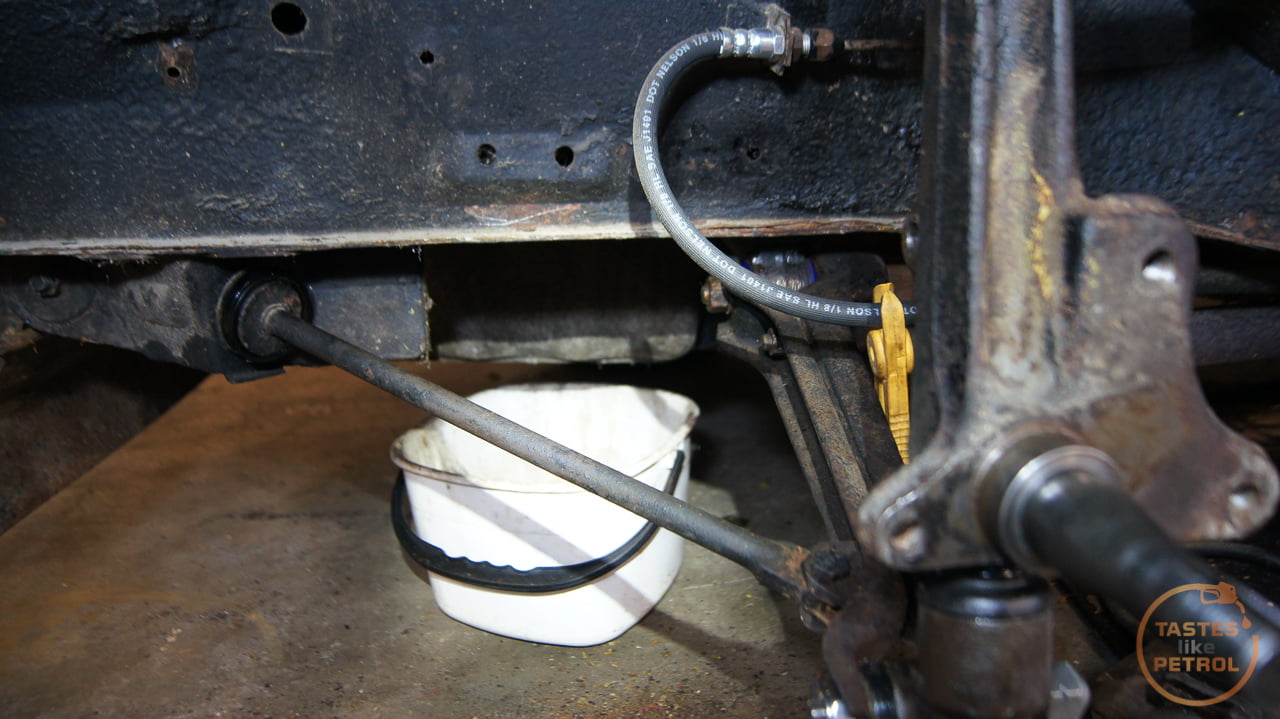
And of course the caliper. I made a slight change to this though and using some alloy plate, I made a bracket to move the hose off the upright, so now if I have to remove the caliper I don’t need to disconnect the pipe, just remove the bracket from the upright. Now, I’m a mechanic, not a fabricator, so these are very rough and ready, but do the job.


The hardline on the caliper dictated where the bracket sat, so it’s angled a little inboard now.


I bled the caliper and it’s all working as it should.
The car is back on the ground again, but I still need to repeat all of this on the other side now.
A difference is already noticeable when bouncing the corner of the car. It’s much stiffer and controls bounce much better. It does sit a little higher, but I’m hoping that will settle a bit with driving. Bouncing one corner and the then other shows a huge difference between the side that’s been done, and the other that hasn’t.
Well done on the perseverance, don’t forget to mark the position of the torsion bar splines on the other side.
You may have to reset the spline position on this side if the ride height is out.