Because I can’t leave anything well enough alone, I wanted to do some science and see if I could make a low-cost big brake kit for the Alto.
I know there are a few options from Japan, which in the big scheme of things, aren’t badly priced, like the Silkroad Big Rotor kit, which takes you from 230mm to 255mm rotors, but they aren’t off-the-shelf parts, and after shipping its around $500NZD for the kit. Any time I needed replacement rotors I would have to buy them from Silkroad in Japan, with the associated freight costs.

There was some info online about people using the “14V” caliper brackets from a Suzuki Swift/Ignis/Kei and the rotors from the same car, which give you a 257mm rotor. So, I found a wrecker that had an HT51S first-gen Swift in stock, which after checking the parts catalogue, had the brakes I needed. I snaffled these up; A pair of calipers with 14V brackets and a pair of used rotors.

I knew off the bat that the rotors wouldn’t work without some work, but the brackets should fit the standard calipers.
The theory here is although it’s still using the standard Alto calipers and pads, it moves the caliper further from the center, giving it more leverage on the rotor, and more stopping power. I guess more metal would also aid in cooling too.
It’s a shame the car lost its fancy 4-pot Blitz brake setup. That used massive 286x22mm rotors, although they don’t fit under stock wheels.

It’s been a long month or so of not being able to drive the Alto. The last time I took it to work the steering was more murdery than usual, with the car all over the place depending on if I was on throttle or not, so something wasn’t right. I got home and jacked the car up to have a look, and found the top mount on the LH front strut had a ton of play in it, so I went down a rabbit hole of throwing money at the problem. Now I’m waiting on the parts to do a full refurb of the front suspension, including new bushes, arms, shocks etc.
It did happen to tick over the big 100k on that drive home though

In the meantime, other than a quick jaunt out to a friend’s place to help with their Alto rebuild (always handy to have a second car to know how it goes back together), it’s been parked up feeling sad.

So with the big brakes in hand, I jumped in, pressed the start button and nothing. It seems three weeks was a smidge too long for the ODB2 adaptor to be left in the connector and it had flattened the battery. A quick jump with my jump pack, and into the garage it went.
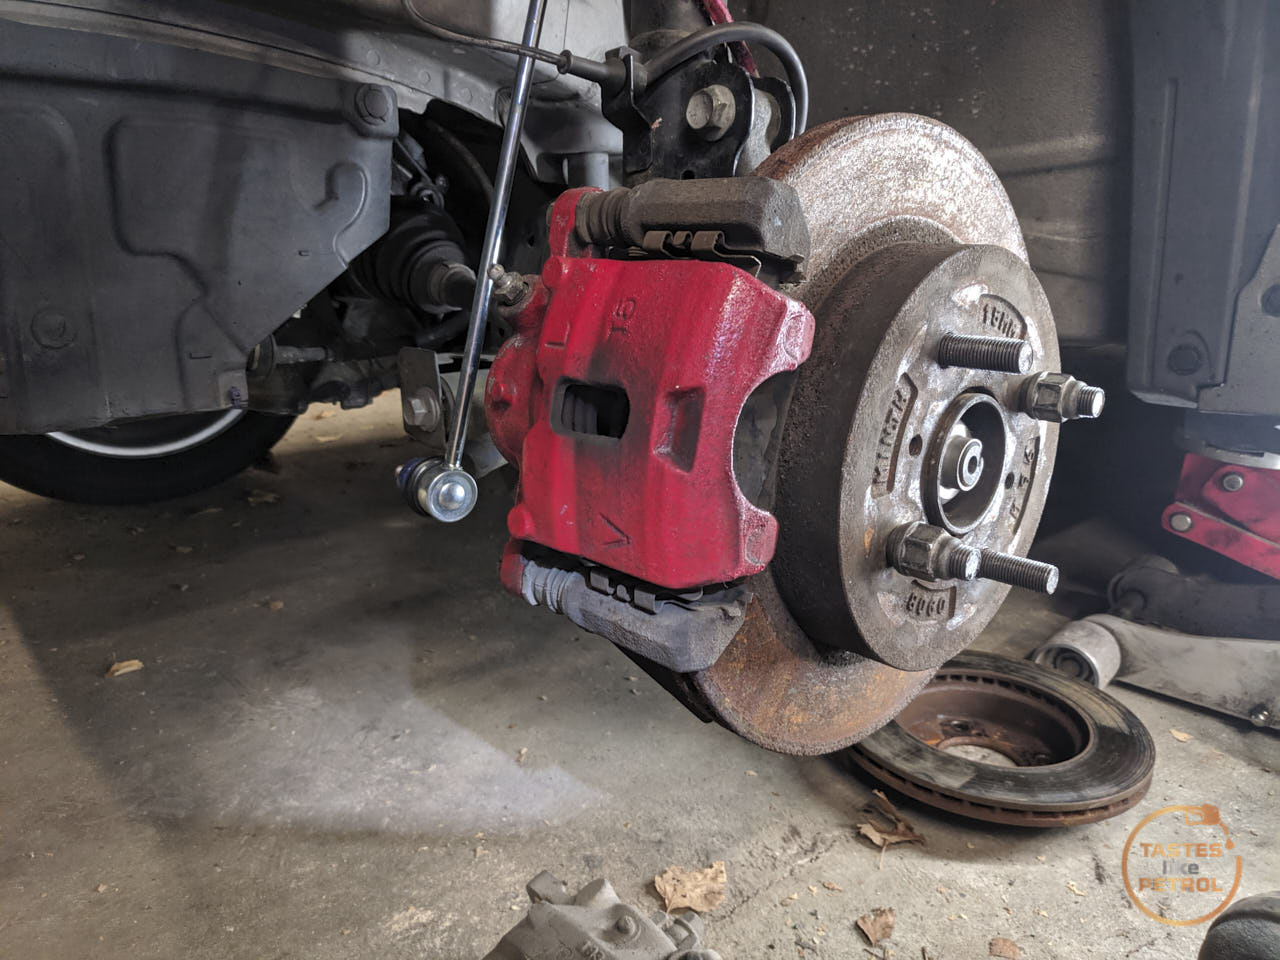
I jacked the front corner up, and removed the wheel, exposing the cute little brakes

That’s the stock 230mm rotor. It’s 17mm thick and has a hat height of 45.1mm. Ignore the rust, that’s just buildup from sitting outside.


I removed the caliper and bracket. This shows the difference in the brackets

“14V” for the big rotors

The stock rotors were a little stuck on, so I used the removal holes and a bolt to push it off. It’s interesting to note that the removal holes are very close to the studs, this is due to the design of the hub, which unlike most, isn’t a complete circular face.

And with the rotor removed, this is the hub. See what I mean about the lightweight minimalist hub? The rotor dust shield is a bit of a joke too.

The rotor size difference is noticeable when you put them together

The problem with the big rotor, is although the thickness is the same at 17mm, the hat height is different. Instead of 45.1mm like the Alto, it uses a 49mm hat height. This pushes the face of the rotor back towards the hub by almost 5mm.
I tried without any spacers behind the rotor first

The 14V brackets are in the same location as the Alto brackets, so of course the rotor now hits the brackets (and dust shield).
I had really hoped 3mm would be enough, and it’s what a couple of people in Japan running this setup are running, but the rotor still wasn’t centred in the bracket. It’s probably not an issue, but I really wanted it to be centered. I stacked 5mm worth of washers behind the rotor and checked again (because 4mm spacers don’t exist)


Looked pretty darn good to me. The stock caliper bolts on without issue.

The only real problem I have is that now the center bore of the rotor isn’t on the center ring of the hub anymore, because the hub tapers from 60mm down to 54mm (so it needs a 60mm CB rotor and 54mm CB wheel… whhhhyyyy)

When I did the same work to the Corolla, using 3mm spacers behind the rotors, the rotor was still hubcentric because the rotor was on the hub-centering ring as it didn’t taper.
It’s probably OK, everything is clamped together by the wheel and nuts, but something doesn’t feel right about not having the rotor hubcentric.
It did look pretty good behind the wheel. You can see how far the caliper is pushed out and how much the rotor fills the wheel


I’ve been through catalogue after catalogue and I can’t find anything off the shelf that has a similar hat height, thickness and in a diameter similar to the big brakes. There was a Toyota one that was almost perfect and wouldn’t need a spacer, but the CB on the rotor was only 54mm, because they don’t use a stupid step-up on the hub.
There are options for having the center bored out of a Toyota rotor, or another rotor machined to work, but at the end of the day I’m trying to find an off-the-shelf option that doesn’t need extra work, is available locally and most importantly, is cheaper than buying a kit from Japan.
The Suzuki rotor with a 5mm spacer behind it is the best option so far, but it needs to be hubcentric. I’m wondering if I could fit a 54-60mm centering ring in there, but for now, I’ve shelved the idea of big rotors. I have plenty of other things to sort out first. I may end up buying the bolt-on Silkroad kit, we’ll see.