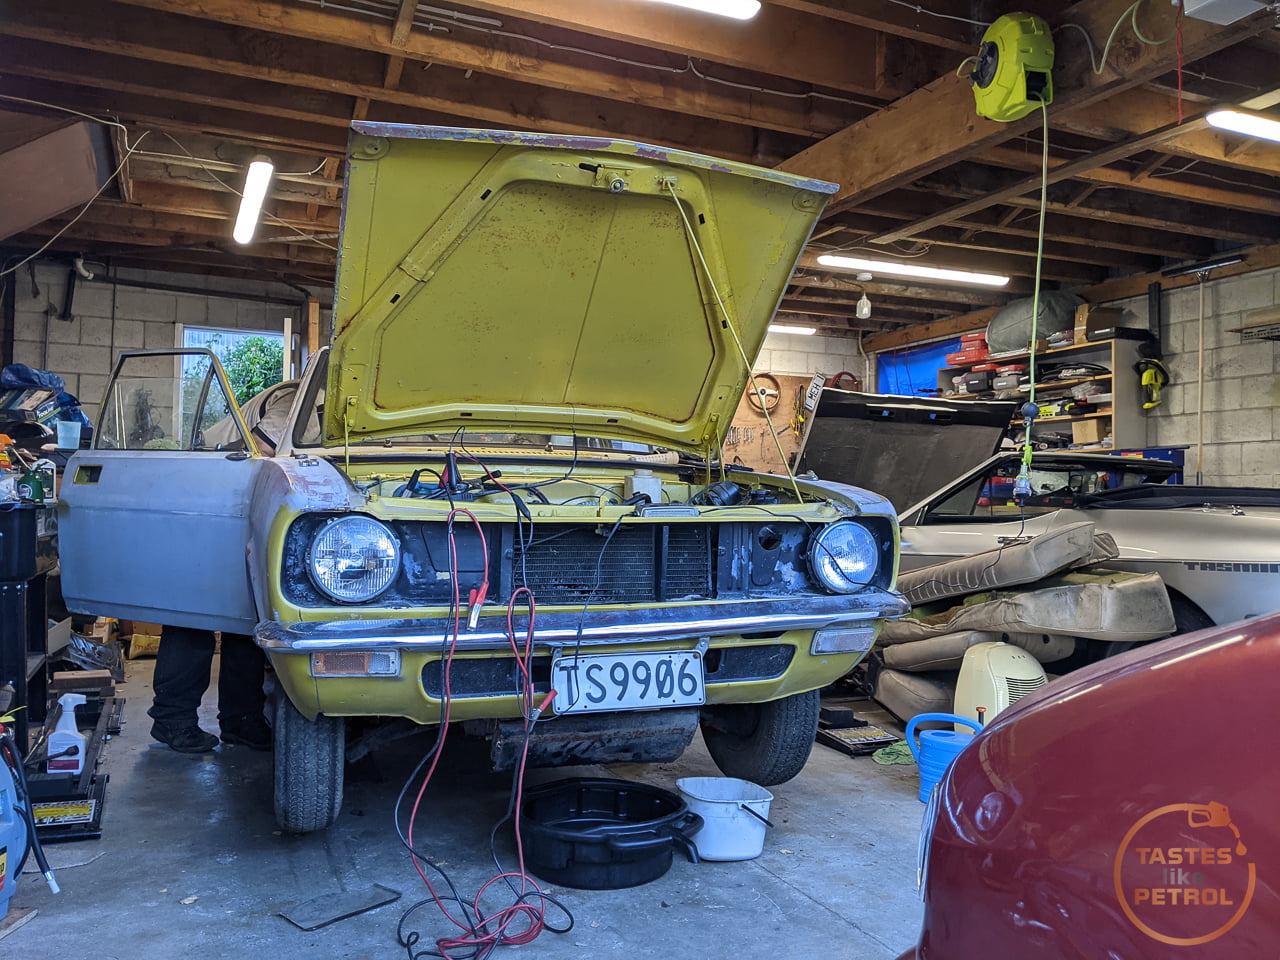
Today has been the first real day of work on the Marina. I got some important prep work out of the way, and had a good look around under the car.
The first task on the list for today was to remove what was left of the interior and give it a vacuum out. I had to wait for the muck to dry first, and now that it was nice and dry I donned my gloves and mask and went to work.
The boot got completely stripped. The carpet was old house carpet and was rotting. Thankfully the metal under it is in good shape.

Cleaning the boot also showed where the rust is. The worst rust in the rear guard is where this little strip (to support the spare wheel?) is attached. It’s basically rusted along that seam.


The other side is solid.

With all the seats removed the whole interior got a good vacuum. So much grot. Cleaning the floors shows the repair panels that have been riveted in and then sealed around.


There are about four patches on the passengers side alone, including one against the inner sill, which will need some work where it joins to the floor.

It’s all pretty straight forward stuff to fix from what I can see. I’ll need to work out how to press some strengthening ribs into the new panels, but I have a press and a welder, so I’ll make something.
The RH side was no better, so that got a good clean too. I did find a lot of screws under the driver’s seat, but no surprises under the paving slabs.

The rear wasn’t missed. There was quite a bit of old mouse poo here too.

With most of my chances of catching Hantavirus sorted I got the car up on axle stands, which is where it will live for a while.

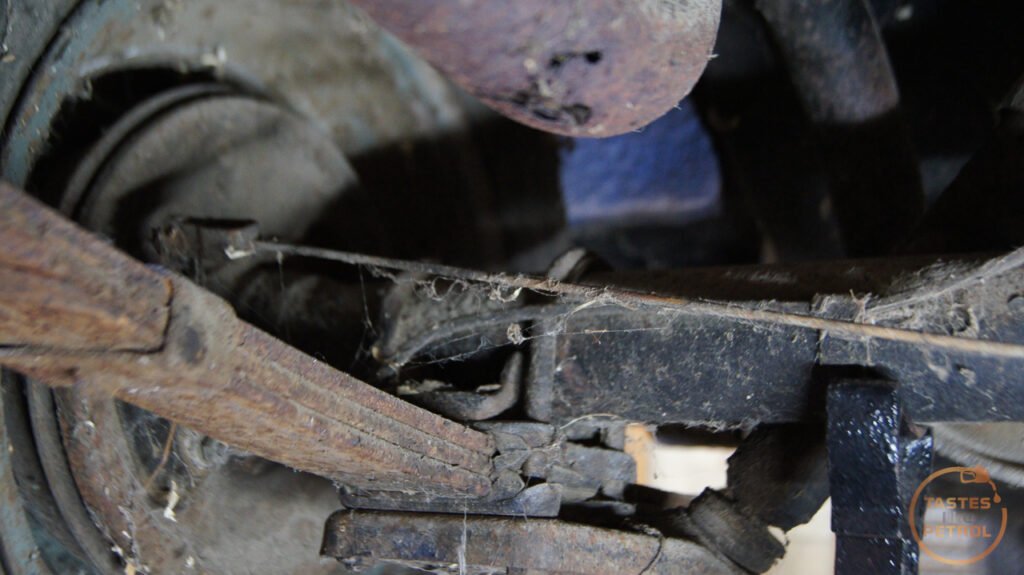
This gave me my first real look at the underside. The good news is that its extensively undersealed, which seems to have saved it from too much underside rust. The bad news is that its cobweb city.
Oh, and the rust that does exist. Like the LH half of the rear valance.

The RH side is almost perfect

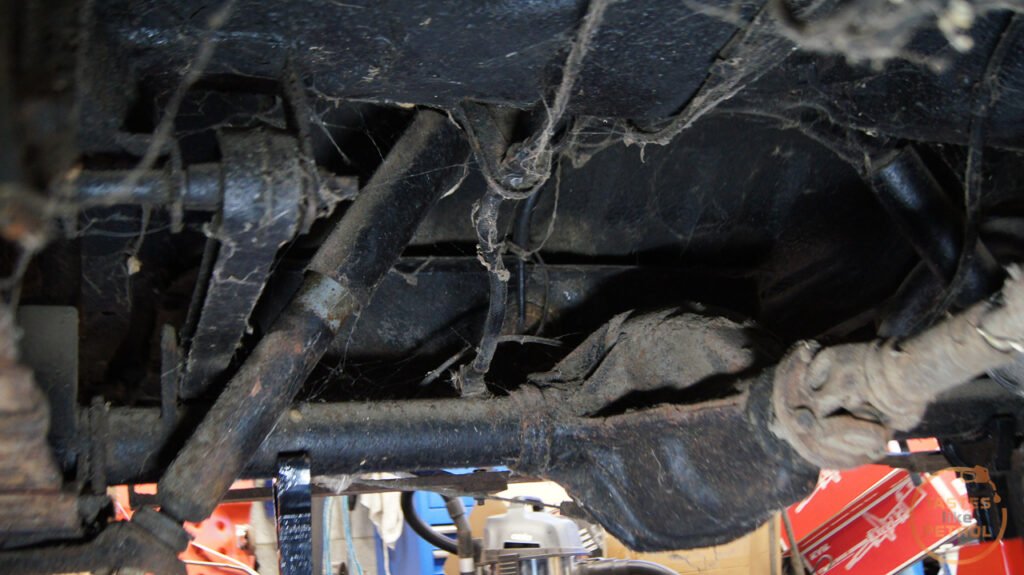
The big Borg Warner diff. Need to source a LH bump stop, and probably shocks.

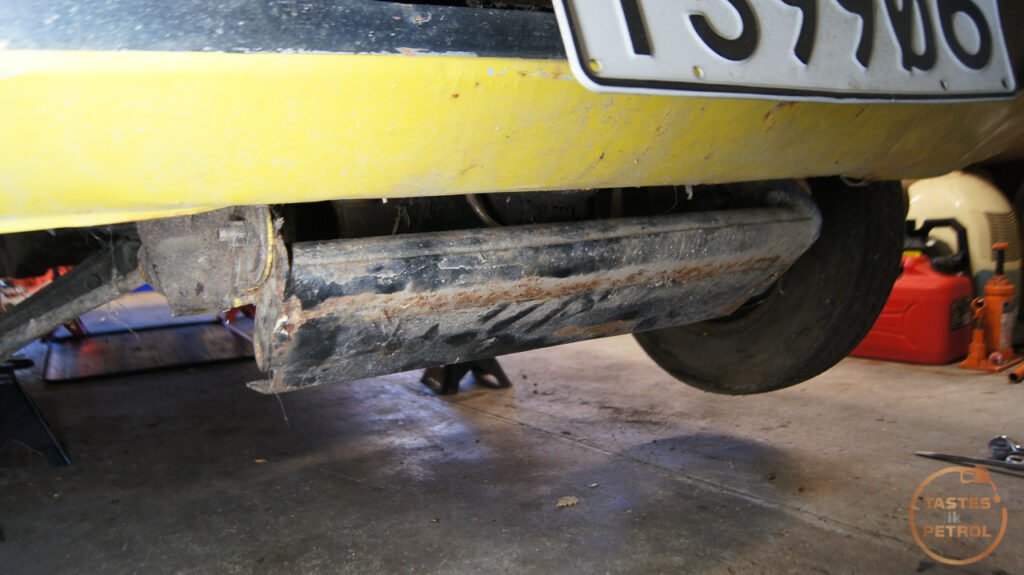
The exhaust has seen better days. Will patch it to get through the WOF and then look at the condition of the rest of the system and whether to just replace from the muffler back, or replace the whole thing.

One annoying thing is the driveshaft center bearing has collapsed, so I’ll need to drop the shaft and replace that. Will also assess the Ujs and see if they need doing too.

Removing the driveshaft will give me the chance to replace the clearly leaking rear seal on the gearbox too

It’s OK, the tyres are only flat on the bottom.

Cob webs. Everywhere. I took a broom to them, and they resisted my attacks.
Moving forward, we see the ancient Ryco Z83B filter. I ordered a replacement and picked up it this morning. There is a high probability this filter is from the 90s.

I think the moisture on the bellhousing is gearbox oil leaking forward from sitting. Its that, or the rear main is leaking, but since the car hasnt been driven anywhere it would be hard for the oil from the rear main to spread like that instead of just leaking straight down. It’s amusing how HUGE the bellhousing is, and how small the gearbox is.

Around the front and I’m greeted by this thing. I worked out from the owners manual that its a “Hinged Kerb Guard”. Well, it was seized solid in the sticky outty position.

It made a lot more sense once I freed it up and folded it back where it should be. I suspect it got caught at one point, maybe moving the car off a trailer or something, and overextended forward.

What it does, is protect the sump, which hangs way down under the car. This is a tall engine.
This is directly behind the guard. Yes, that hose in the front is the fuel hose from the pump…

Once freed up and folded back it looks like this. It has pins on either side that stop it from going further back.
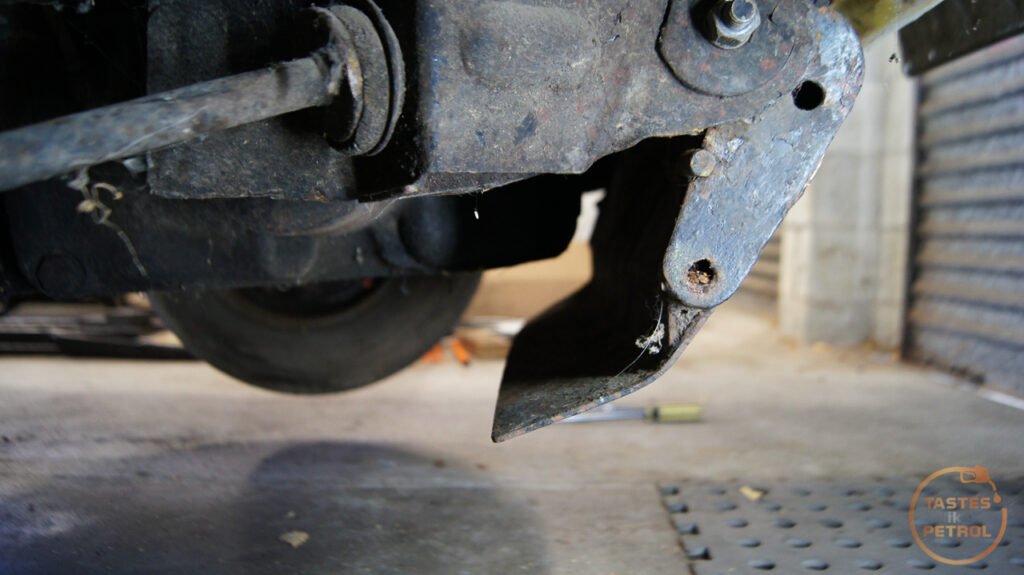
I’m not sure why they bothered to “hinge” it. The “hinge” is just that it can rotate on the two bolts that attach it. If it was to make servicing easier, it would’ve been just as easy to make it fixed in place and removable. I’ll just tighten the bolts in the furthest back position.
Next, I drained the engine oil and removed the old filter. The old oil stank and was the darkest black oil I have never seen. It was like draining treacle.
While waiting for it to slowly drain, I removed all the old spark plugs. The 4th plug was damaged at some point and the top was stuck in the (also damaged) ignition lead.

Luckily the OE Champion plugs cross over with NGK BP6ES, which oh hey, I happened to have on the shelf. I gapped them down the specified 0.6mm gap, but before fitting I used my awesome Castrol oil can to put a little oil into the cylinders to help the dry cylinder walls out a bit.


And now the new plugs went in

The oil was still draining, so I fit the replacement filter in the meantime. Because the engine hasn’t run for about 10 years, I prefilled the filter before spinning it on. I don’t normally, but this made sense to me.

Next was to replace the old fuel hoses from the carb back to the tank. The hose that had been put on the car from the pump to filter was… odd. I don’t even know if it was fuel hose. Looked like a small garden hose, and was “food quality”.


I replaced all the hose with 1/4″ ID Gates and Codan hoses (depending on what was on hand at the time). All R6 rated, so not rated for EFI or Ethanol, but not an issue for me as its carb and I won’t be running E10 in it.

When I did the Mini fuel system I got a filter at the time but didn’t have the space to fit it. I’ve had that filter on the shelf since, so its good to finally put it to use.

As per the above photo, I took the top off the fuel bowl to see what was in there. There was a little bit of old perished fuel in the bottom but otherwise looked OK. This was cleaned out with a rag and brake cleaner.

I removed the dashpot and piston to clean. The inside of the carb was filthy, so that got a good clean. The old oil was drained and new 20W60 poured in on refitting. I may play with this dashpot oil if it’s too thick, which I think it might be.


It’s not all nicely polished, but its clean inside, and that’s what matters. I’ll look into a rebuild kit later and redo the whole carb.

Now it was finally time to pour in 3 litres of Penrite’s finest HPR30 mineral 20W60. This stuff is gold for old cars. Total capacity is 3.4L including filter.

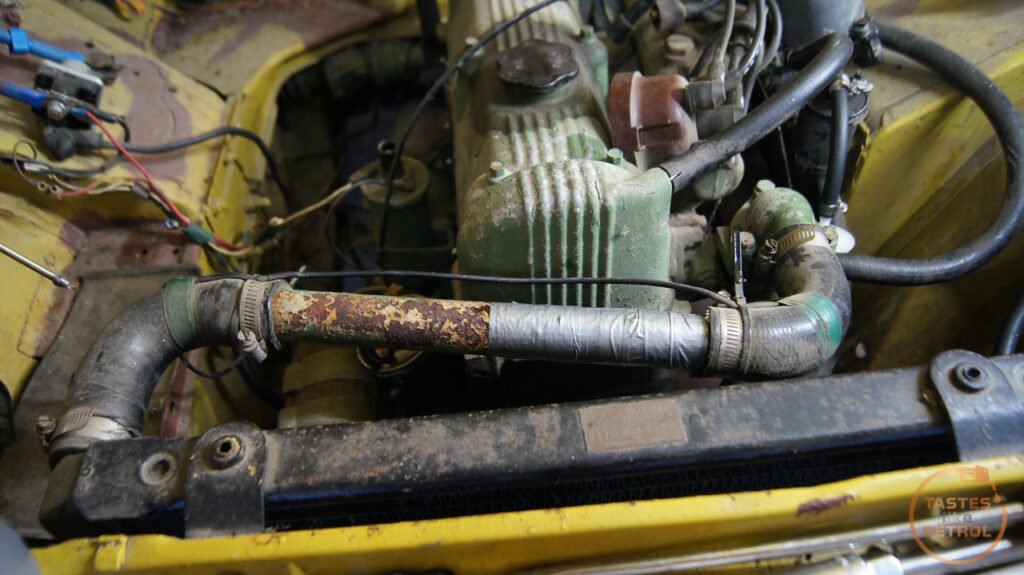
With the level checked, and between the marks, I moved onto the cooling system. I knew there was water in the expansion tank but appeared to be nothing in the radiator. I sucked out the old rusty water from the tank and cut the old hose off. I fit some of my spare rubbish J30 R9 hose from the radiator to overflow (all that hose is good for since its no good for 40+ PSI EFI).
I removed the bottle and gave it a damn good cleaning with the garden hose. Lots of chunks came out, but the lower outlet was completely blocked. It took me shoving a screwdriver through the outlet to clear it.

Now that I had free flow between the radiator and expansion tank, all that was left to do was fill the system and see where it all comes out again. One of my recent tool purchases came in handy for this. I’ve been wanting a coolant funnel for ages, but they’re usually so expensive, but I scored this off Trademe for cheap, near new. It increases the head height of the coolant, making it easier to bleed, and has a tap to stop me making a mess when the funnel is still half full but the system is full.

Almost immediately there was a leak as soon as the level reached the top radiator hose. This isn’t an original hose; someone has cut and shut it with a steel pipe in the middle. It should be one big S-shaped hose. I turned the pipe over which revealed why it was leaking.

Mmm, crusty. It was damp down one end.

I decided to try the other recent tool purchase, a radiator pressure testing kit. Its second hand and a bit rugged, but it still works. This highlighted quite clearly where the pipe had rusted through


The rest of the system handled 15psi happily, once I applied duct tape to the pipe. Even the radiator, despite having a bunch of missing fins and generally looking haggard, held pressure fine. I need to work out a way to pressure test the heater core too, since it’s been bypassed and removed, but that may just involve hooking it back up to the car cooling system and pressurising it all again.
With all that work done, there was nothing left to do but see if the engine actually turns over. I refitted the damaged/old leads just in case it wanted to fire. I have replacements on the way though.
I borrowed the battery from the TVR

Turned the key and got dash lights!
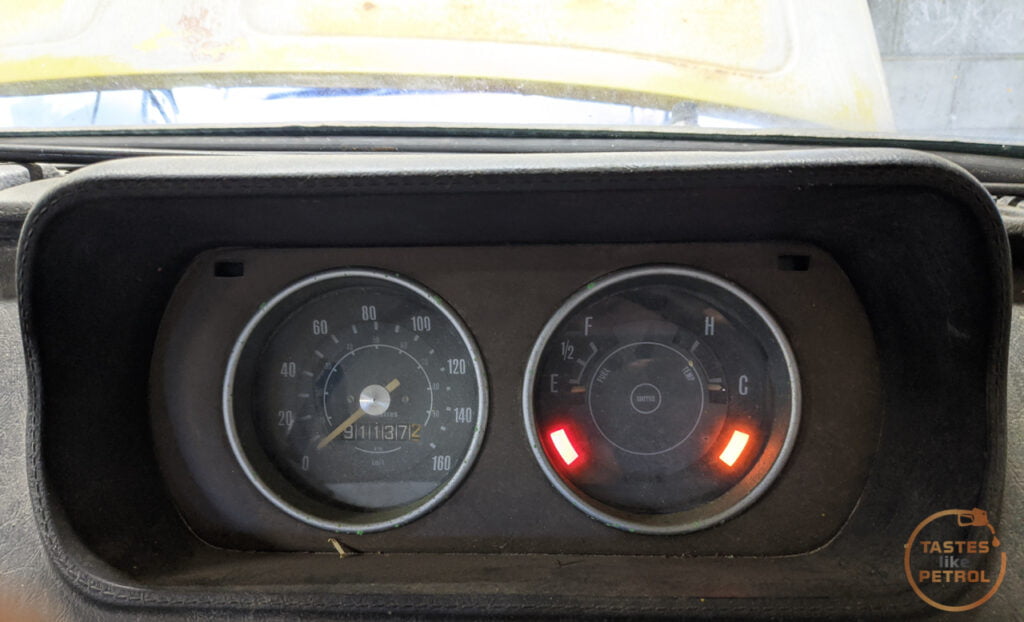
The indicators also kinda worked, although they are flashing super spastically, probably due to the missing/blown bulbs in the rear and not being used for 25 years. No horn or headlights though.
Next, I turned the key further, and sure enough, the engine reluctantly turned over. It was kinda like an old man (me) getting out of bed in the morning. Very slow and kinda “eh, do I have to?”. Adding a jump pack made it turn a little faster but it quickly ran out of juice and even then “faster” was still slow.
I need to get the car its own battery, but I’m also wondering about the engine grounds now as that is apparently a common reason for shitty slow cranking. I’ll try again and see if we can get it fired up this weekend.
To celebrate its uh, not starting, I gave the car its face back. The center painted section still needs to be repainted and fitted, but otherwise, the difference with just the grille surround is quite large. Makes the car look proper. It’ll come off again to see why the headlights don’t work and to fix some minor rust in the panel, but it can hang there for now.

Damn, I’ve just noticed the bumper is on the piss too. Guess thats something else to fix.
Thank you. I’m loving your blog on your Leyland Marina. So informative, informal and a few laughs along the way.
I’ve recently bought a 1974 Marina I call tinker toy. In similar condition to yours. The information your providing is invaluable to me.
Cheers
Richard
Thanks, and congratulations on the new project. Hopefully it’ll bring you as much joy as mine does to hoon around in, when it gets to that point.