It’s been a while since I had done any work on the Marina. The Tacho kinda progressed in the background, but most of the focus had been on getting the Carib going.
But with the Carib on the road, I turned my attention to the Marina again.
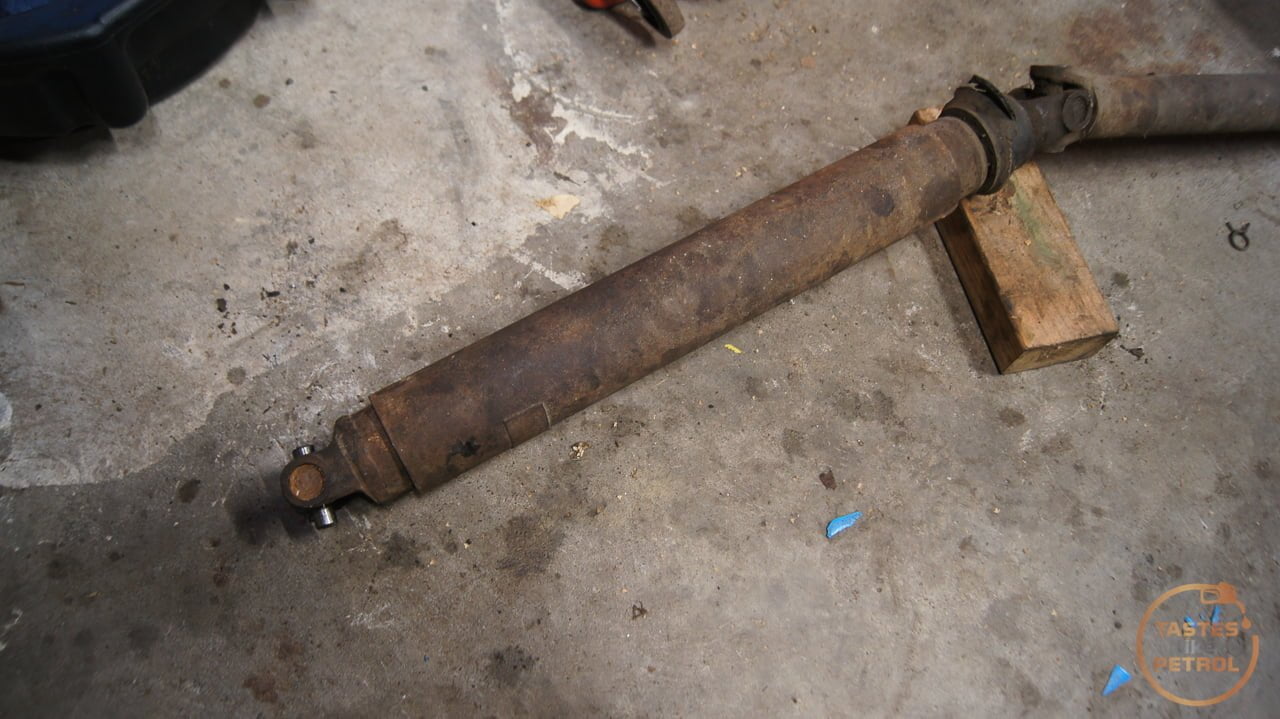
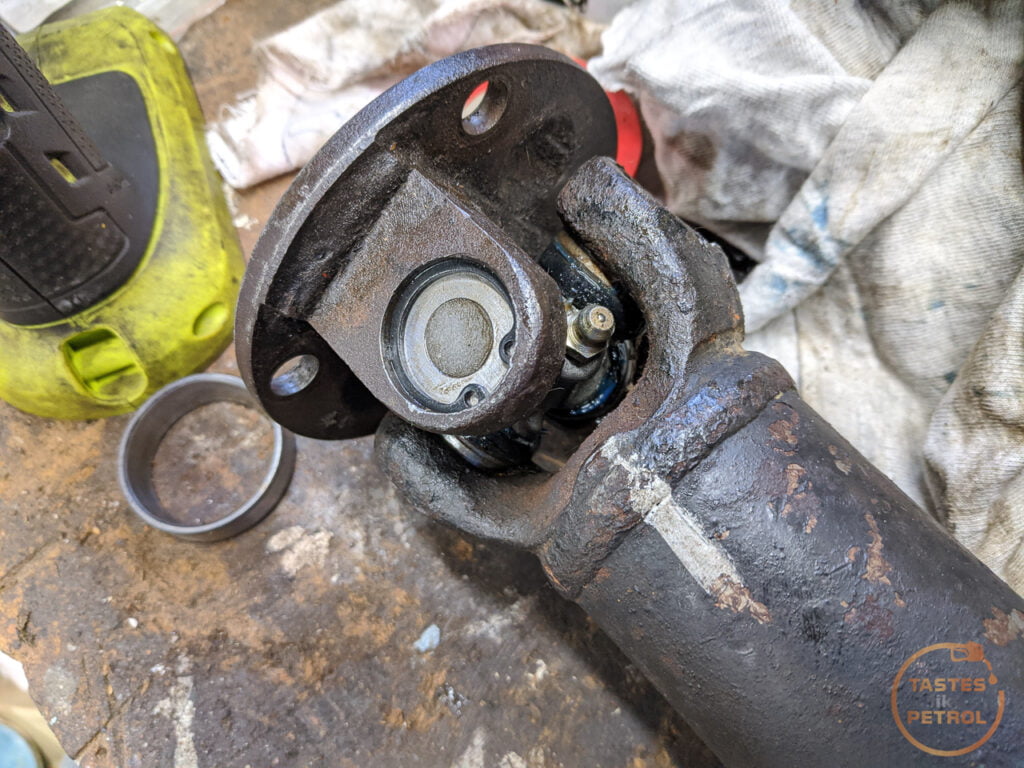
One of the things that had to be done before I could attempt to move the car under its own power was to rebuild the driveshaft/propshaft.
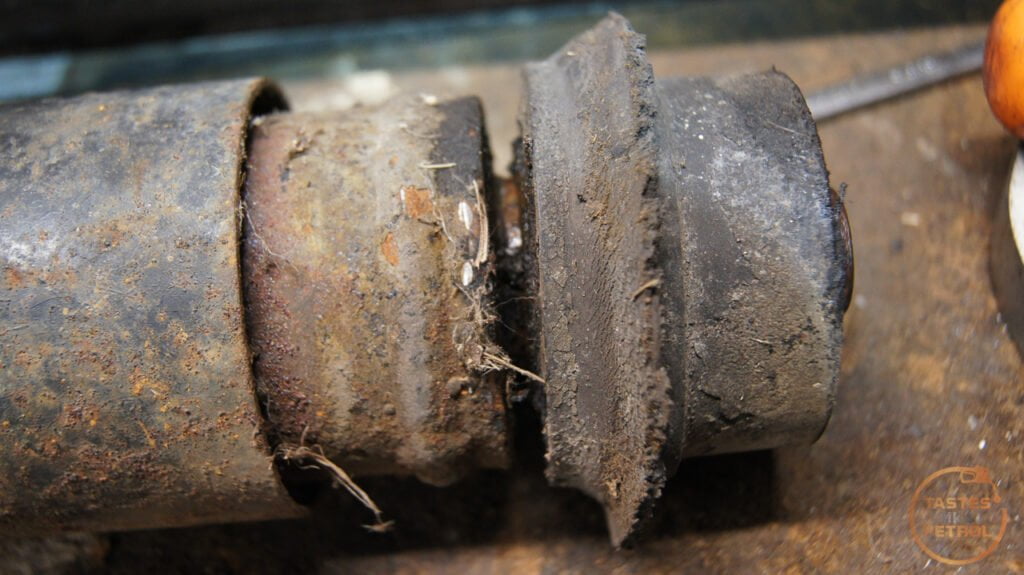
I knew from when I first went under the car that the center hanger bearing was completely shot, and had collapsed, so at the very least that needed to be replaced.

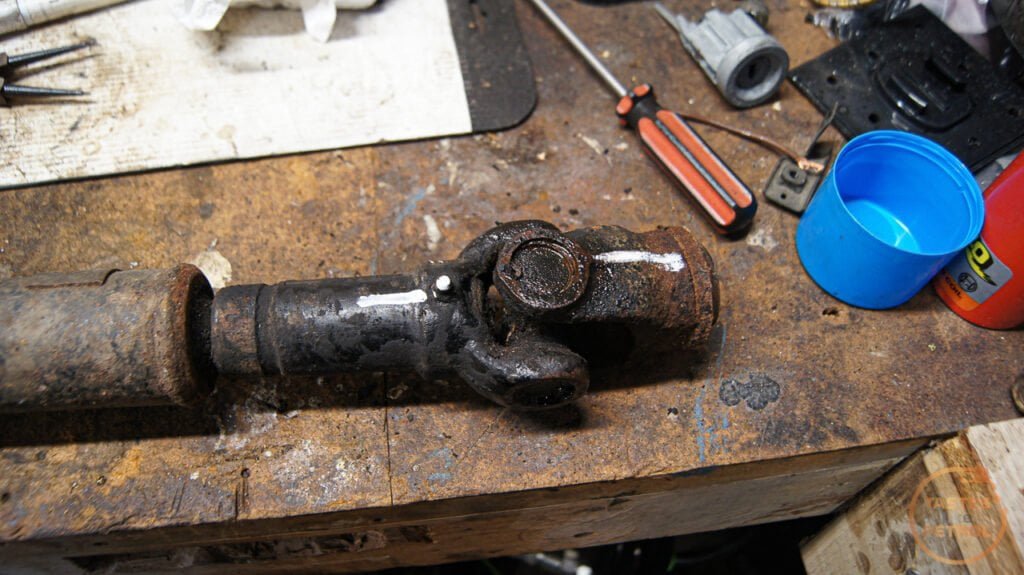
Ages ago (about two months ago) I slid under the car and removed the driveshaft.

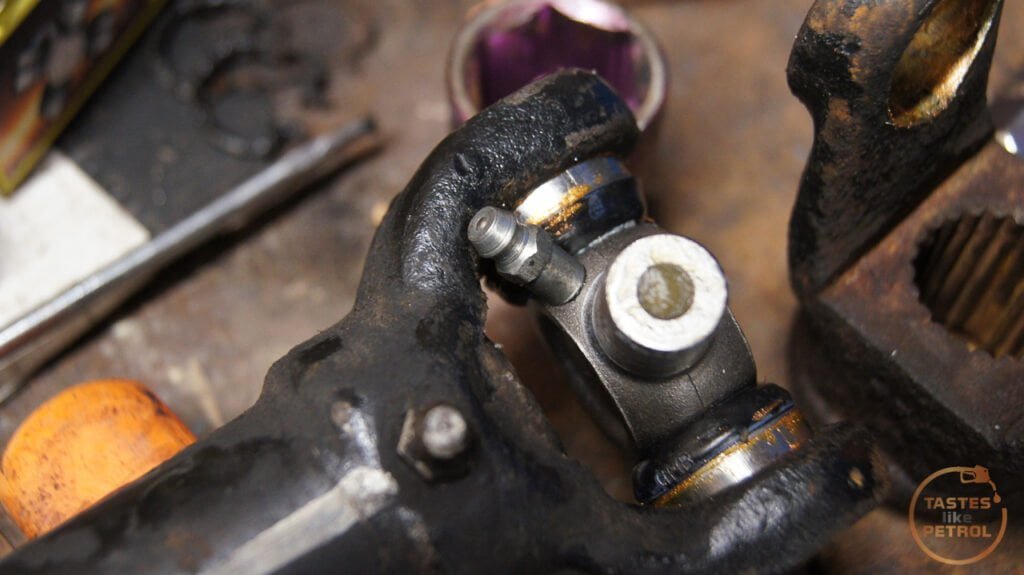
Hanger bearing was looking a bit sad
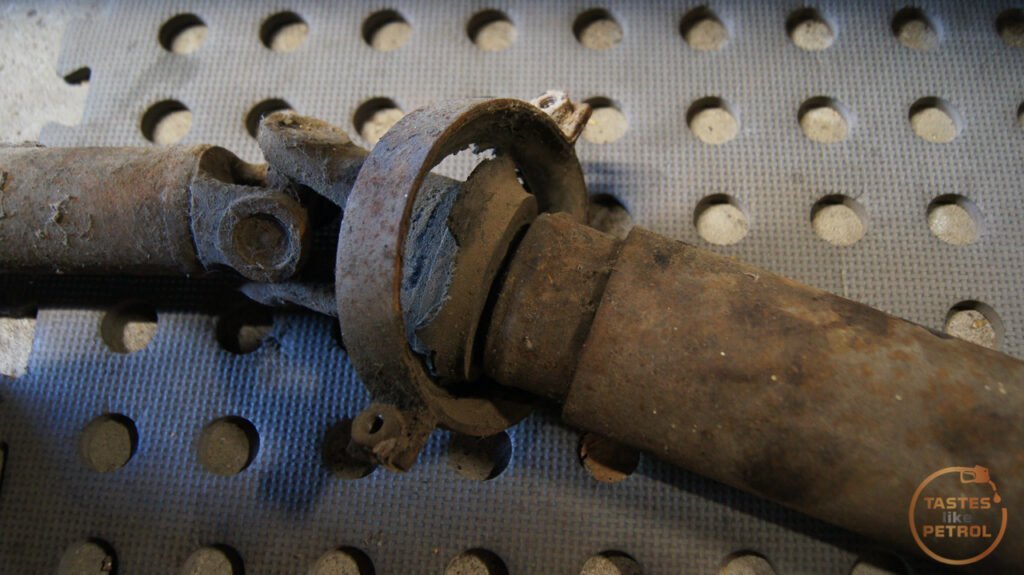
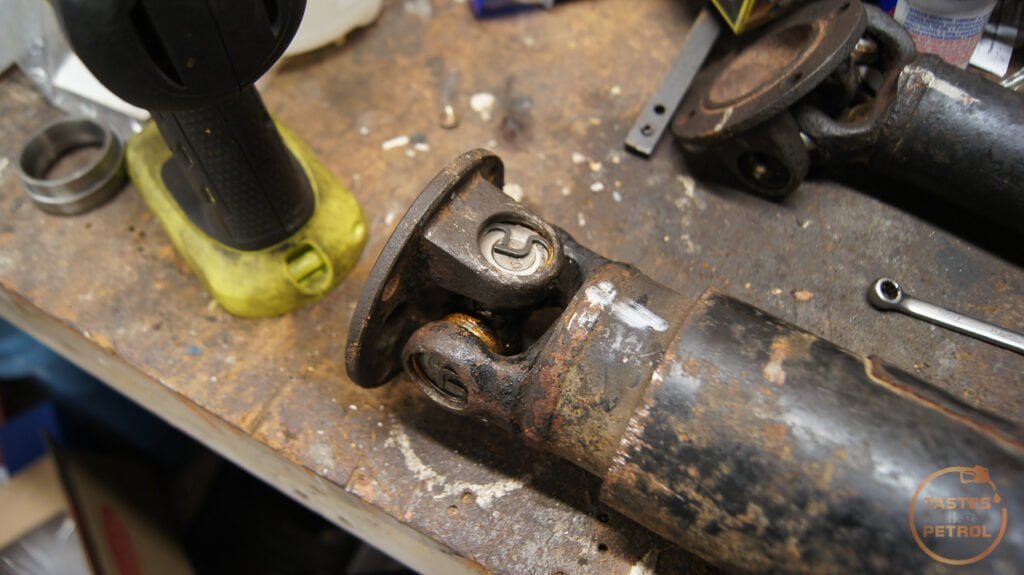
I’m glad I took it out and checked, it turns out the bolt that secures the two halves together was… missing.
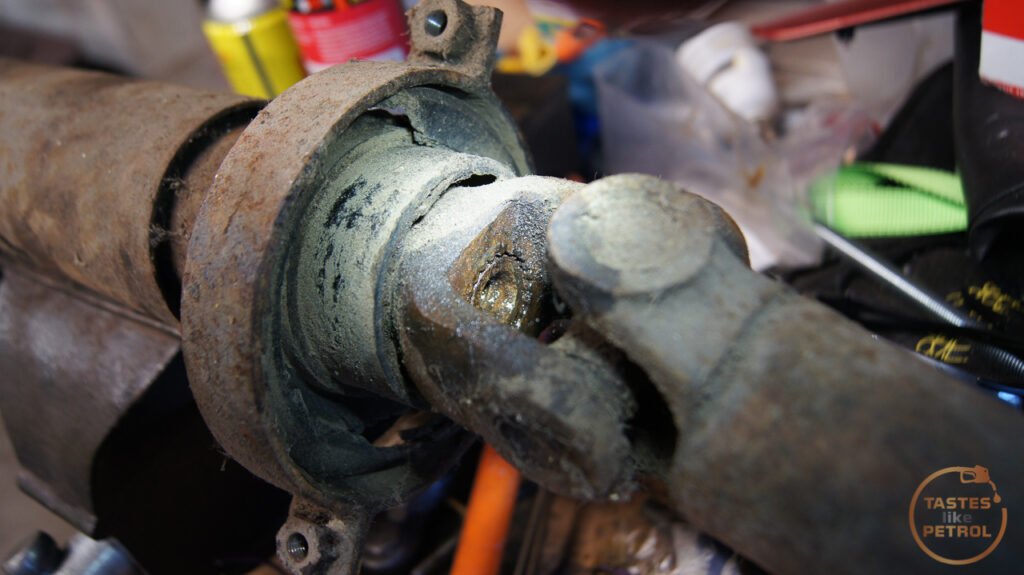
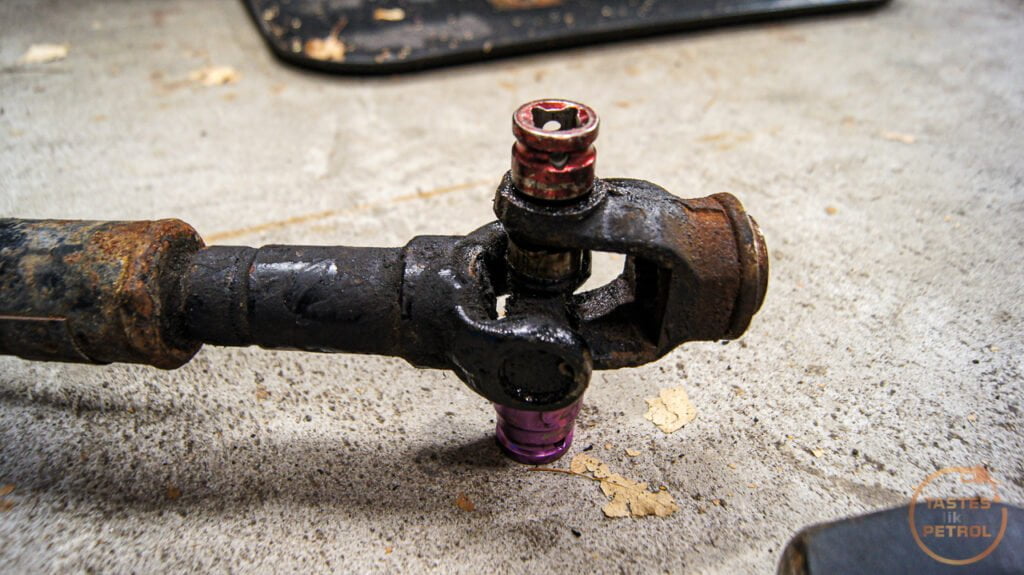
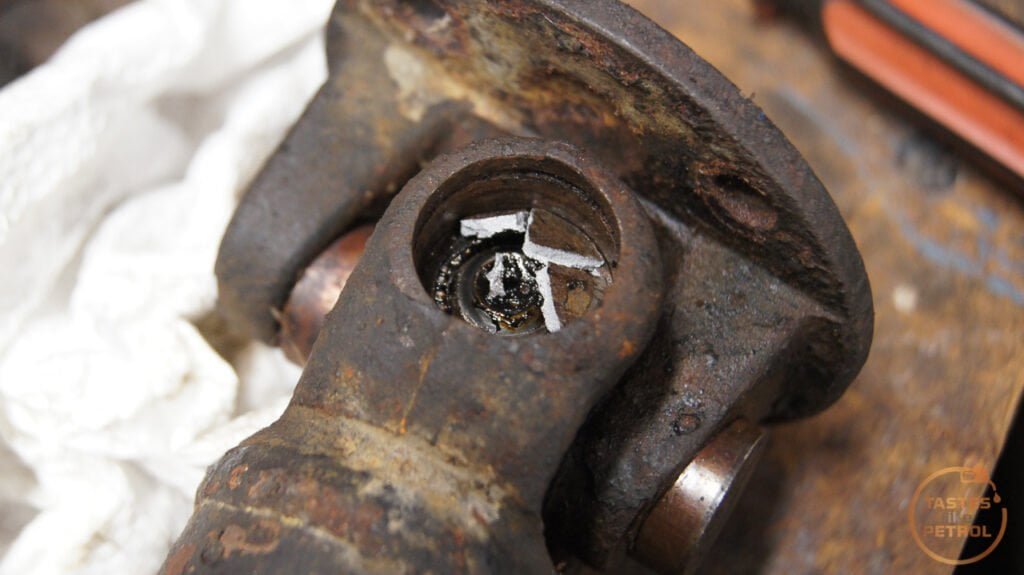
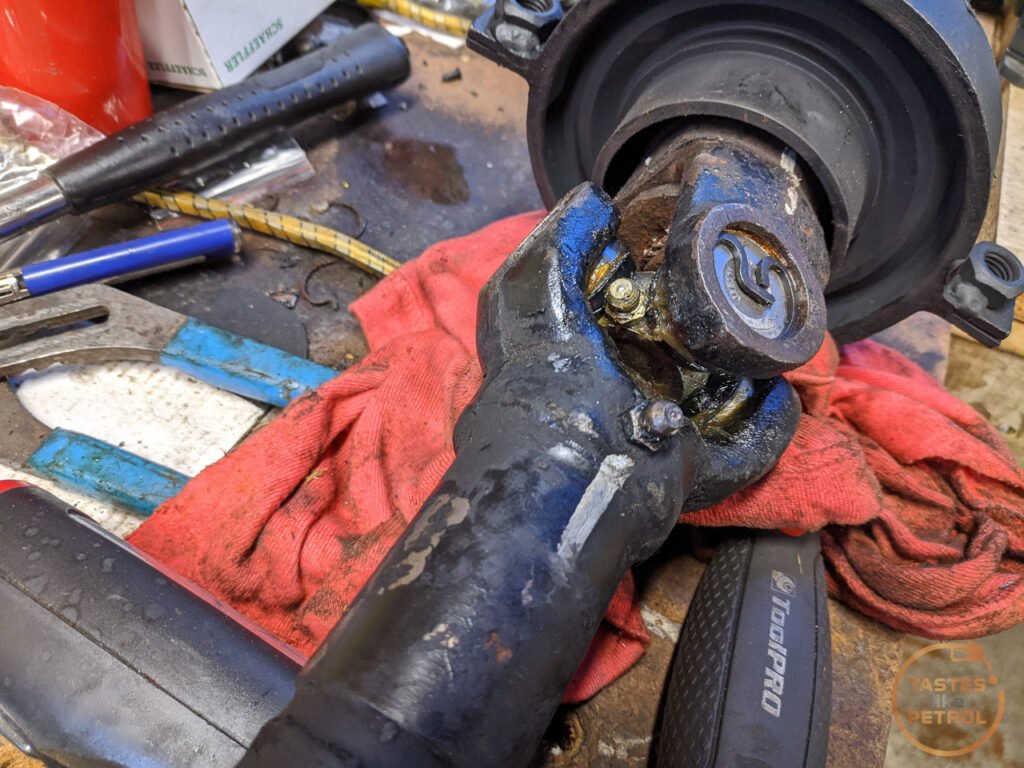
There was also play in at least one of the universal joints, and it wasn’t the one secured by clips. Two of the three UJs are secured by a process called Staking, where they physically deform the metal around the edge of the cap to hold it in place. This is a real pain because it needs some skill and usually a bigger press than I have to replace them.

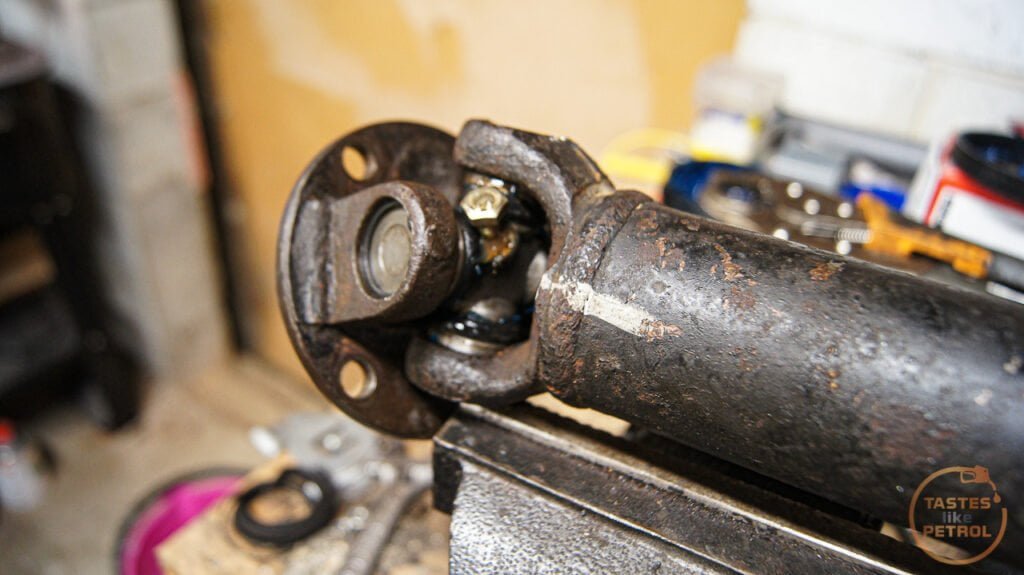
You can see better detail in this example image
A normal universal joint is secured by a big circlip in a groove, which is far easier to work with.
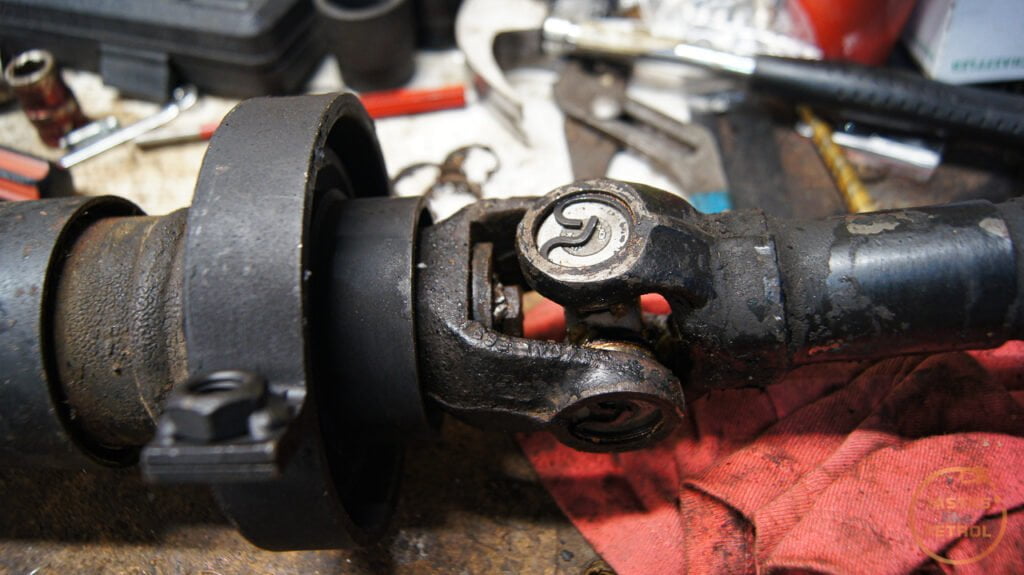
This prompted me to reach out to a fellow Marina owner and purchase a spare driveshaft off him, which although had a failed center bearing too, used Circlip style UJs and had the securing bolt for the two halves.
I finally got around to attacking the replacement driveshaft the other day. I wanted to refurbish the whole thing since it was old and I didn’t want to have to pull it out later to replace the UJs.
There is a great video by Chris Fix on how to replace UJs. He makes it look easy, but I hated this job.
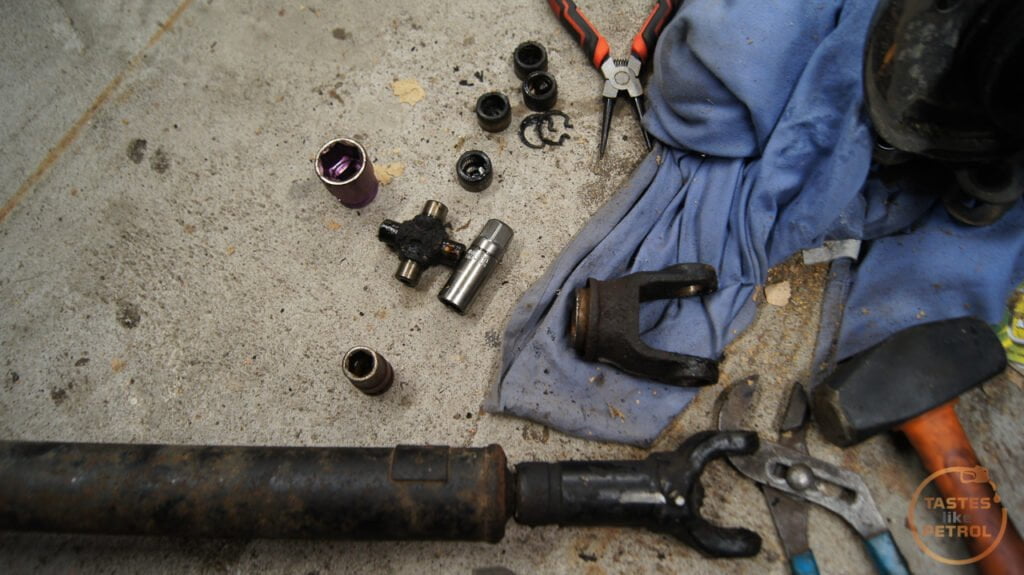
First I cleaned it up a bit, marked the alignment and removed the clips with a pair of circlip pliers
This end was pretty straightforward. Big socket (24mm impact) underneath, and a smaller one that fits into the recess (14mm impact, 16mm normal) on top and using a big hammer, smash the 14mm socket down, pushing the UJ cap out the bottom.
It came apart more or less with no trouble. Push the joint down, pull the cap out. push the joint back up, pull the cap out. Done.
To fit the new joint, I found it best to lubricate the recess you are pressing the caps into with clean ATF, and then press them both in together using a bench vice. This helps to press them in square. I didn’t do this for the first couple, I used the method of hammering the new caps into place.
I did unfortunately find out why they recommend sealed joints without grease fittings… There is not enough room in the joint for the long grease fitting, and you would risk breaking the fitting off when the joint moves.
These joints were very cheap on clearance though, so I persisted anyway and dealt with that later.
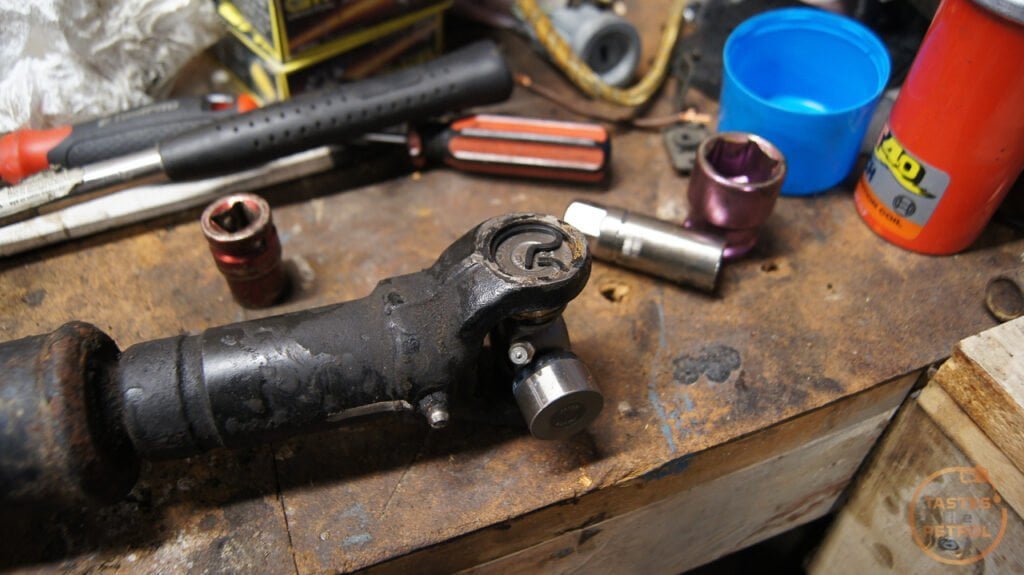
One end of the driveshaft done. The new joint is smooth and feels great. A few pumps of the grease gun and it was ready for action. Kinda.

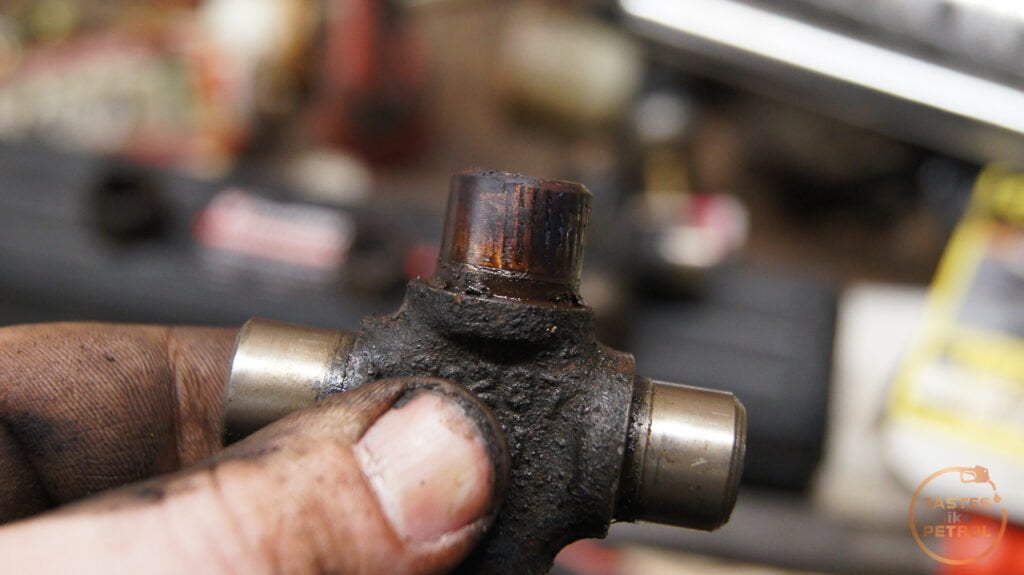
The next joint was well jammed in place, to the point it blew the end out of the cap before dislodging it
You can tell from the state of it when it did come out that had some issues. Being a sealed unit, you can’t grease it, so once the grease hardened it was all bad.
Fitting the replacement wasn’t much better. This was when I was still using hammers to fit the caps and I came really stuck on this second UJ. I can only presume the caps weren’t going in quite square, which meant they were binding. After a few tries I moved to the press, which only did one thing, it blew the new cap to bits.

But it also scored the cross piece
So no, I’m not perfect, I do sometimes make stupid mistakes too.
I took a little break from that UJ here as I needed another new one to continue and moved to the hanger bearing. I tore the rest of the outer part off and used a hammer and pry bar to carefully drive the old bearing off.

After a little bit it popped off

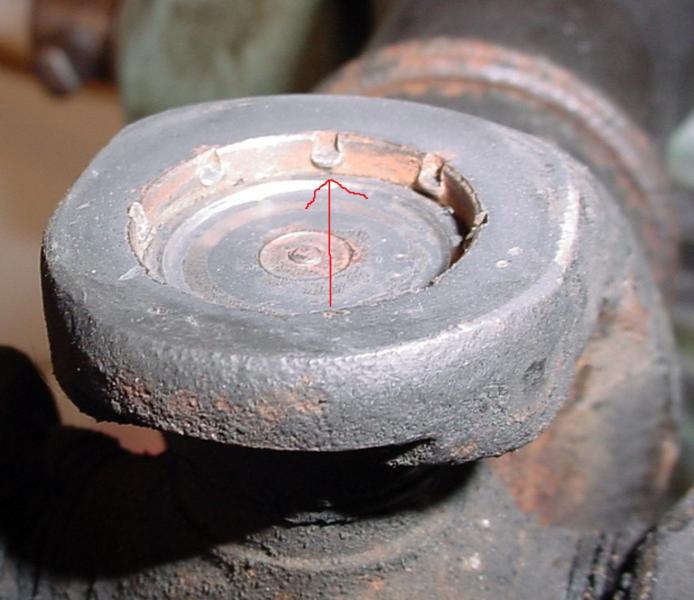
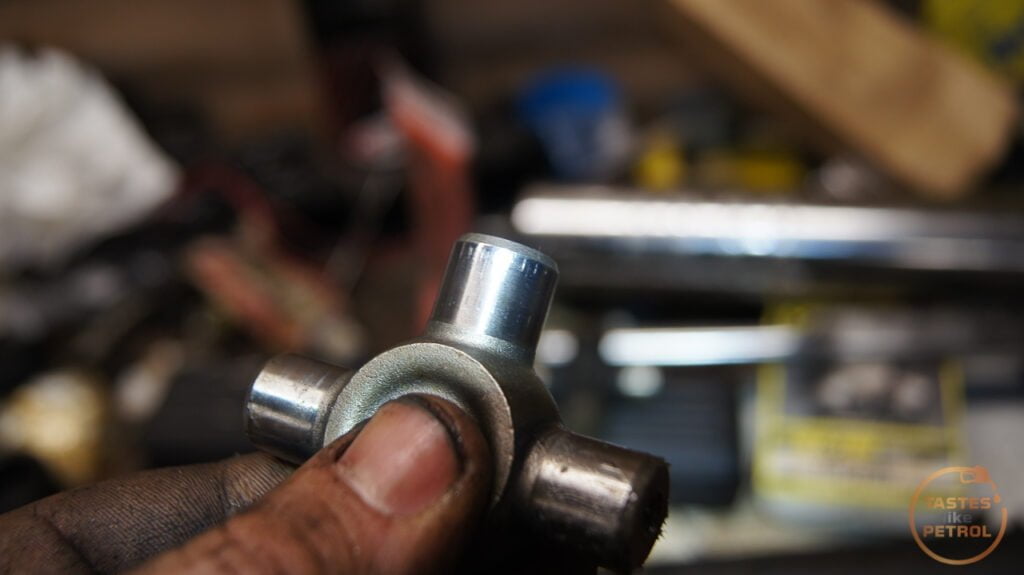
With the bearing off it was easier to handle, so had a go at replacing this UJ. This was the only one that is greasable, and as I later found out this is because there is a small recess in the flange to allow space for the grease nipple. You can just make the recess out here.

This was another one that I was having a battle with, but instead of trying to use more force to press it out, I just grabbed the grinder and used a cutoff wheel to make quick work of it.

Take that!
The new caps pressed in fine, using my newly honed method of starting with the flange, and pressing the caps in with my vice until they are flush, and then tapping them in the rest of the way with a socket and hammer until the clips fit in the recess. A couple of taps on the flange frees the joint up. Another rookie failure here, I didn’t notice there was a recess for the grease nipple at the time, so fitted the joint in the wrong orientation. Argh.
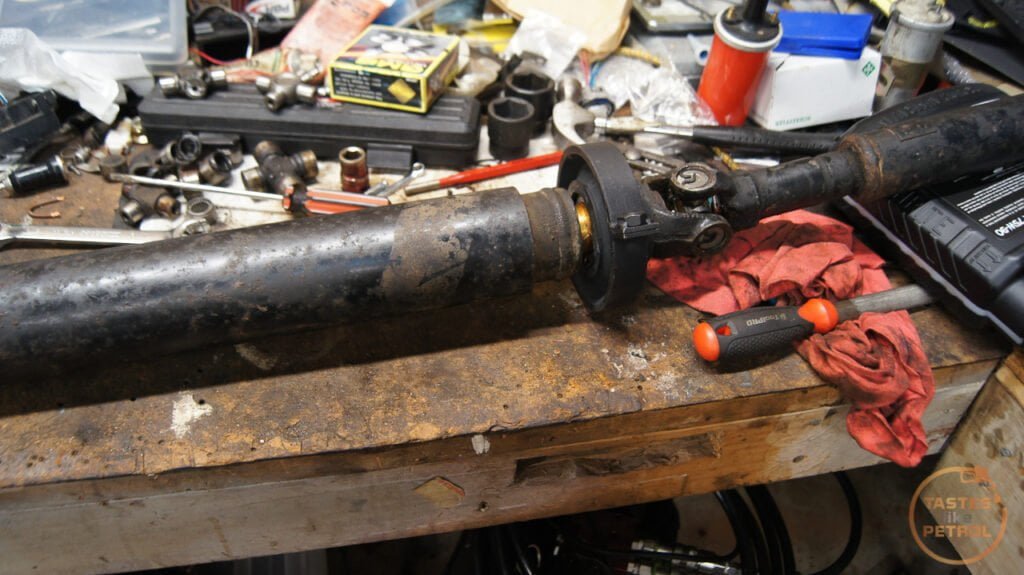
Without another new joint to replace the damaged one, the only thing I could do was fit the new center bearing. This was as easy as popping it into place, with the longer side facing the splines and then tapping it down until it bottoms out. I used a big socket and an old bearing race as a spacer.


I had a new joint arrive a couple of days later, so in that went. I initially tried fitting it to the existing flange, but it didn’t feel right, so went with my gut feeling and pulled the flange off my original driveshaft, and used that instead (thankfully it was the one joint that wasn’t staked). It’s not ideal, but I feel like the flange may be damaged on the other one which is why I was having so much trouble.
The joints pressed in with no issue. Ignore the placeholder bolt, that was just testing it was a 6mm grease fitting thread. The other two joints were 1/4″ UNF thread.
Speaking of, to sort my issue of all the grease nipple being too long and fouling the joints, I went out and bought some short grease nipples.
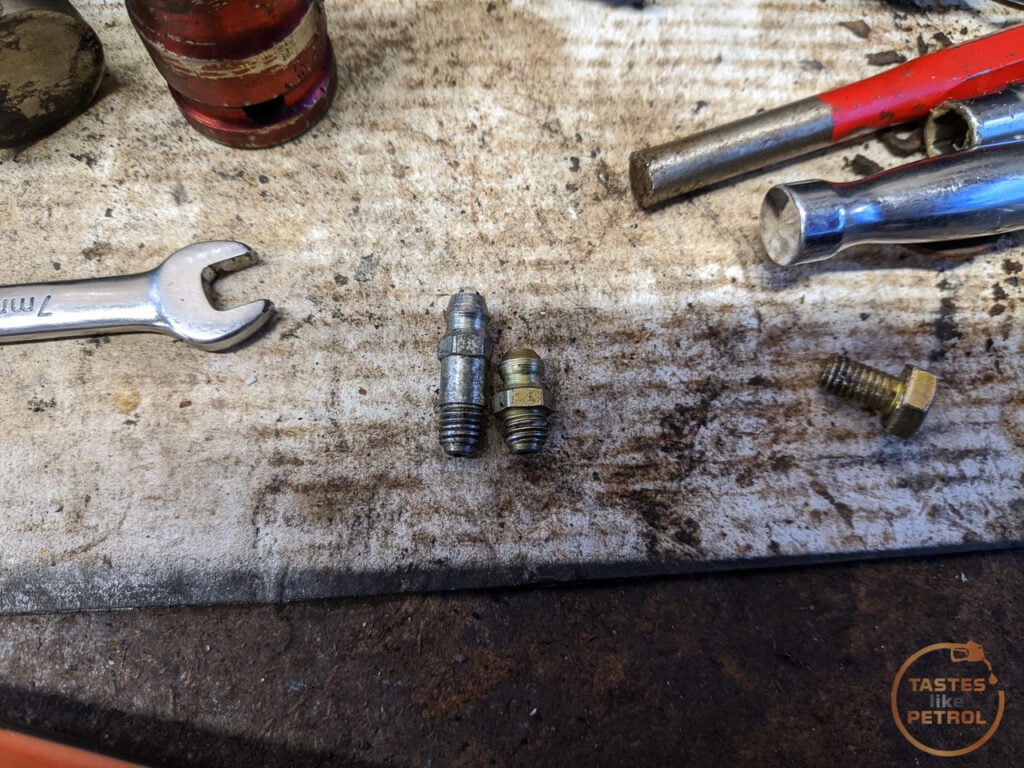
These clear with ample space, but were an utter bastard to fit. They have a bigger hex than the longer ones, and there is no room to actually get anything on the hex when you screw it into the joint. I ended up tightening them up one flat at a time with the spanner sticking straight up in line with the fitting.
In hindsight, I would get the sealed joints, but if I couldn’t, I would get some grub screws with the correct threads and use them to plug the holes after greasing. Either way, the joints are all greased, and the holes plugged.
With all the joints replaced and the new center bearing in place all I had to do now was refit the two halves of the shaft. The spline is keyed with a double width tooth, so it can only fit in one orientation. Take note before sliding the spline completely down that it’s easier to start fitting the bolt in the center when the shaft is slightly apart as there is limited space with the joint in place.
I did the bolt up as tight as possible, and then bent the locking tab over.
Now all I need to do is fit it back to the car, but that can happen another day since I can’t be bothered rolling around on the ground right now. Once that’s in, since the clutch is bled and working, all that’s left is new tyres, which are currently in a stack next to the car waiting for me to strip the old tyres off and paint the wheels.

Getting real close to moving under its own power for the first time in about 25 years.