Just a quick update to show where I’m at with the Marina.
It’s been slow progress, but don’t worry, the Marina is slowly ticking along. Its been almost two months since I started the rust work, but I hit I big milestone today.
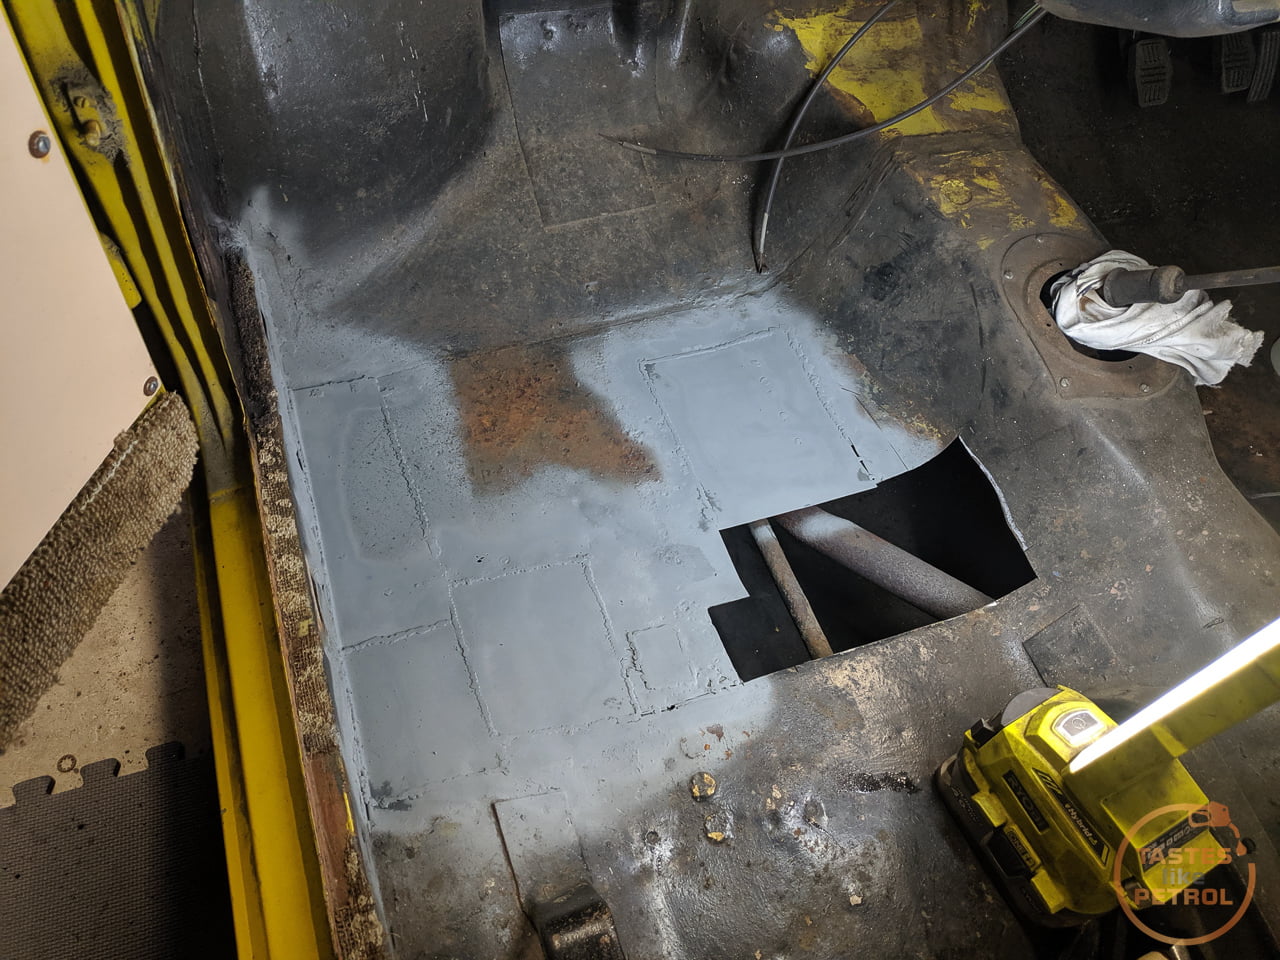
I left off the last post with a hole still in the passengers side floor, and a grinder that had eaten all the batteries. The grinder issue I fixed by buying a corded Makita grinder and wow, that thing has so much more grunt. The little cordless Ryobi is great for its portability and compactness, but the Makita is the king of just ripping through steel. It’s handy having both as I can chop and change depending on what work I’m doing.
The hole in the floor? Well after everything getting in the way (life, cars, work etc) and the Marina being tucked off to the side for a few weeks untouched, I welded the section on the trans tunnel in yesterday after work. That was a real prick to make, since it bends in so many different directions. Its hard to tell in the photos but the floor slopes up towards the rear of the car, and also curves sharply up the trans tunnel.
The real progress though, was today after work, where I did this

That’s the final patch on the passengers side floor done. I even seem to have the welder dialled in, and did some of my best welds on this patch.

After hitting it with the grinder and some zinc-rich paint, we have a solid floor.

It’s looking a lot better than it was

I have learned some really valuable lessons/skills doing this work.
Firstly, is that the welder settings are crucial, and it takes a lot of experience to work out what setting is causing what issue. That feeling though, when you have it all dialled in and the welds come out good. Practising on some scrap steel of the same metal you are using for the repairs helps to dial in the welder to about where you need to be. I did find that ambient temps cause a lot of problems for me; when it’s warm the welder is great but as the temps get lower I need to tweak the settings again to get more heat into the metal.
Secondly, in hindsight, I wouldn’t bother with all the little patches. On the drivers side, I’m going to do as large patches as possible, instead of making a patchwork quilt. It takes too long and there is more work in trying to get all the patches lined up.
Thirdly, along with the last lesson, is to make the shapes as uniform as possible. Straight squares are good. I ended up cutting extra bits out of the floor just so I could make one big square patch, instead of two smaller ones or one unusual shaped patch.
Lastly, and a tip I keep forgetting, is to cut/trim the car to match the patch, not the other way around. I spent so much time trying to get the patches to perfectly match the hole, when instead it all went a lot smoother and faster when I made the patch to the approx size and shape needed, but then trimmed the hole to match the patch. It’s a lot easier than running back to the bench to grind a bit more off the patch.
I still have a lot of work to do, but I plan to keep on plugging away at it. I will cut the drivers floor out soon and start working on that. I still have to do the LH B pillar and LH outer sill after that too. The next update will likely be once I have finished the drivers side, seam-sealed and then painted the floors.
This car will be going for a WOF sometime this year, so I’m working towards that. Once the rust work is done there are a few more things to do and then it should be ready to give it a try.