In the early R06A engines like in my Alto, the crank thrust bearing issue is well known. I decided to preemptively replace mine.
From 2016 to around 2019, when they changed to the Type 2 cars (which basically just incorporated all the changes made through the production of the Type 1 cars), the crank thrust bearings have an issue where the metal was too soft, and the bearings could wear prematurely.
The issue is so prevalent that Suzuki Japan issued a warranty extension/recall in Japan for it, extending the warranty to 10 years/200,000km. Unfortunately this doesn’t carry over to imports in NZ, and I’ve also seen reports that getting Suzuki to actually cover the work means waiting until the engine is basically toast from the bearings failing. Their “solution” is to replace the crank, block and bearings; a full rebuild.
My friend Tom with the blue HA36S, who unfortunately had an engine whoopsie on track earlier in the year, happened to order a spare pair of thrust bearings with his order of bits to rebuild his engine. Knowing my car was in the VIN range of affected cars, I obtained the bearings from him, intending to replace them before things went bad.
I was doing this preventitively, not because I knew mine were stuffed, keep that in mind. I had been ignoring the niggle at the back of my mind knowing my car could be affected by it. The usual indication that the bearings are starting to fail is a knocking when engaging and disengaging the clutch, as the force of the clutch causes the crank to move due to excessive runout.
My car was what I would consider quiet, for what it is. No noises out of the ordinary, but the other day when I drove the car to work my Android Auto was a bit slow to connect and the first couple of minutes of my drive had no music… and what happens when there is no music, you hear EVERYTHING.
At one point, I thought I heard a slight tapping when coming on and off the clutch in traffic.

It was quiet, and I couldn’t be sure I wasn’t just hearing things, my car does buzz and vibrate a bit at low RPM due to the inserts in the rear mount…
That day after work I picked the bearings up from Tom. I couldn’t risk it.
Last night, after work, I put the car up on stands and set about replacing the bearings. Unfortunately they are inside the engine, so not a “simple” task, but overall very doable in a garage on stands, with standard tools (with the exception of a torque wrench and angle gauge, both of which are easy to obtain).
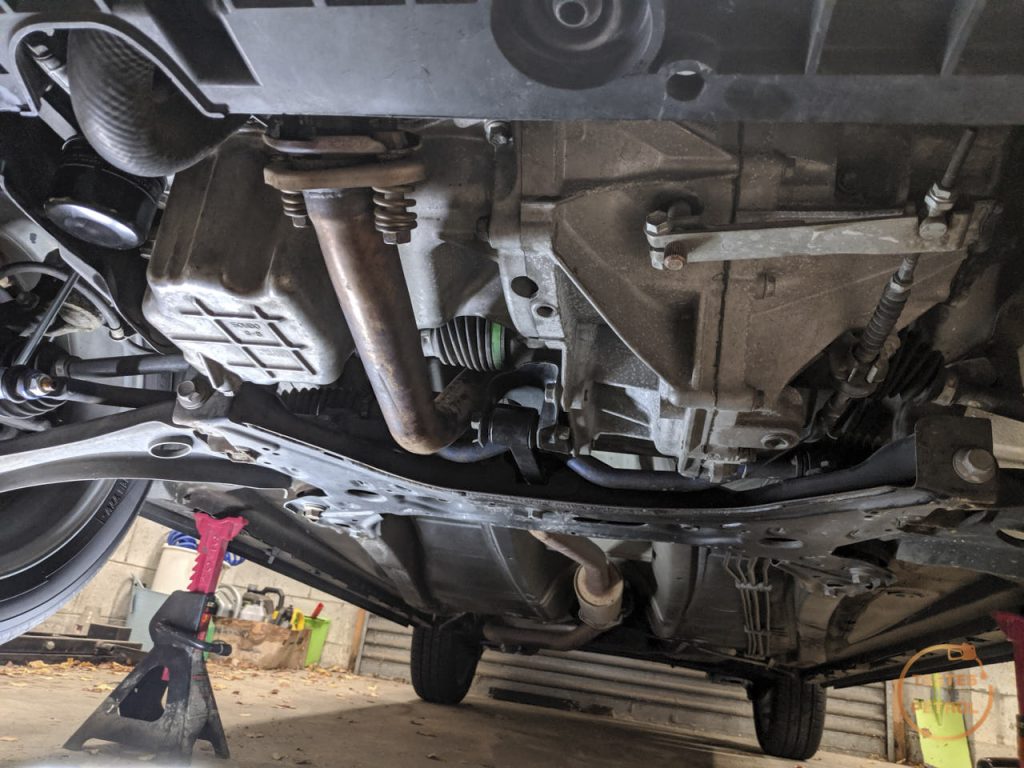
The biggest issue is that the sump needs to be removed. To do so, the front pipe of the exhaust needs to also be removed, so there is space for the sump. My bolts were a bit rusty, so with a lack of fire-making abilities, I aimed the heat gun at them on full blast and got them as hot as I could (pretty hot, really). With a crack, the bolts came free.
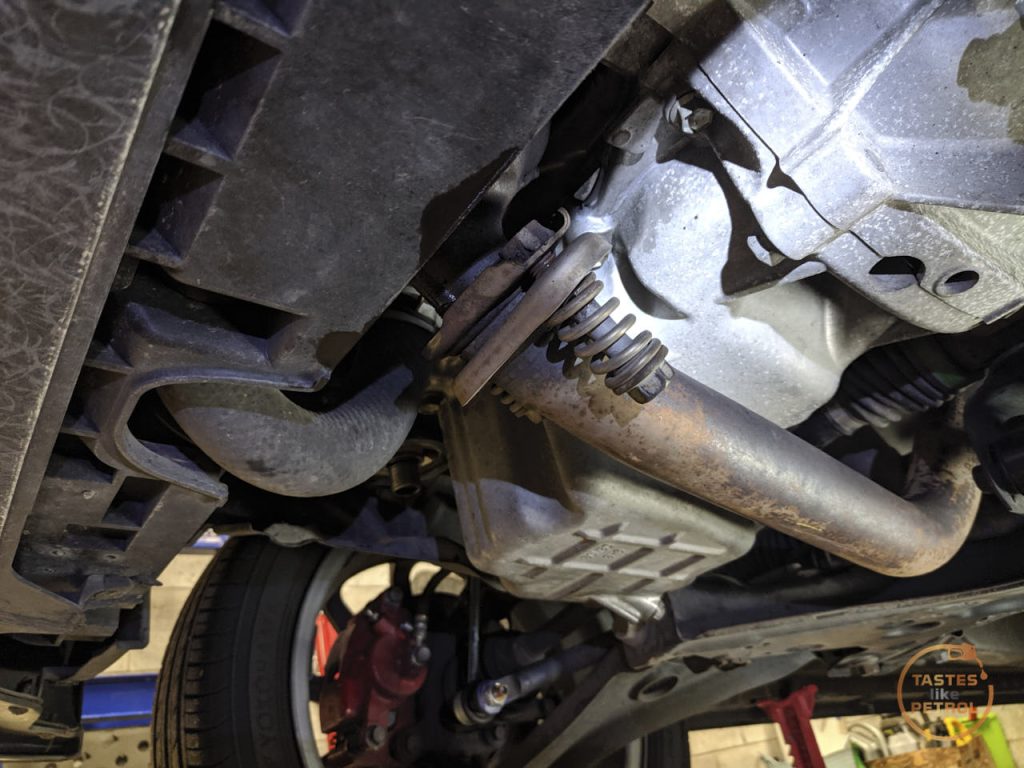
I completely removed it, but I guess you could probably just drop it down and leave it hanging if your rear bolts were unable to be removed
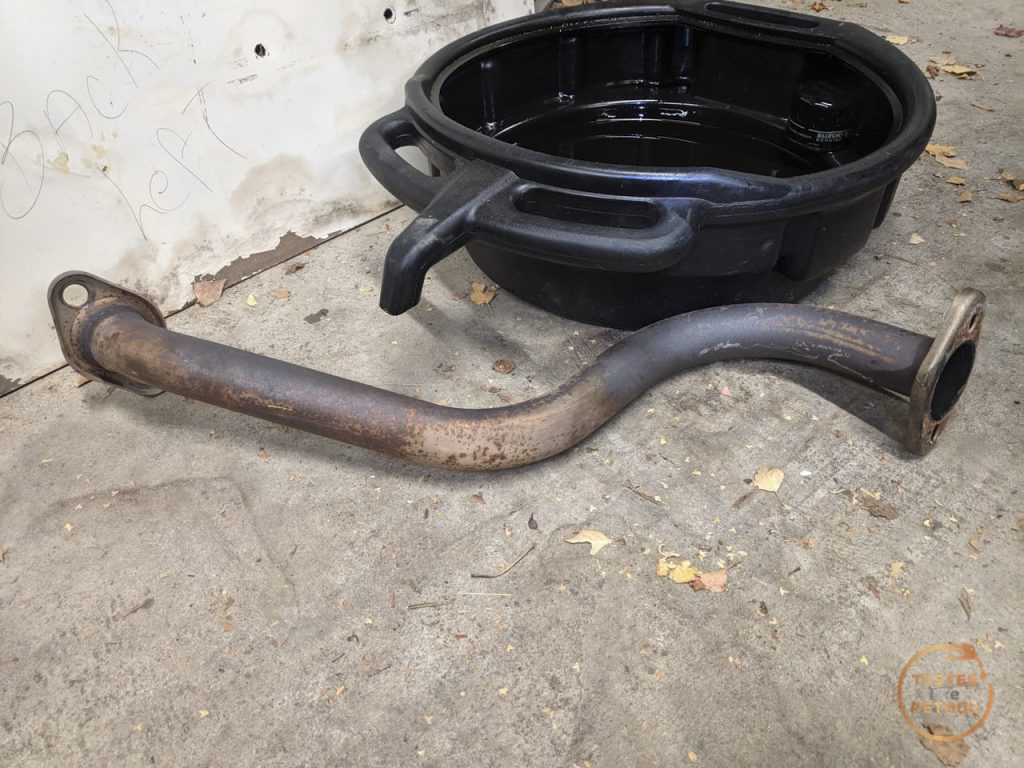
I also drained the oil and removed the filter. I did this with an engine that had sat overnight, so as much oil would be in the sump as possible, so I wouldn’t have it dripping on me when the sump was off.

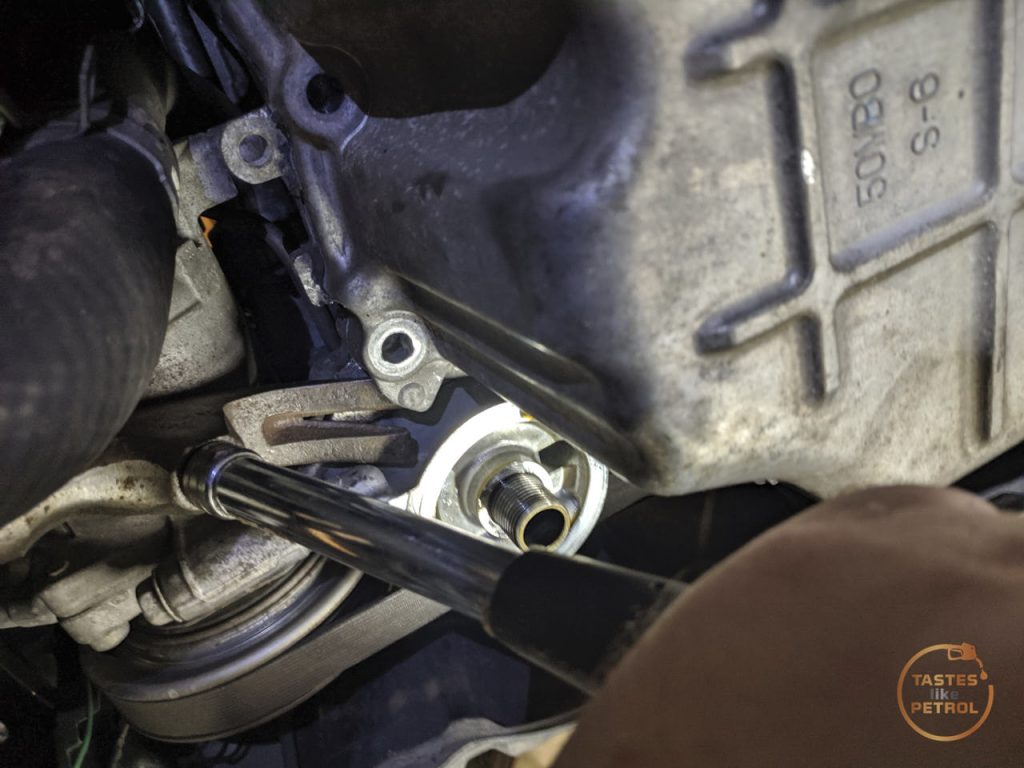
Next, I removed all the sump bolts and tried to get the sump off. The sump is sealed on with goop, and I battled for a very long time trying to break the seal. In the end, and I wouldn’t recommend it if you have other options, I used a claw hammer to pry it free. It worked well with no damage, but you could easily break the sump if you aren’t careful.
There were two points on the front edge of the sump that were perfect to pry from
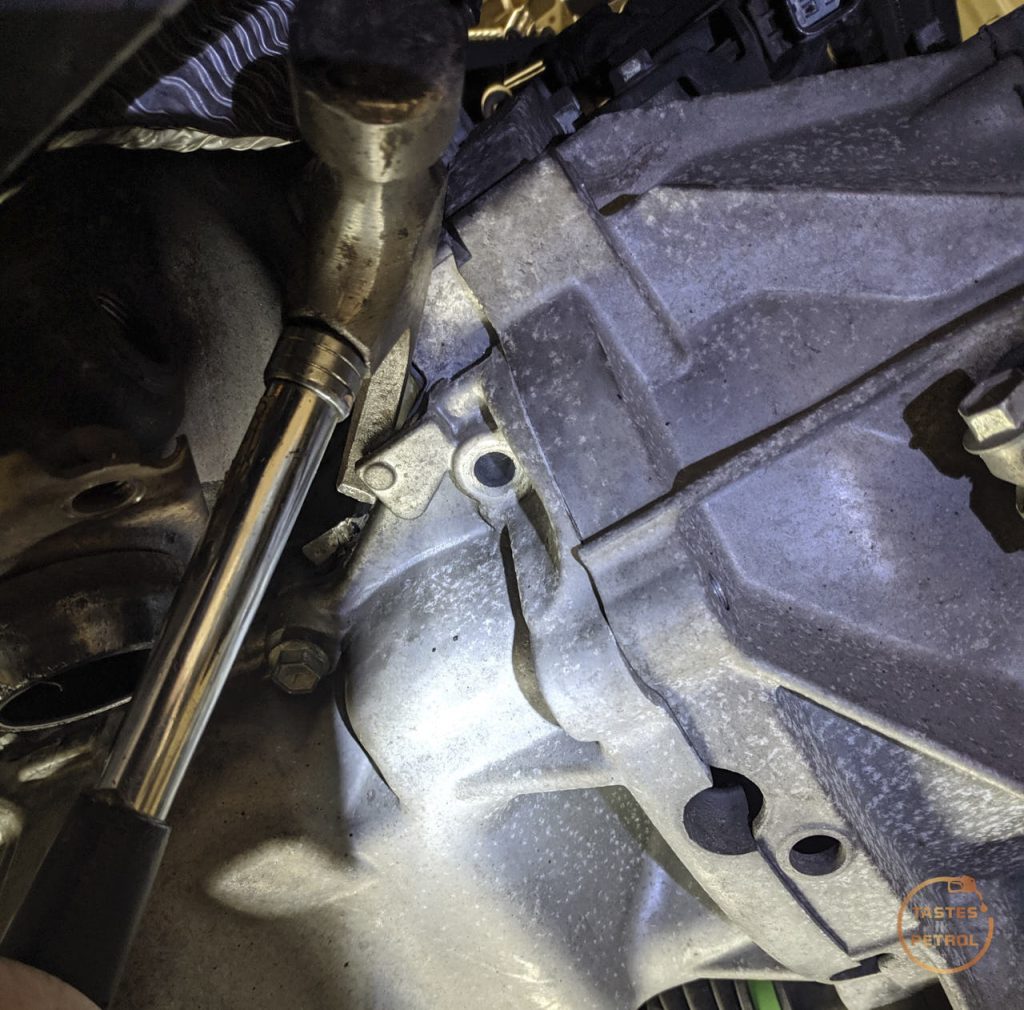
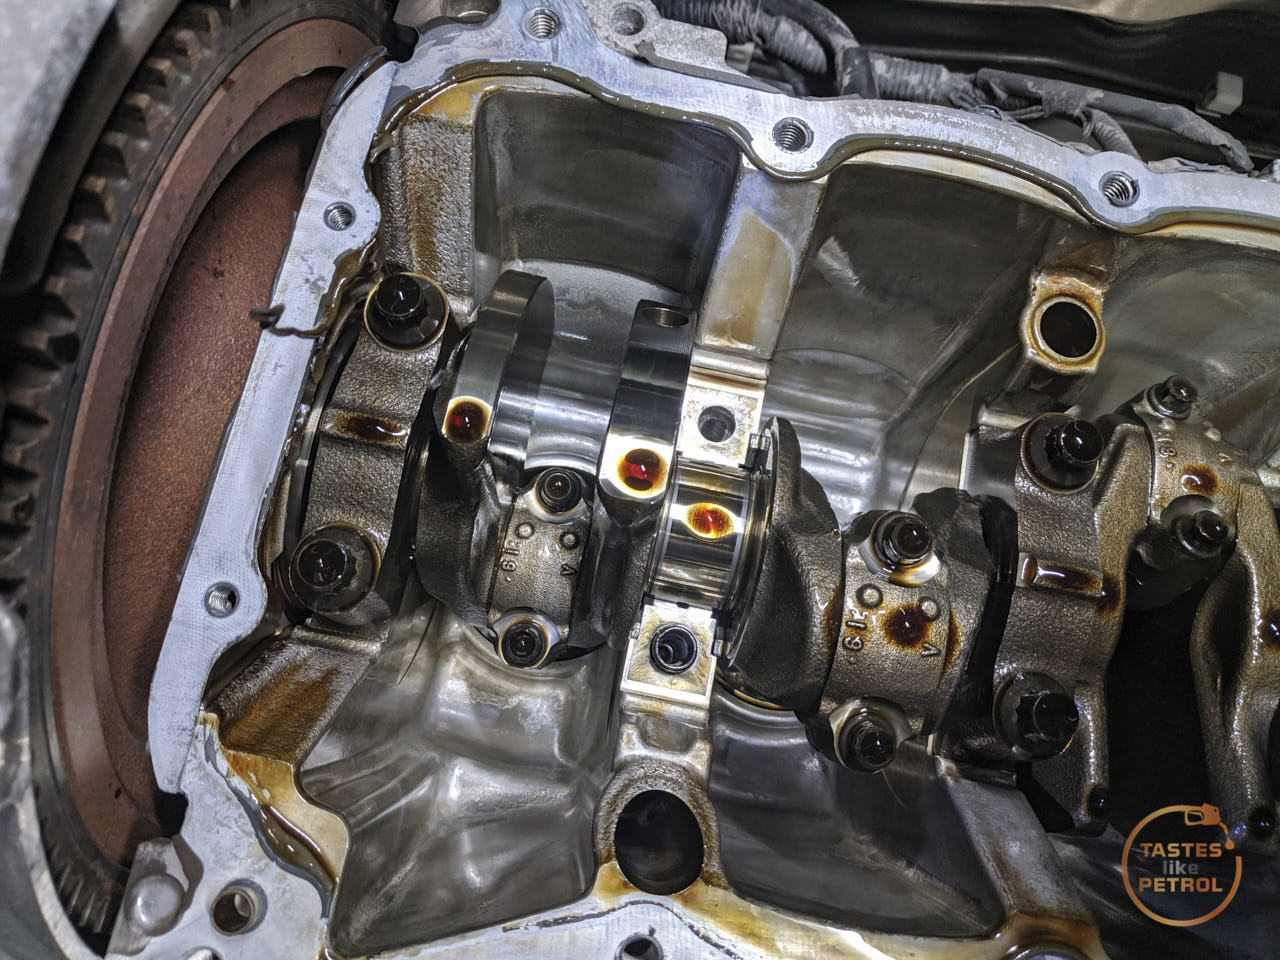
With the sump off, I had access to the guts. It was very oily, so photos will be limited, but I removed the cap in question (second from the flywheel). With the cap removed you can see the bearings. Thankfully both of mine were still in place; when they get bad one, or both, can slip out and drop into the sump leaving the crank free to move back and forth.

The bearings are curved and wrap around the top of the crank, one on each side of the main bearing cap. Using a pick to carefully push on the end of the bearing, you rotate the bearing around the crank so you can slide it out

Well, it appears I was on borrowed time

This is what the bearings should look like; the old ones are the inside pair
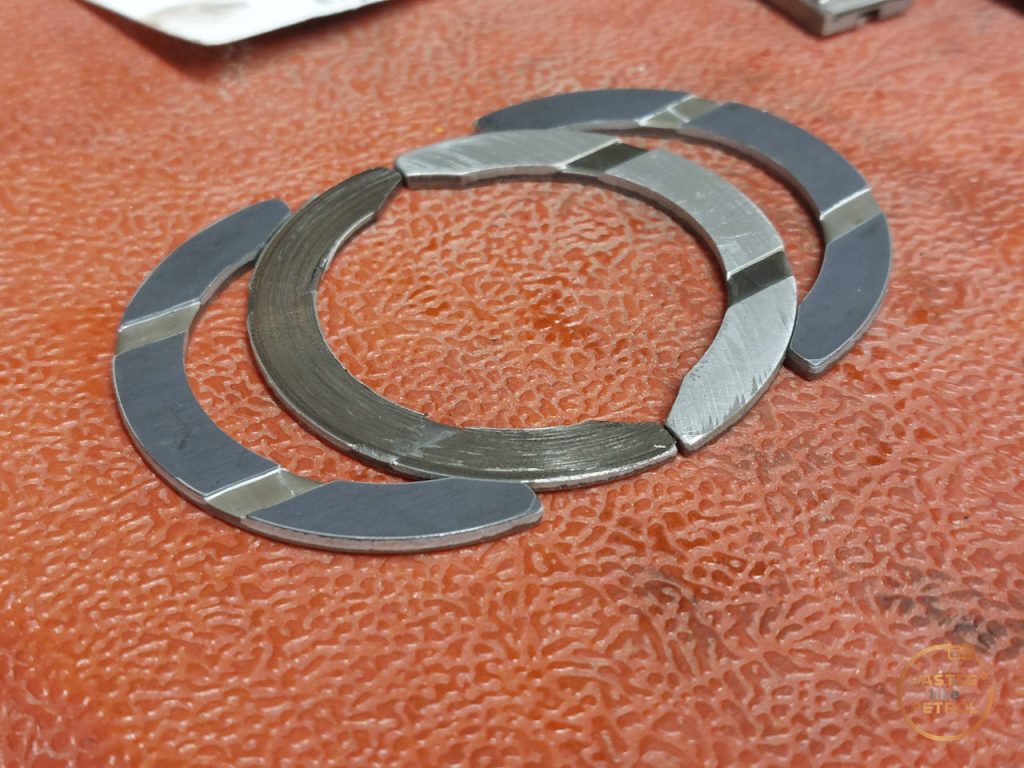
There was no sign of any metal in the oil, or in the bottom of the sump, so I guess it’s just been slowly grinding itself away over 100,000km. The new bearings (and the “good” old bearing) measure 2.5mm, the bad bearing?
It’s lost almost half a mm of metal
You can tell if they are the original bearings (or at least not countermeasure parts), as the markings on the back will be different to the new countermeasure parts
Old

New

Thankfully the crank bearing itself looked great, plenty more track days left in it

The crank also appeared to be in good shape. The “bad” side had some slight ridges in it, but was smooth and still looked polished (some looked really chewed up when the bearing failed)
I cleaned and lubricated the new bearings, slipped them into place on the crank, and reinstalled the bearing cap.
Of note, was that before I removed the old bearings I could move the crank back and forth in the block by hand a small but noticeable amount. Now, I can’t.
The bolts are stretch bolts, which means they stretch when torqued correctly. Normally you would consider them one-time use, and replace them, but since I would be waiting over a month for a pair of new bolts from Japan, I looked for an alternative.
According to the workshop manual, there is a spec that allows the bolts to be reused.
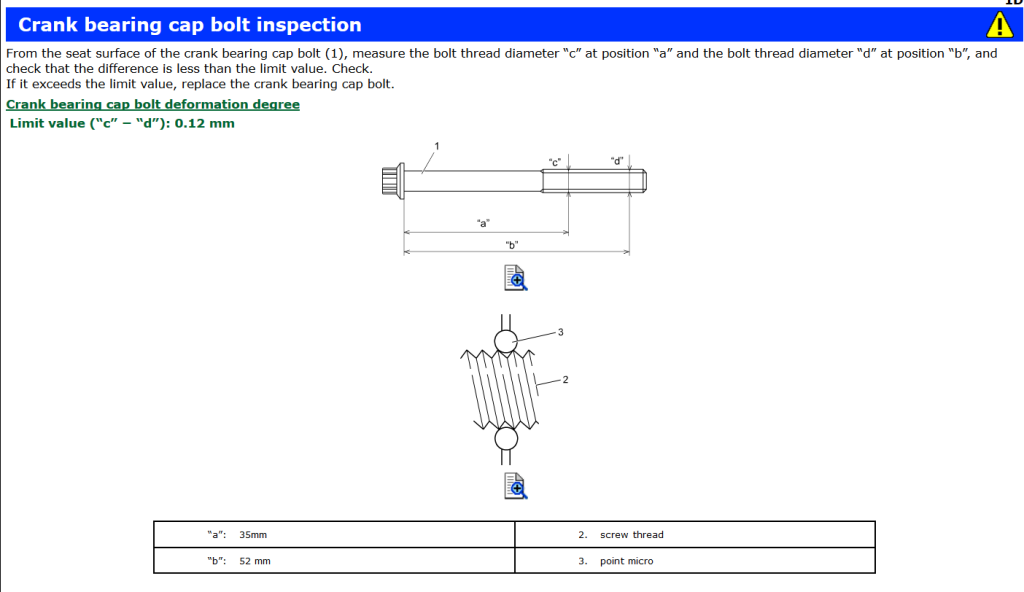
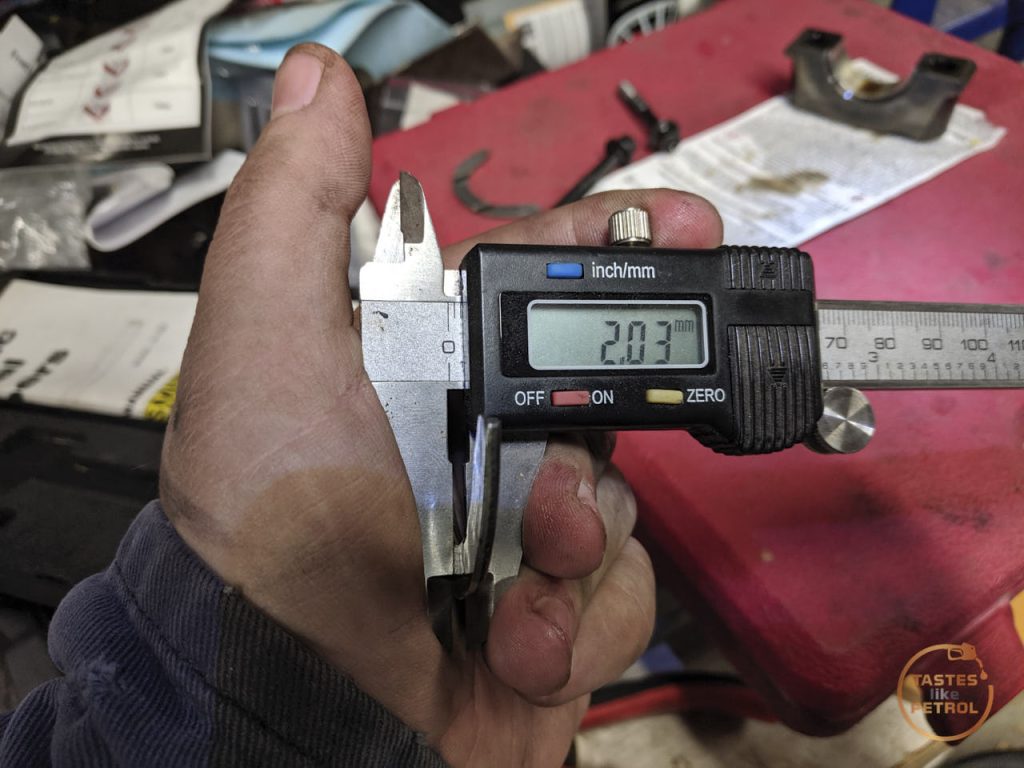
You measure the thickness of the bolt at two specific places along its length; A, where the bolt would thin when stretched, and B, where the bolt should be original thickness. Subtract C from D, and that leaves you with a value that needs to be less than the 0.12mm limit.


My calipers wont be amazingly accurate, they’re ancient and weren’t that expensive in the first place, but the main thing is that regardless of what the reading is, the value still needs to be consistent and less than 0.12mm.
Because I didn’t want to be left with no bolts that are in reusable tolerance once I pull the bearing cap off, if mine were over tolerance, Tom was kind enough to supply me with his old bearing bolts, since he used all new ones in his rebuild.
I went through every bolt and measured them
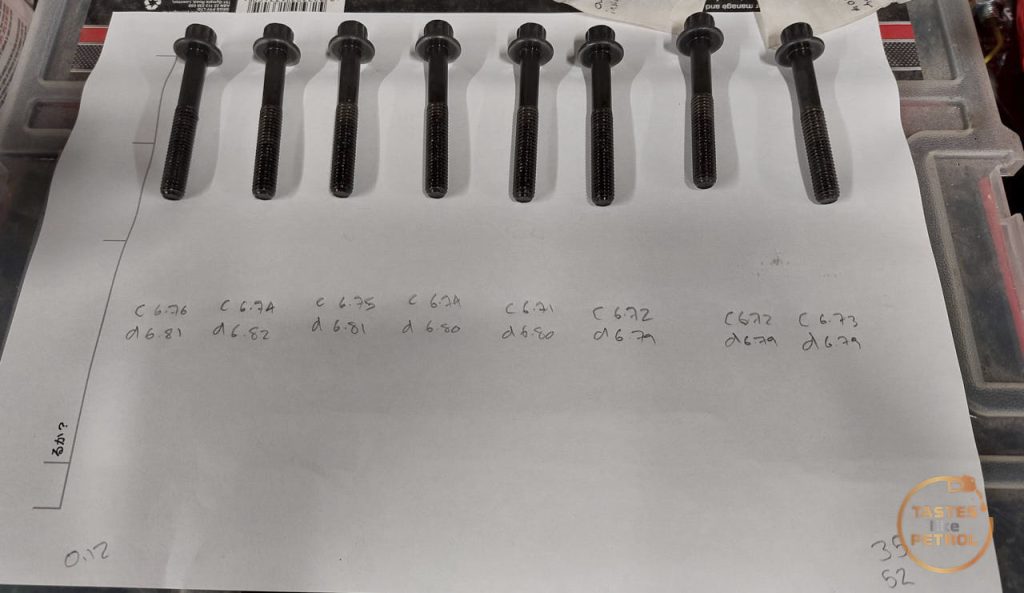
All of them were within tolerance, some more so than others, so I picked the three best ones and knew I could at least rely on them if mine were no good.

I checked the two bolts from my engine, and one was 0.10mm, which is closer to the limit than I liked, so I swapped that for one of Tom’s bolts and reused the other.
Using my torque wrench and angle gauge I started torquing the bolts up. The spec is 30nm to seat the cap/bearing, undo it to zero, and then 20nm, before turning to 45 degrees and then a further 50 degrees.
Both bolts torqued up fine, and the first one went to the two angles fine. Unfortunately when doing the first 45 degree angle on the second bolt the little lever that holds the angle gauge in place slipped, so I lost the accuracy of how far I had gone. I ended up removing this bolt and replacing it with another of Tom’s bolts, which went fine this time.
The sump was pretty clean after draining the left over oil out of it, so I scraped all the old sealant off and cleaned the inside with brake clean
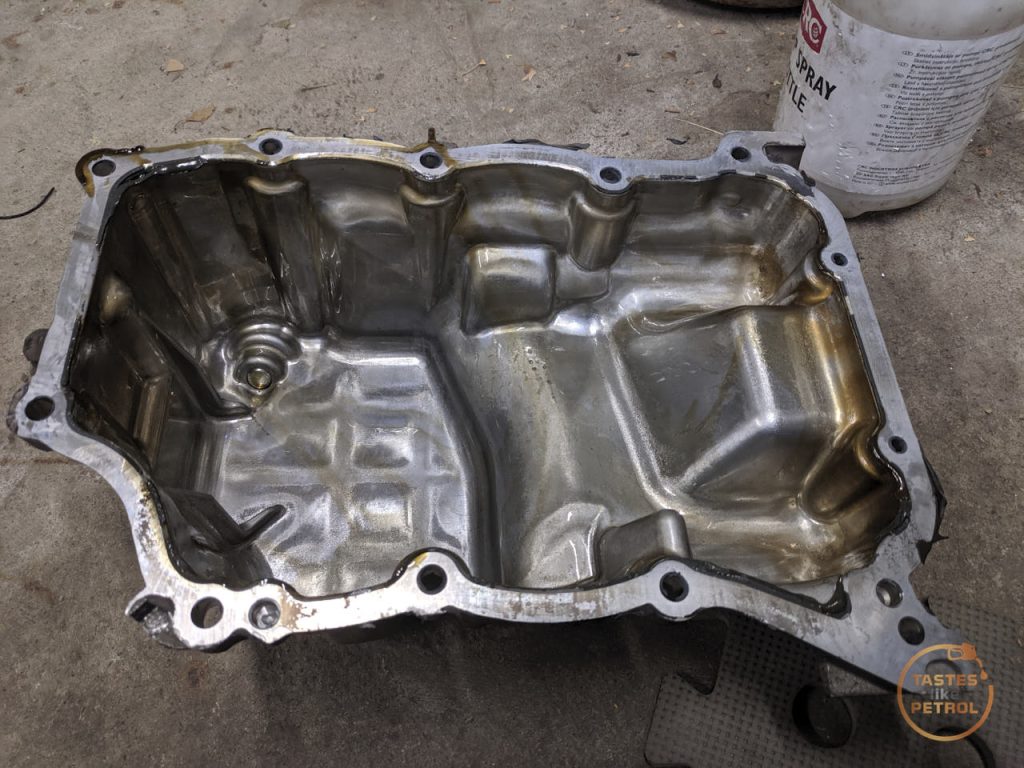
I then cleaned the sealing surface on the engine block, which is super fun upside down under the car.
Permatex Ultimate Grey seemed to be a good replacement for the Threebond called for in the manual, so I slathered some of that on the sump and fitted it to the engine

The bolts need to be fitted in a crisscross pattern from inside out, and were the perfect chance to use my little 1/4″ torque wrench as their torque is quite low.
The sealant needs overnight to cure, so I finished by installing the exhaust front pipe
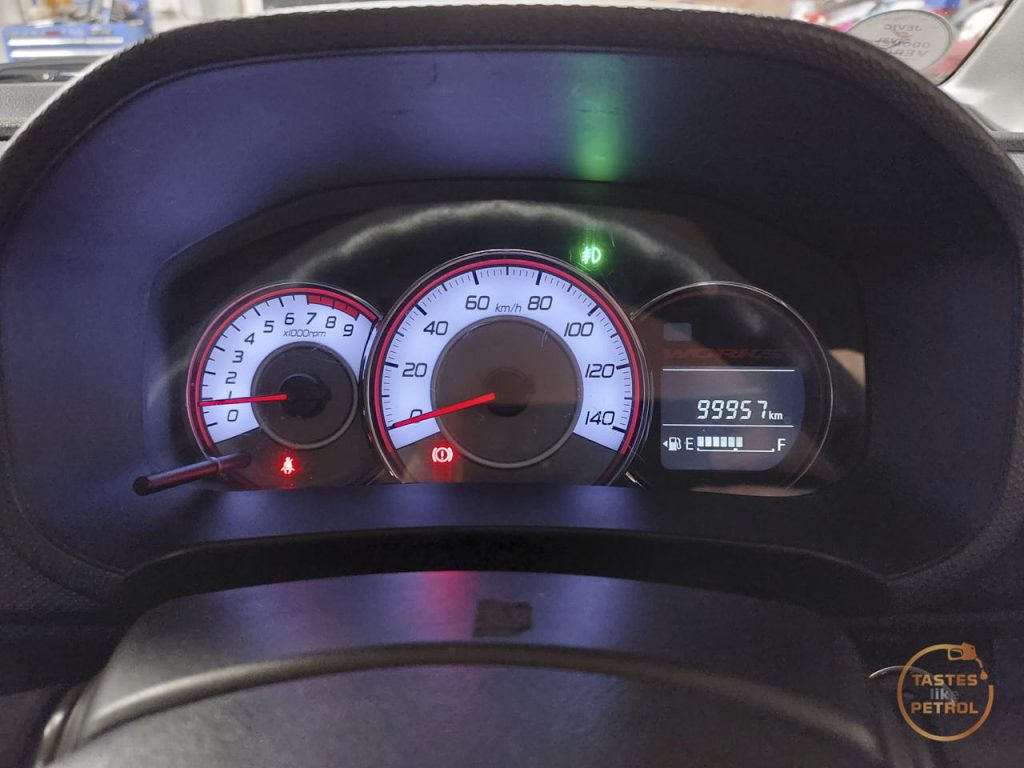
I wanted to make it as obvious as possible that the engine had no oil in it overnight

Today after work, the sealant was cured, so I filled the engine with oil and fired it up. After a quick check that nothing was leaking, everything looked and sounded fine.
It appears I dodged a bullet this time. I took the car for a drive, and it was noticeably quieter. I didn’t think it was particularly loud beforehand, but there is less “mechanical” noise from the engine now.
The two main noises that seem to be gone are the knocking/clunking when I back up my driveway from a stop when cold. I attributed this to the gearbox, as I had to slip the clutch a bit and it wasn’t too happy doing it. Now that noise appears to be gone.
The other noise was at high RPM, off boost, particularly when decelerating, the car would have a kind of buzzy tapping noise. It wasn’t a bad noise, but it was there. This also seems to be gone.
Over all the whole engine just seems quieter. I guess the bearing failure was more obvious than I thought.
It’s a good timely reminder that anyone with a Type 1 Alto (Works, RS, NA or Lapin), Wagon R, Hustler, or Jimny with the R06A engine is on borrowed time with their bearings unless they have been changed.
Some of them go fine for many thousands of KM, and some don’t last to 50,000km. My car has had a very hard life, and at 100,000km the bearings were stuffed and probably had one more trackday in them before it fell to bits.
I’m very happy to know they have been done now, and extremely relieved to have caught that before it wore further and grenaded the engine.
Countermeasure part number 12300-50860
Countermeasure oversize (if crank is damaged) part number 12300-50860-012
Great research and diligence by checking the crank back and forth slop.
Thanks. I had no idea how sloppy it had got!
Firstly, why am I only finding your blog now!
No google translate needed. Waheyy
Secondly, this makes me worried now about my works with 130k km on it
Purchased mine at 108k and it’s had some fiddling about done with it over there previous to me getting it. So possibly, maybe, who tf knows if the bearing was replaced.
I rarely drive in silence so maybe there’s a noise there somewhere… I think I better go and check right now actually
Yeah i’m convinced mine was only a matter of a few more KM away from failure. It’s had a hard life, being an ex track car in Japan, so it’s likely to have more wear in it than most cars, but still worth checking out.
So much of my time is spent searching sites in Google Translate to find Alto information. I’m glad if my site can be any help.
Mr Kelvinator, please help me do my car <3
A super interesting read ! I have the same engine in my Caterham 170 and was worrying and planning to have the engine open at 100 000km preemptively. As it’s from late 2022 it should be alright. I guess keeping an eye on the crankshaft pulley once in a while and applying clutch is still a safe thing to do.
With an aftermarket ECU and a good prep of the turbo, we got 116hp from that R06A.
That’d be a heck of a fun little car with that power and no weight. The R06A is a solid little unit and very understressed by Suzuki in stock form. 2022 should already be on the Type 2 bearings, so I’d be surprised if you had any wear, but as you say, it doesn’t hurt to keep an eye on it.
Yes, I wouldn’t change it for a “bigger” Caterham. Would you guide me to a source for the workshop manual for the engine? I have found nothing and resources are very scarce as it’s the only car in Europe with a R06A.
If you search around the HA36 Owners Australia facebook group (you might need to join it), there is a very good English translated Suzuki workshop manual on there for download.
Outstanding ! Thanks a lot
Hello. Loving the blog. Do you have a place where you source the parts? I’m looking to redo my bearings but I’m having a nightmare trying to find them.
If you knowing any website that stock standard parts and service bits please let me know.
Hi Mike, I mainly use Amayama to source parts from Japan. There isn’t an online catalogue for the HA36S as it’s too new, so you either need to know part numbers, or have access to a parts book.