Progress on the Marina has been a slow burn, but it’s been ticking away in the background, around the work on the other cars.
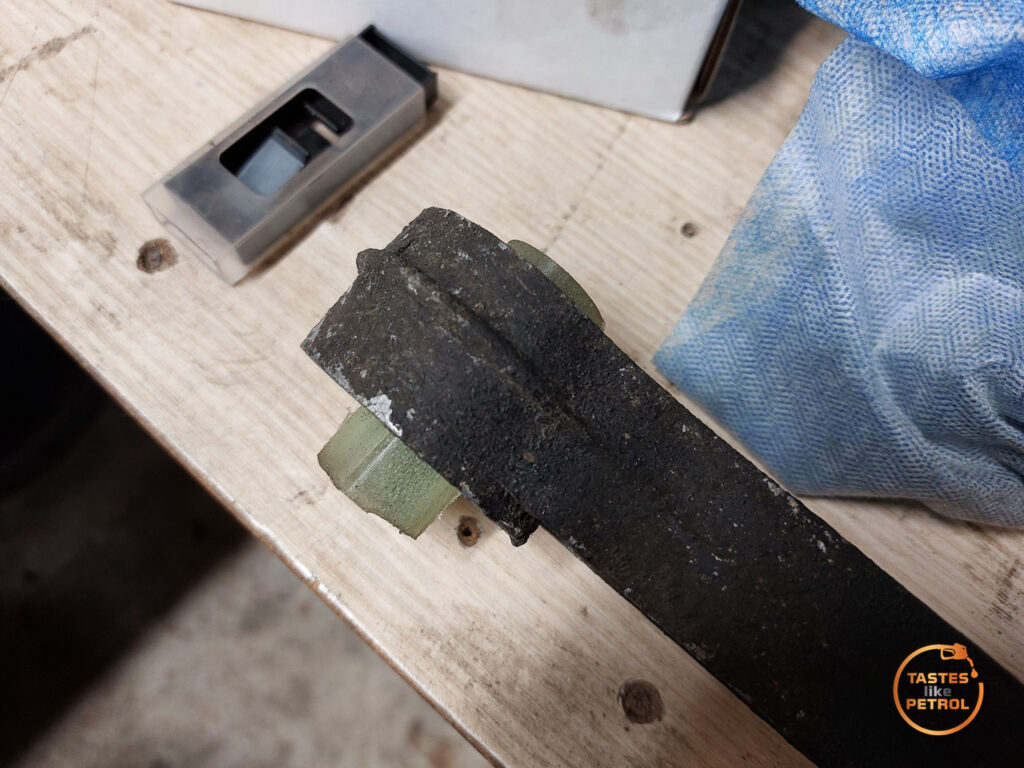
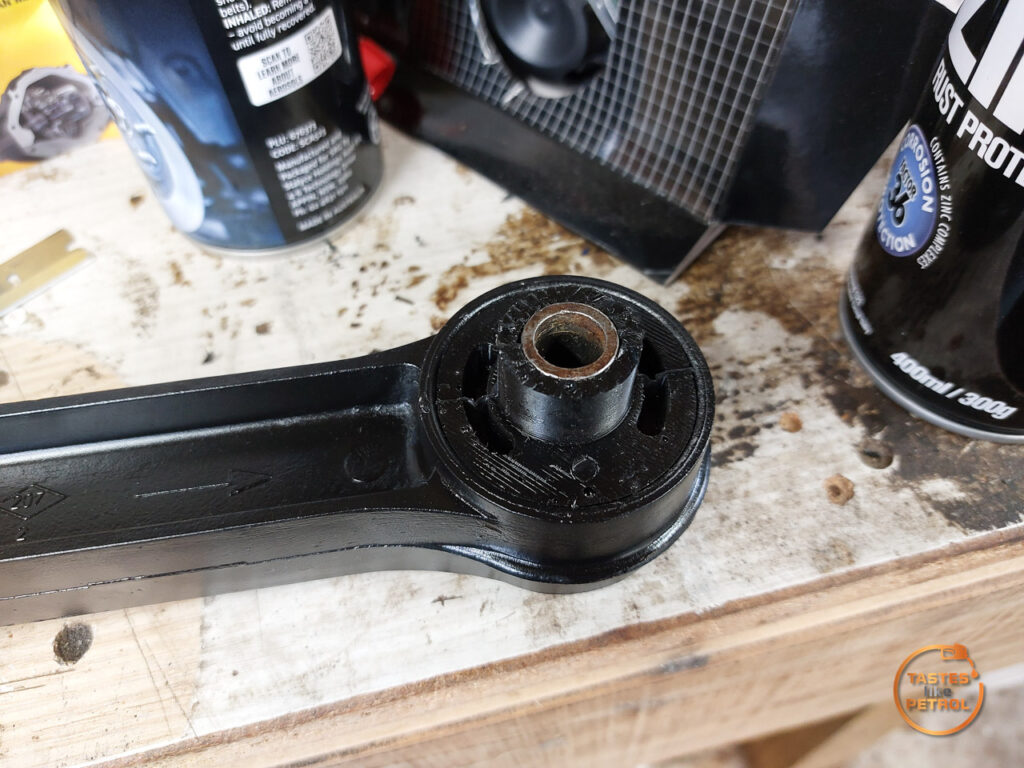
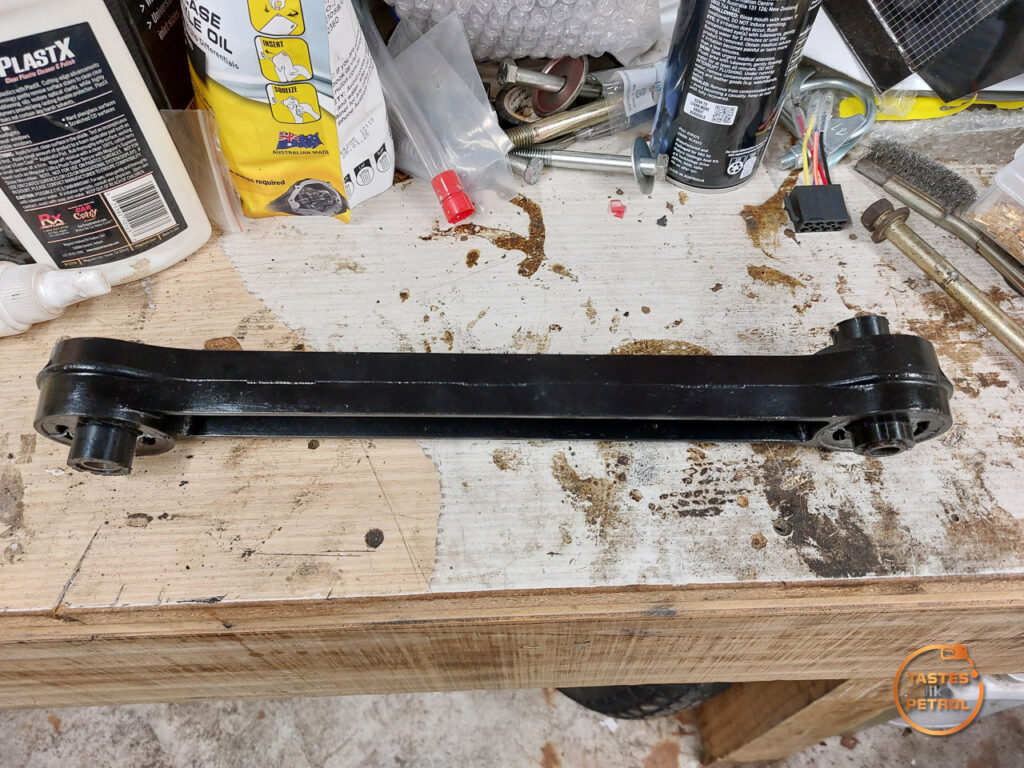
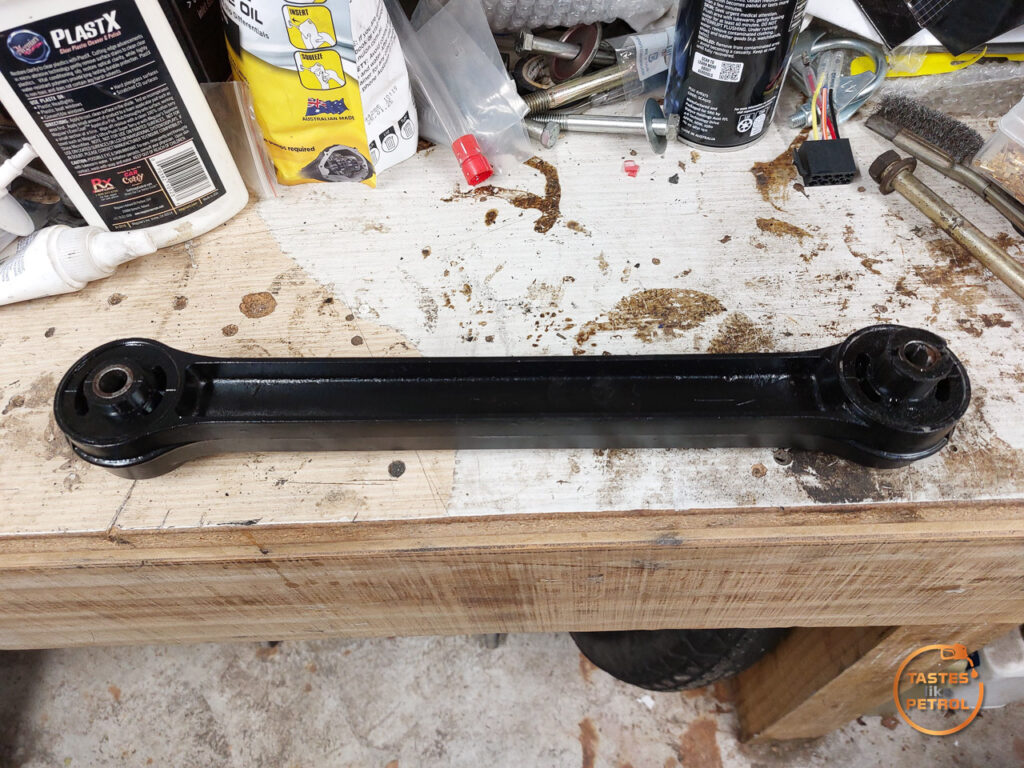
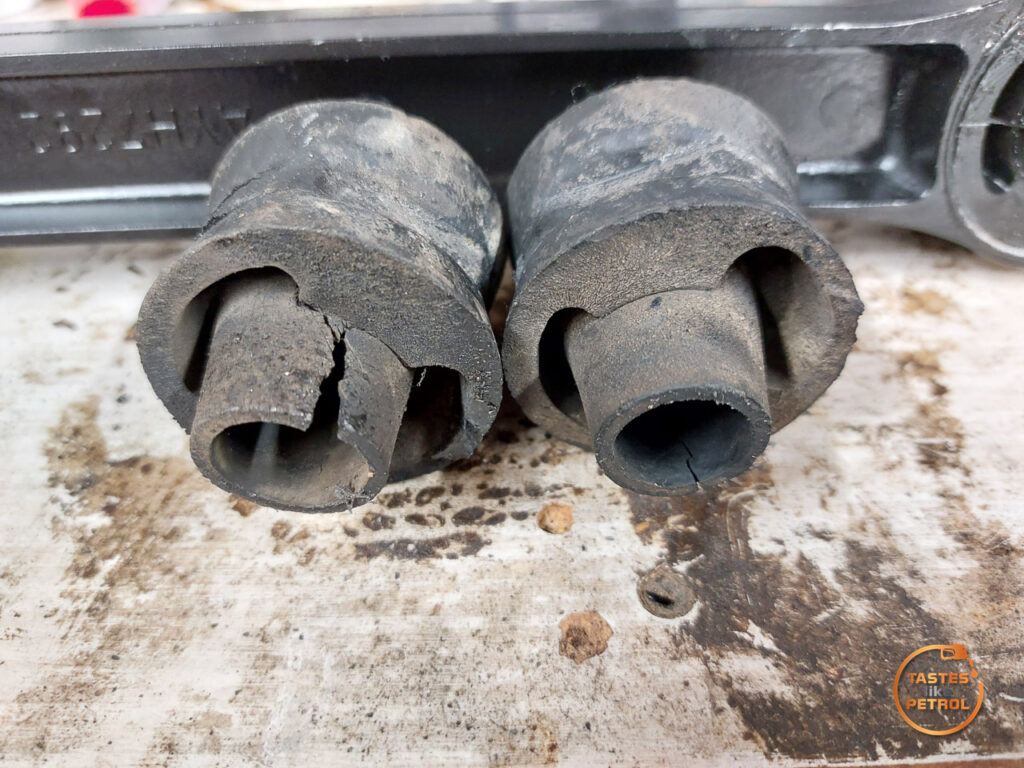
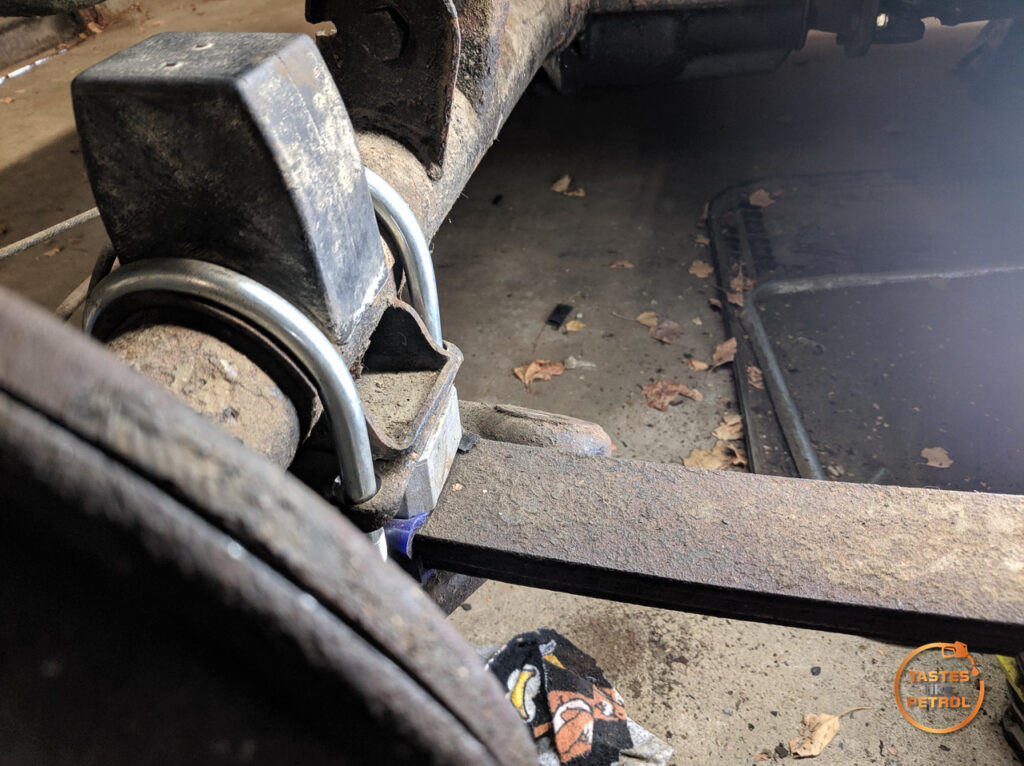
Last WOF I was given an advisory for the rear axle radius rod bushes being perished. It wouldn’t pass another WOF like that, so I was forced to look at options.
I knew the OE bushes were long since unavailable, as they were only used on the Aus spec cars, were local content and the factory that made them back in 1970 has probably been turned into a housing estate.
There are the odd ones out there in the hands of owners, but people aren’t selling them since they’re impossible to replace now and they might need it for their car.
My initial thought was to replace the arm completely. OE arms are also NLA, so it would have to be custom-made, or something off the shelf adapted to fit. I went through days/weeks of searching through the options for different bushes, arms, and anything that would work, and came back with little to nothing. If I tried, I could’ve made something work, but it was turning into a bigger job than I liked.
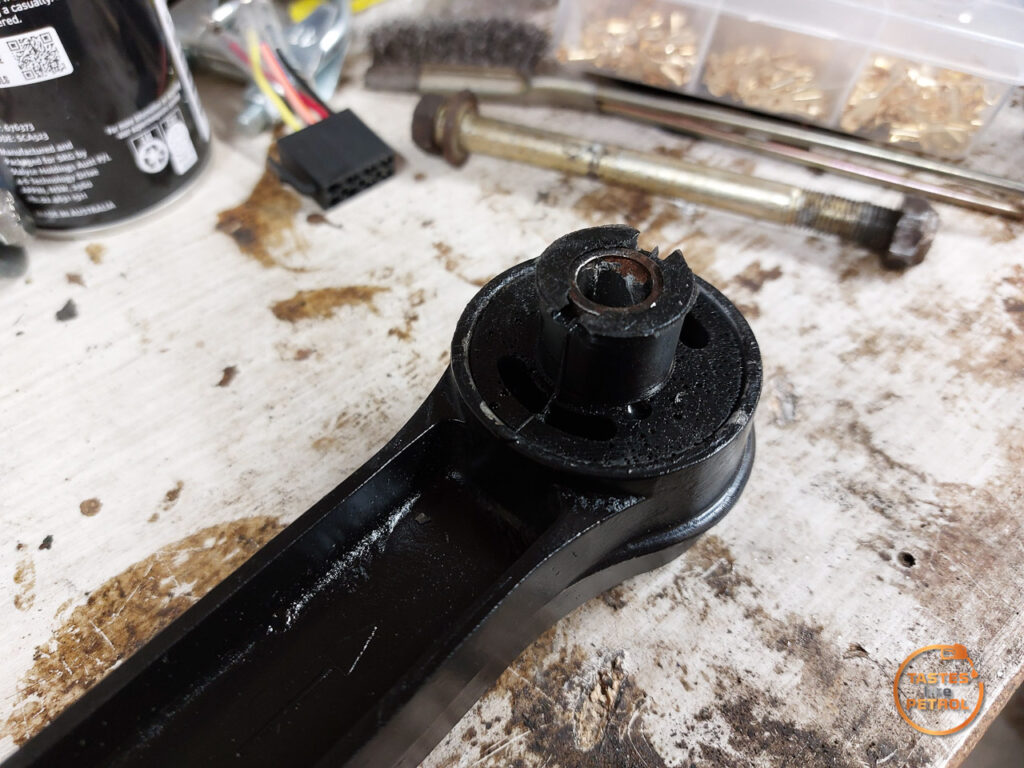
The next option was to replace the bushes with something off the shelf. No one makes replacement OE bushes, there are no poly options, and allegedly if you press a firm polybush into the alloy arm, when it twists going over bumps it can actually break the arm since the bush can’t twist and the arm tries to instead. That’s an absolutely no go, I can’t risk the arm as I can’t get another.
To add to the frustration of finding a bush to fit, there are two locating bumps in the arm to stop the bush from rotating and the tube is tapered, so a standard sleeved bush won’t fit without grinding it out
So, what’s left then? Make new replacement OE bushes myself then, I guess.
I had thought of 3D printing the bushes in TPU (Thermoplastic Polyurethane) but that only comes in harder shore ratings, which means I would risk breaking the arm.
The answer was to cast the bushes in a polyurethane that has a similar hardness (shore) rating to standard rubber. I did some research, and settled on a 65A shore rating castable polyurethane.
But the poly is useless without a mould to pour it into…
So, I pushed one of the old perished bushes out of the arm, grabbed my callipers, fired up Fusion and set about first modelling the bush
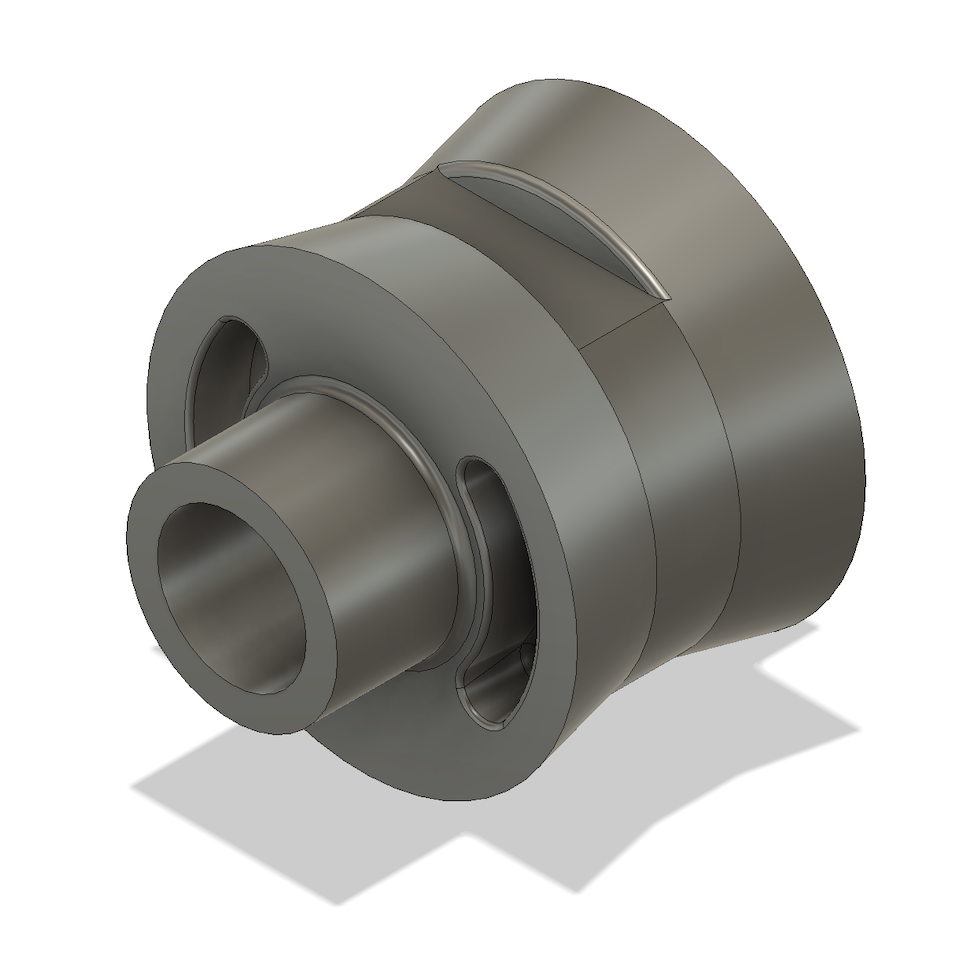
After a couple of tweaks, I turned that into a mould

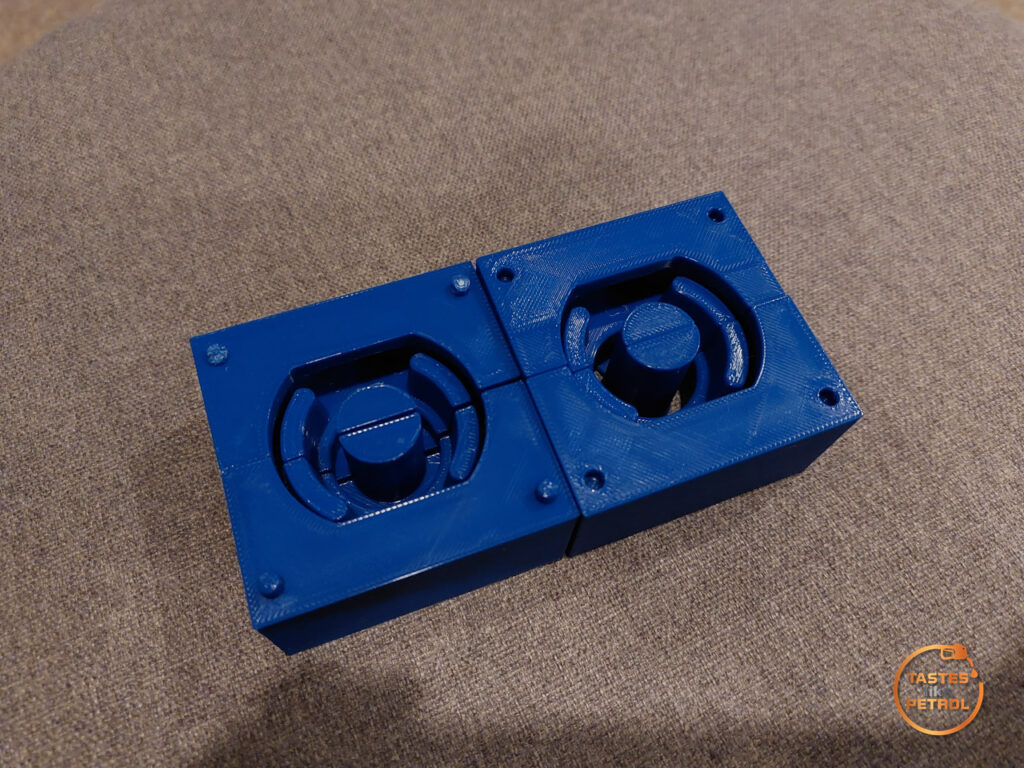
Which I then fired through to my new Bambu A1 3D printer
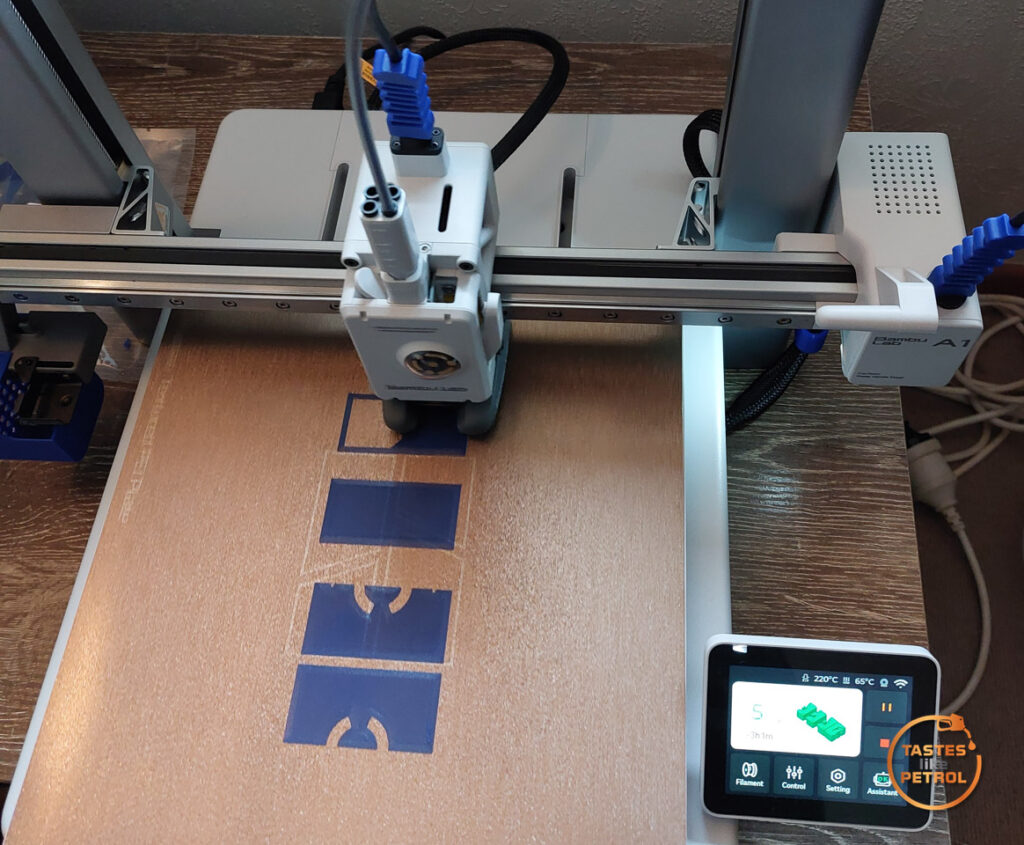
and suddenly, I had a mould to make a proof of concept with
I measured how much water a standard bush displaces in order to work out roughly how much poly I would need to mix up, and then sprayed the mould in mould release
Then the scary bit, I mixed up some poly according to the ratio on the bottles
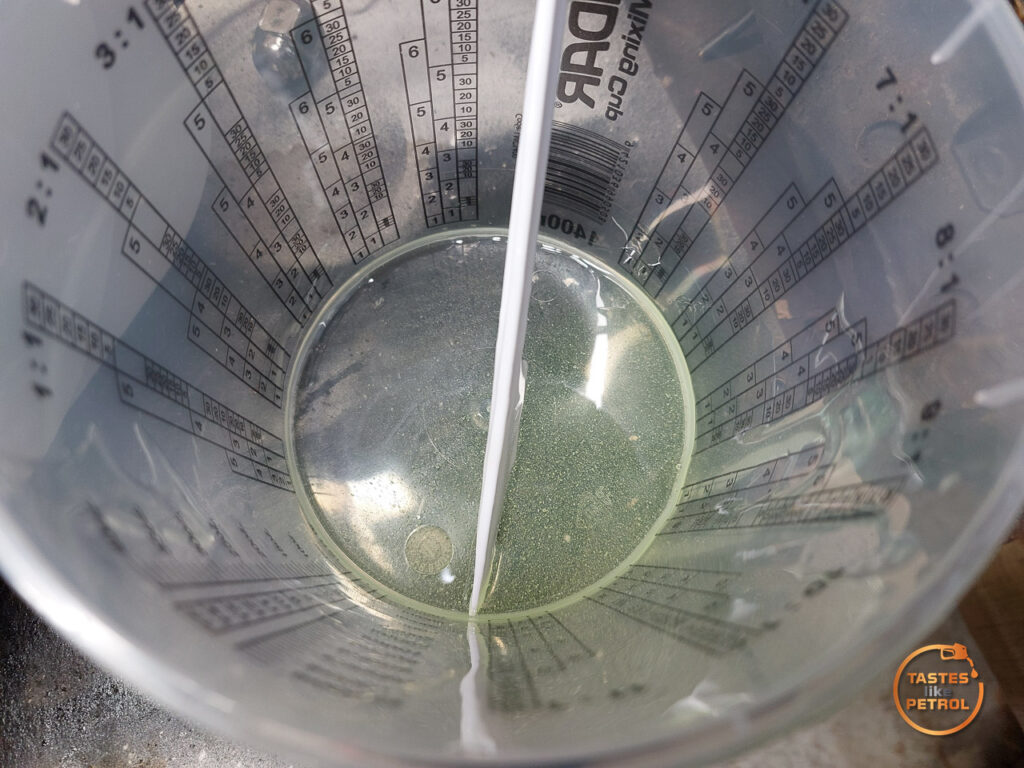
And carefully poured it into the mould
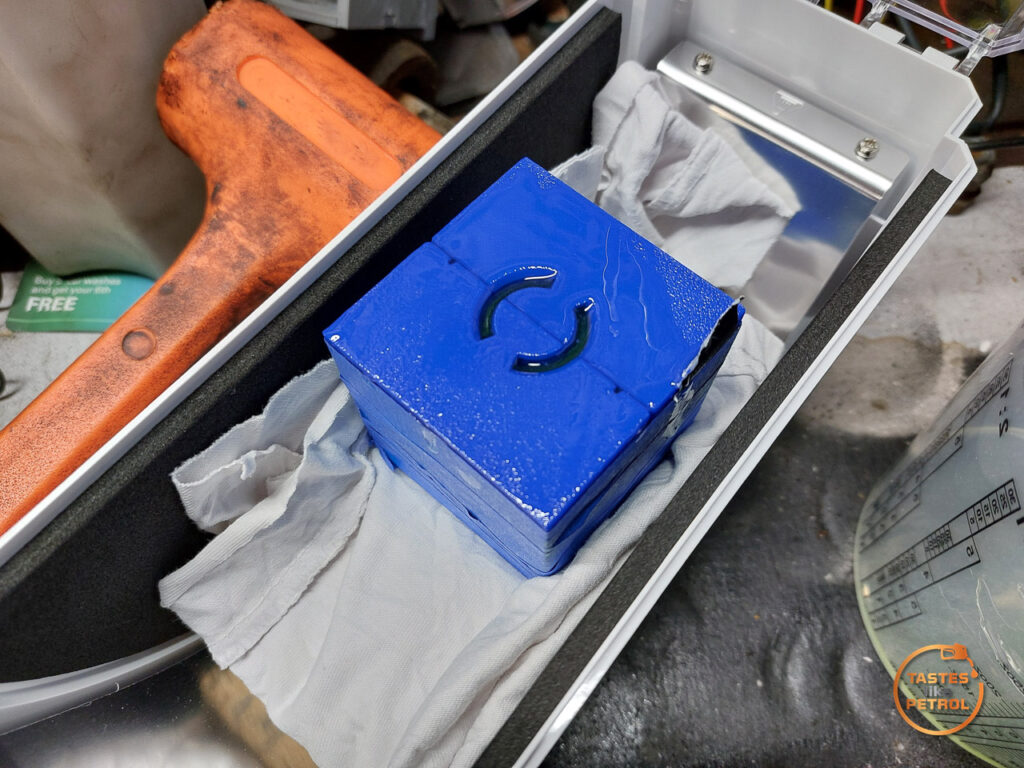
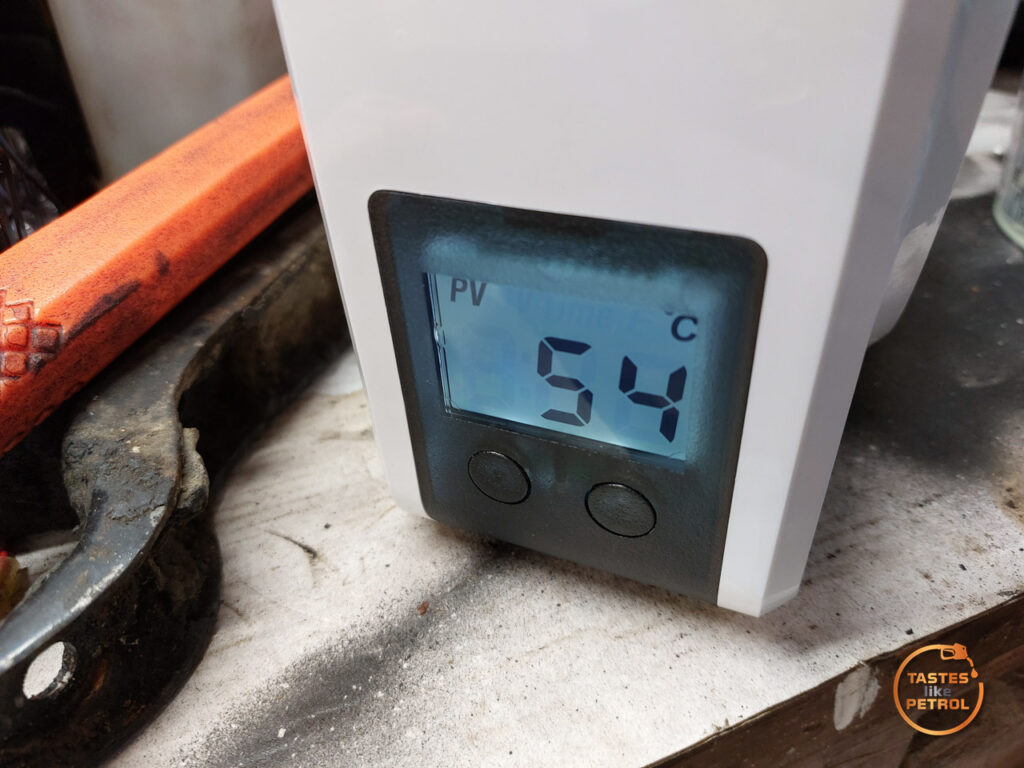
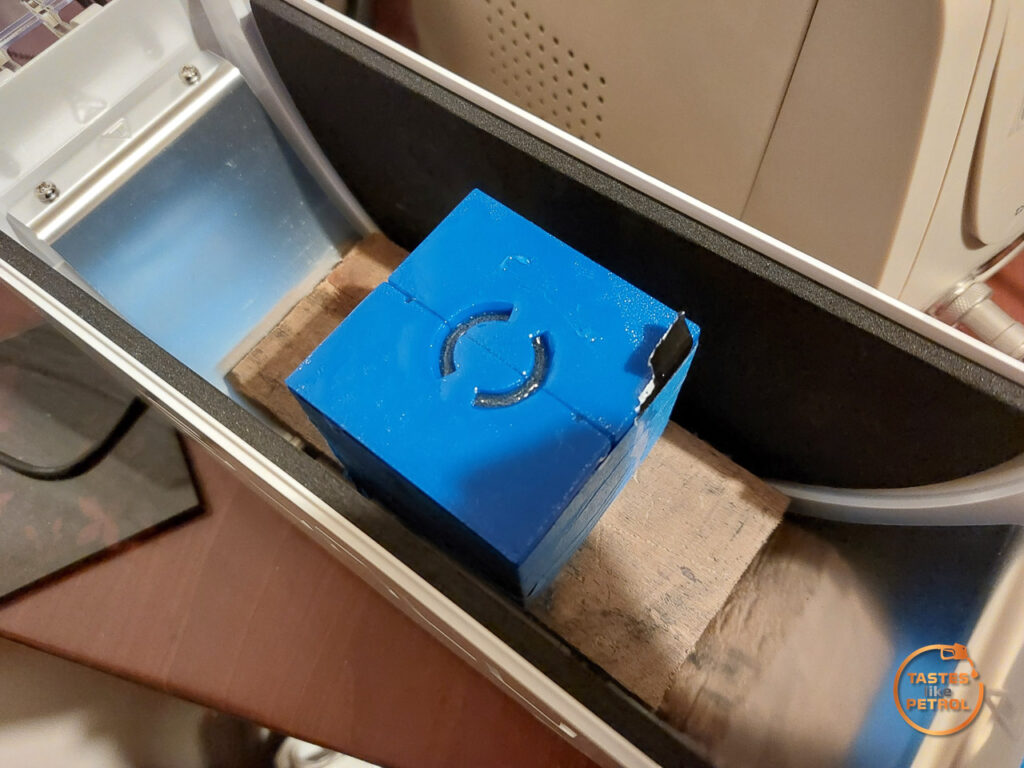
Since I’m doing this in the middle of winter, and it recommends not to cure it at less than 15c, I employed my filament dryer to keep it warm for a few hours in the garage
Once I was confident it was set enough to move and not risk getting it on the carpet, I moved it upstairs into the much warmer house for the rest of the 24-hour cure.
After the 24 hours had passed, it was time to see if A: I could get the mould off B: I had something that resembled a bush
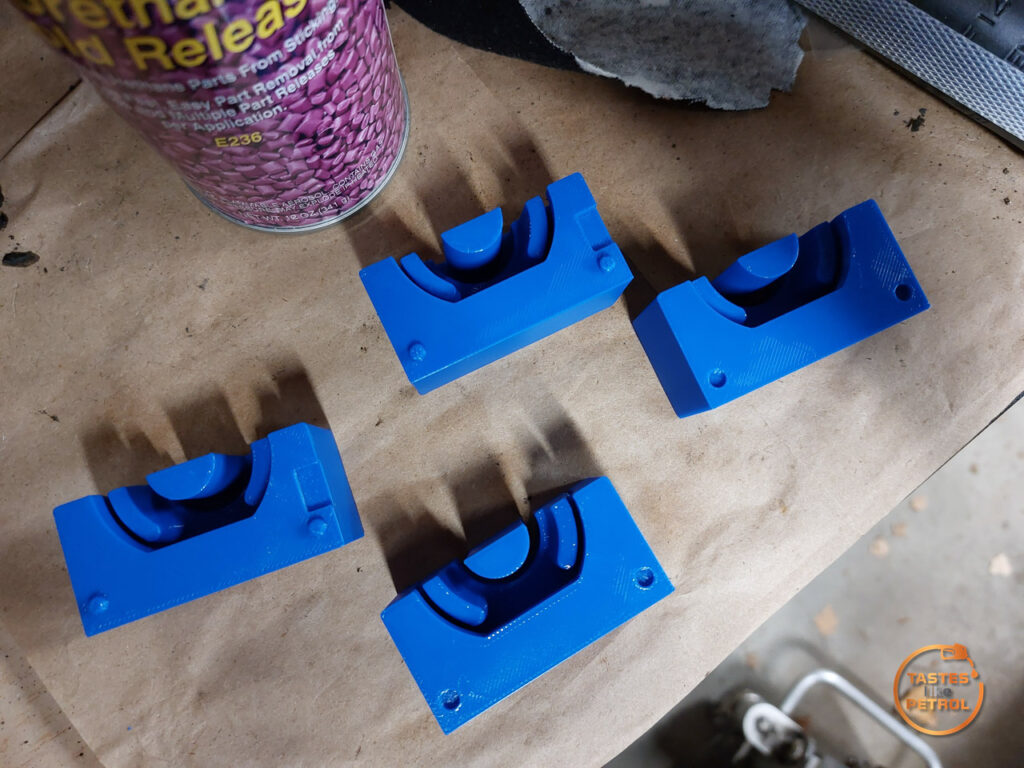
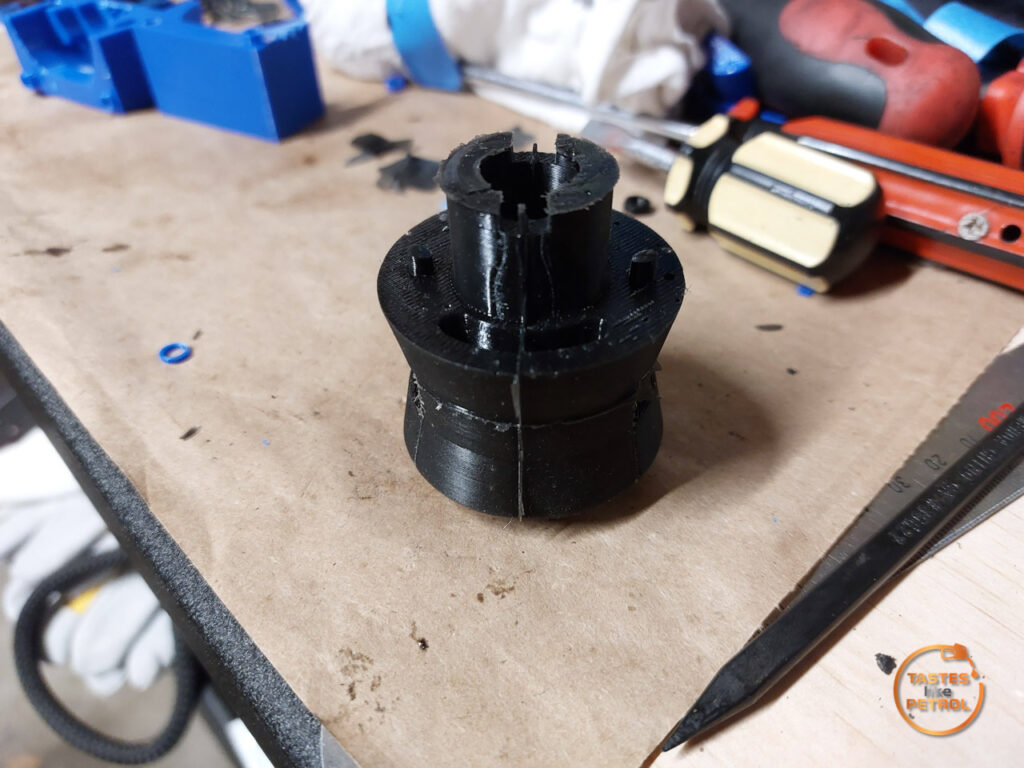
It was a real pain to split the parts of the mould, but eventually I got the first part off and got my first look at the bush. It kinda looked like a bush!
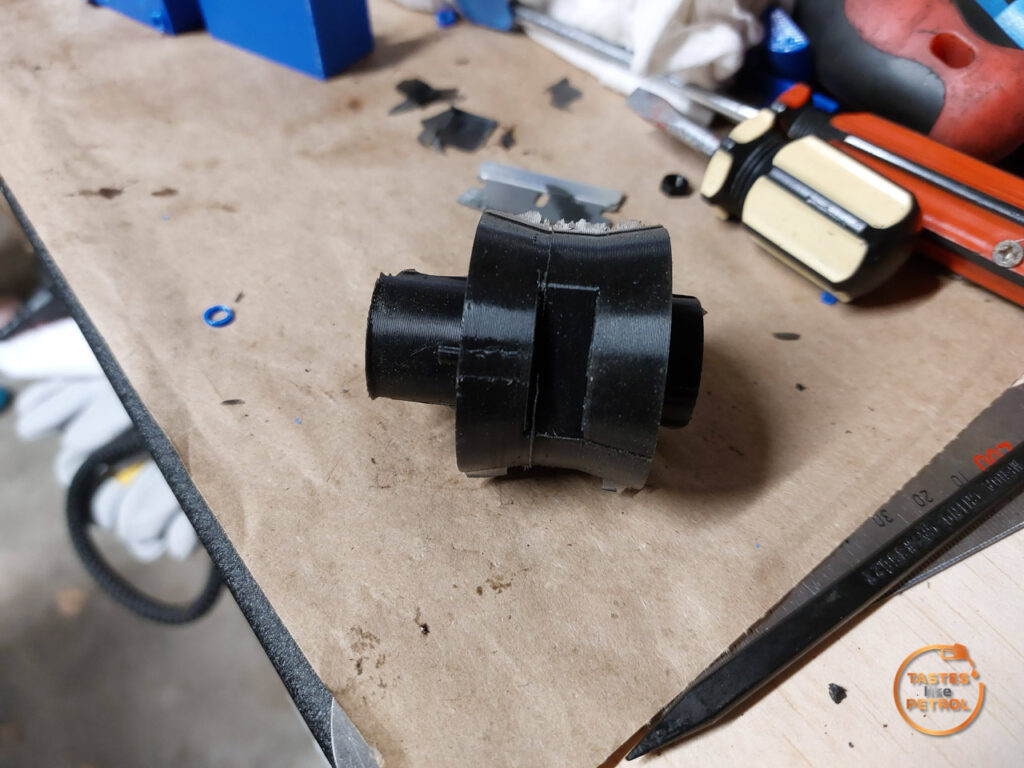
After much fighting, I got the rest of the mould off and the bush out
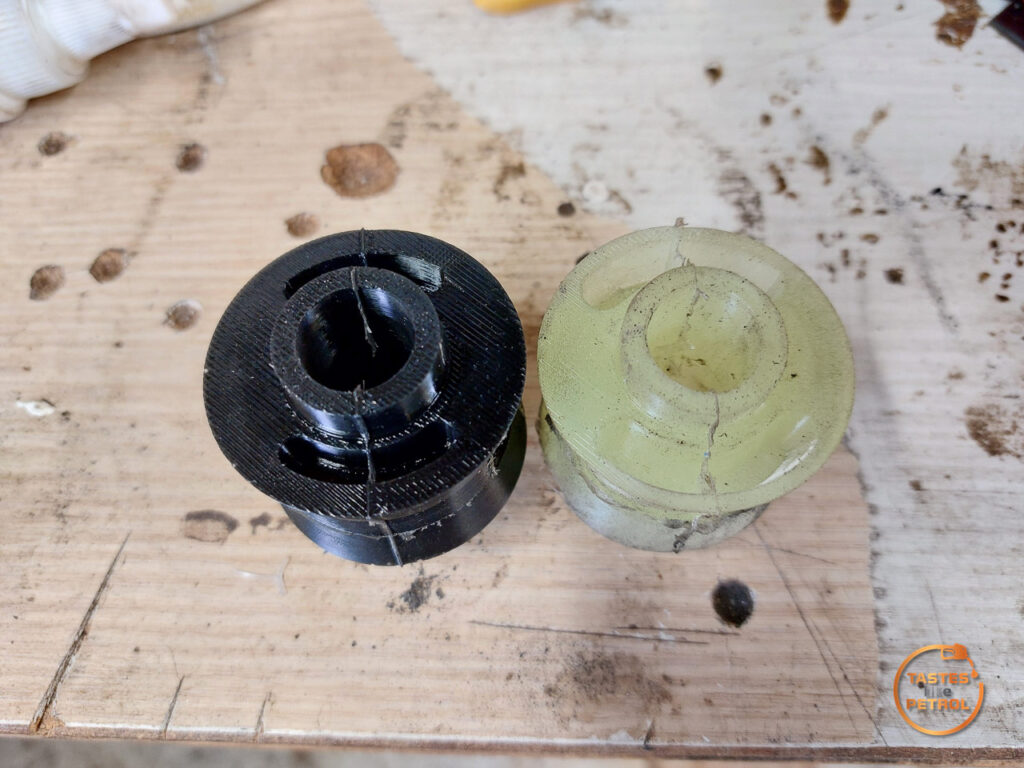
Compared to a stock bush. Unfortunately one of the walls around a void didn’t survive the demoulding process and tore, but otherwise I was impressed with my first attempt
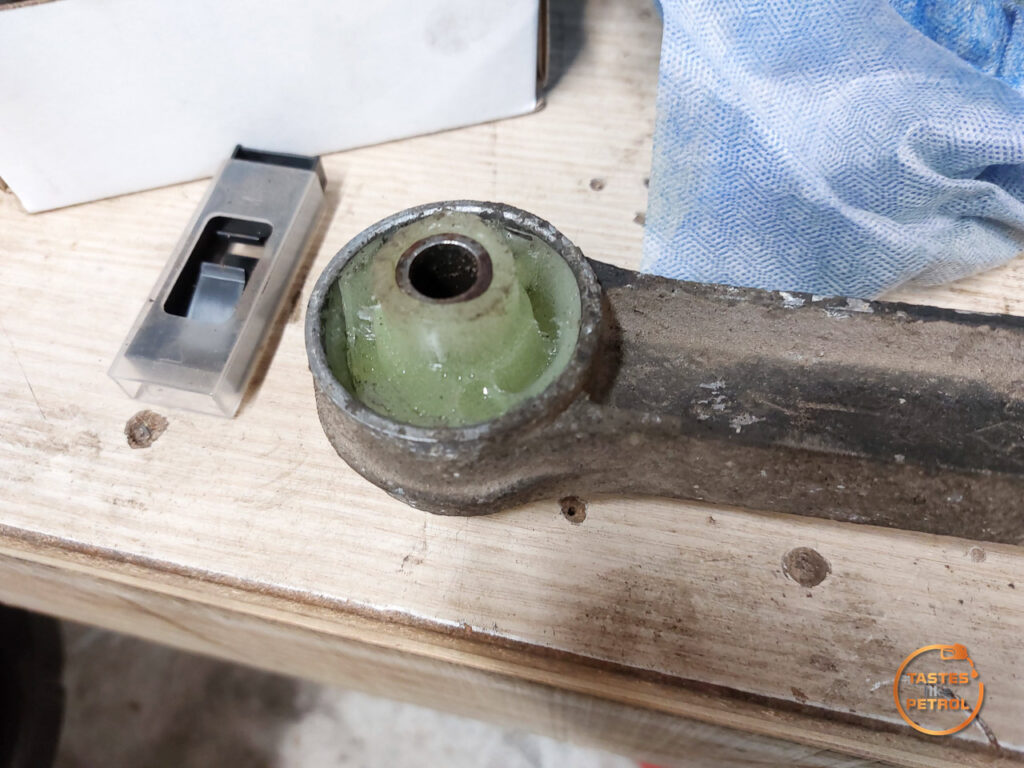
I pressed the bush into the arm to see what it looked like in place and how the fit was. The fit was more or less perfect
The other issue was that the bush was full of tiny little air bubbles. This was from mixing the resin since it’s two parts, and I’m not using a vacuum chamber or pressure pot.
The concept was proven.
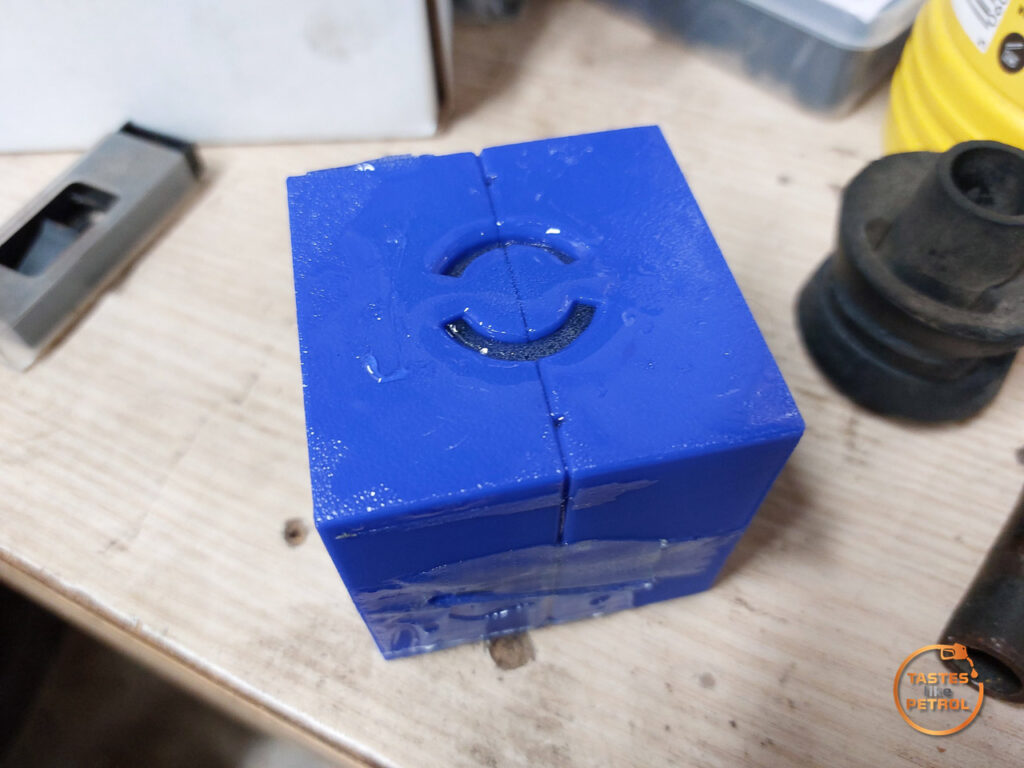
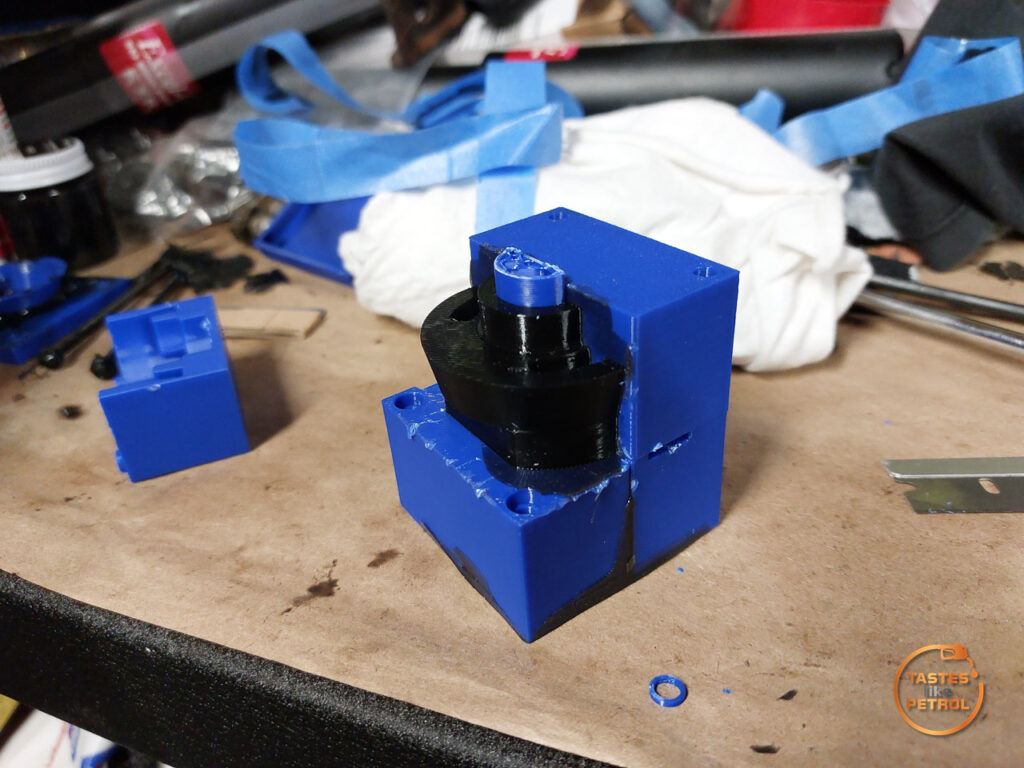
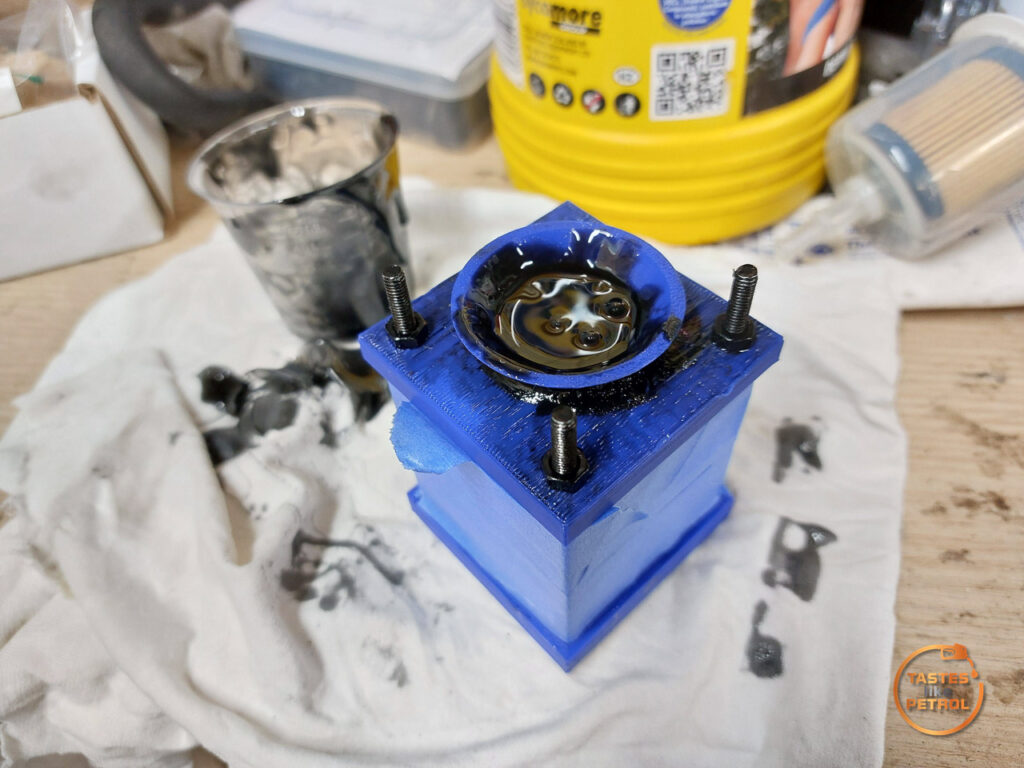
With that success under my belt, I went back and did some tweaks to the bush model and mould, making the voids in the bush smaller and shallower, so the walls are thicker and easier to get out (this will also stiffen the bush a little) and also making the mould physically smaller
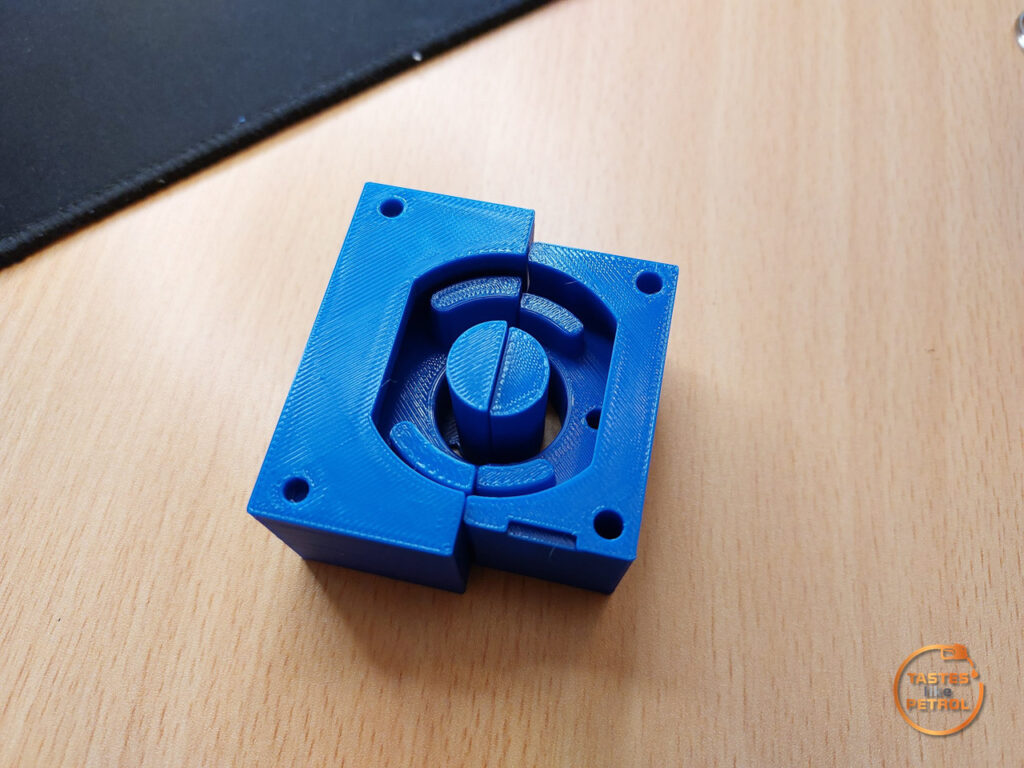
I altered it so I could run some long screws through from bottom to top and clamp the mould together, this also allowed me to add a top and bottom plate, with an integrated funnel to make it easier to pour and keep the sections located in place

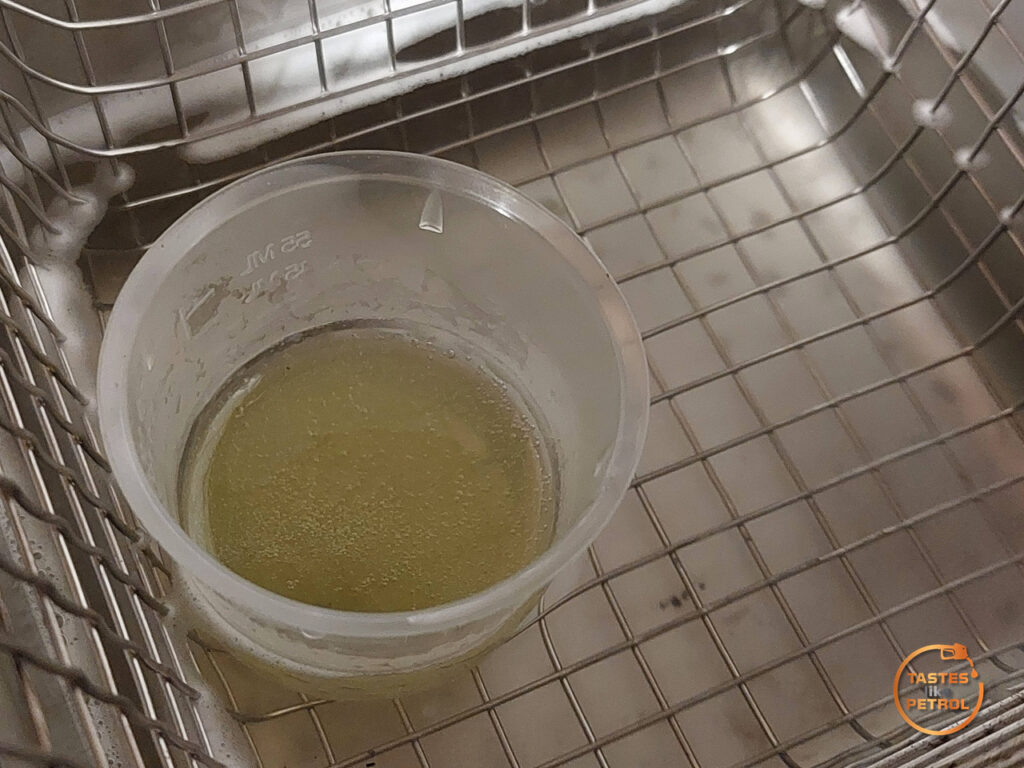
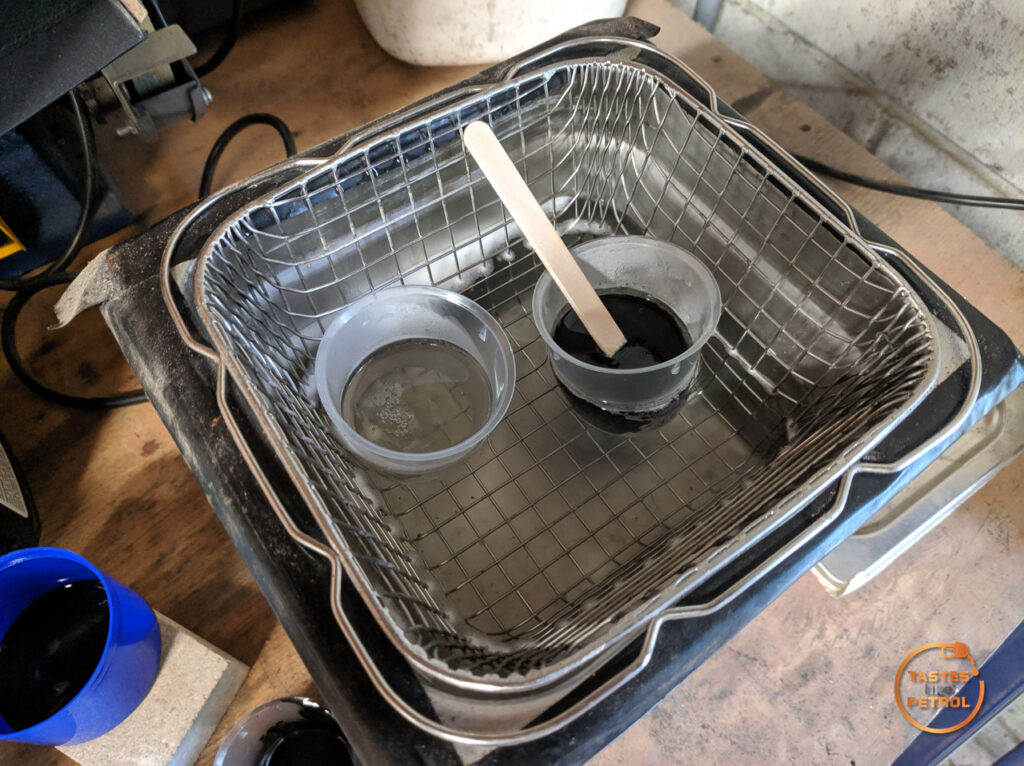
The other thing I tried was degassing the resin in my ultrasonic cleaner. This basically pummels the resin with ultrasonic waves, which shakes the bubbles to the top and they pop. I wasn’t sure this would work, and certainly there isn’t a lot of positive information about it, but maybe because I’m using such small volumes of resin it’s different, because I found it quite effective.
I also got some black pigment as I didn’t really want translucent yellow bushes. A very small amount of this gets added to the resin (it’s like 0.5% by weight)
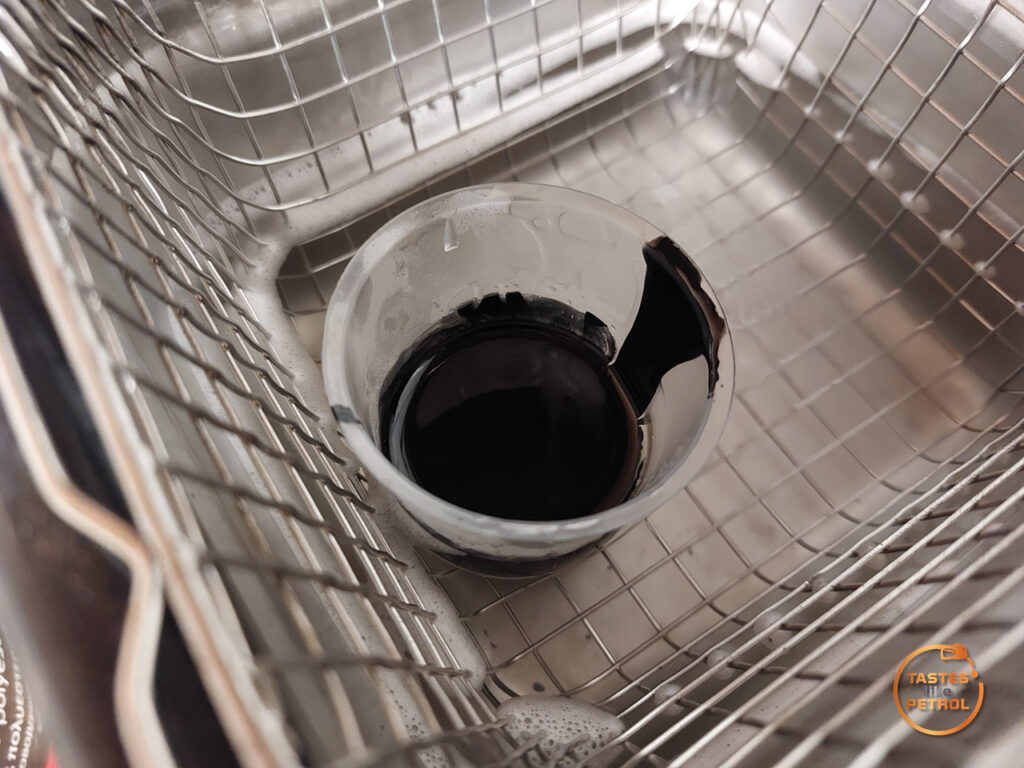
I degassed this one in the ultrasonic and poured it in my new mould

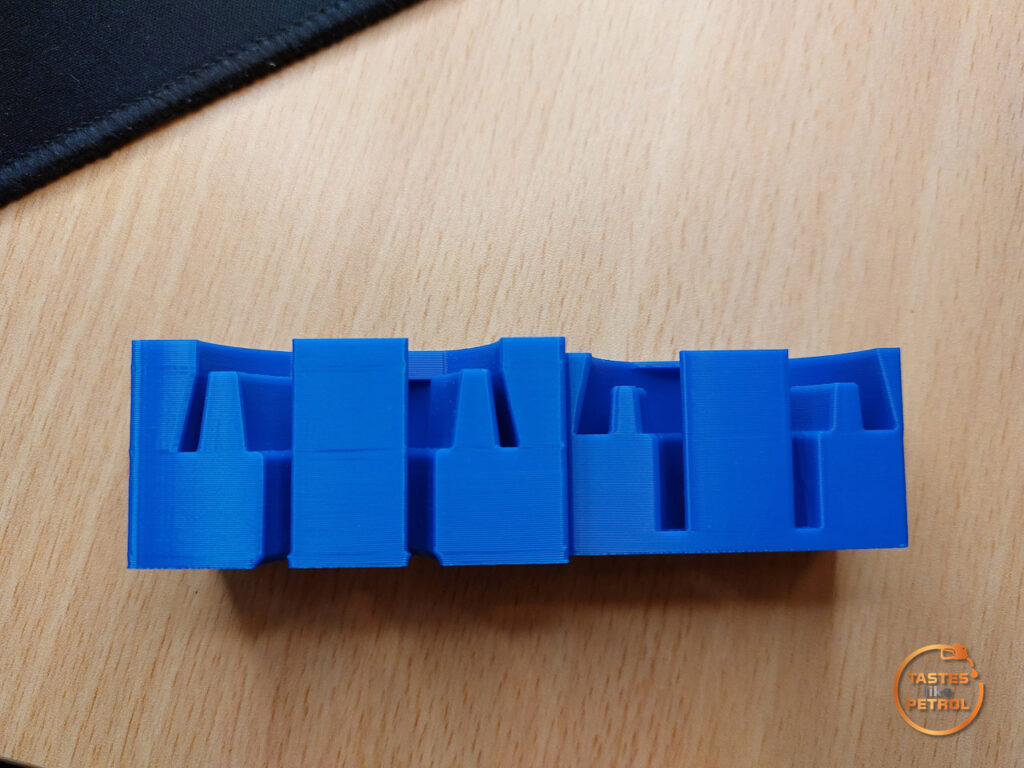
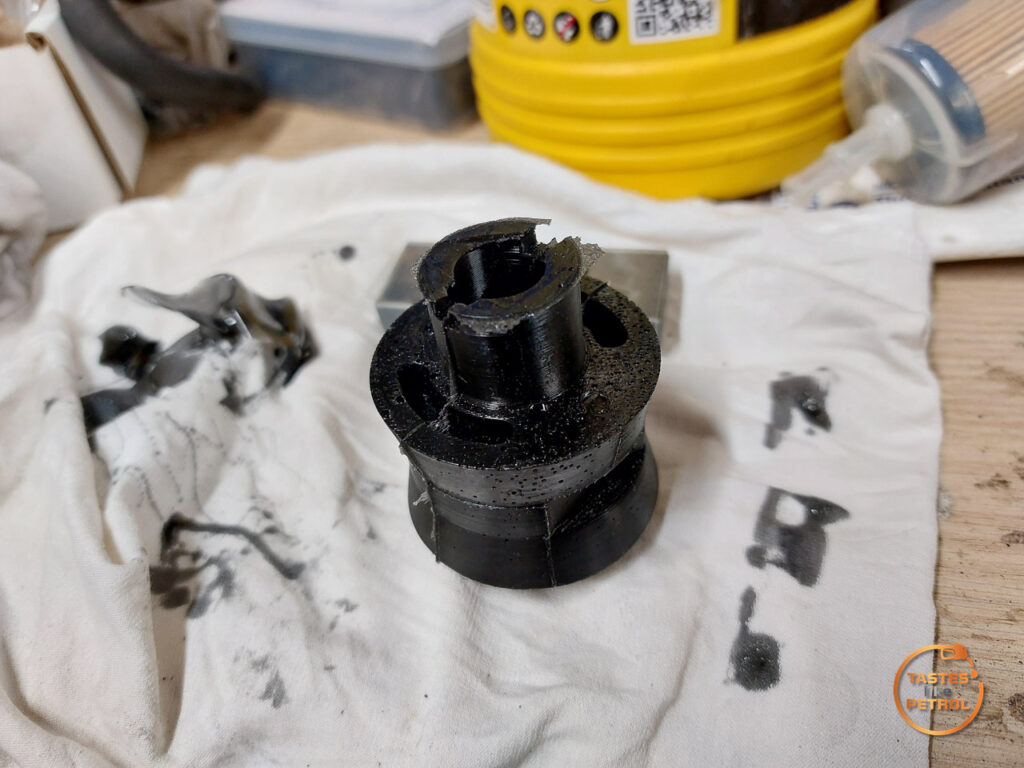
And after the 24-hour cure, this horror show is what emerged
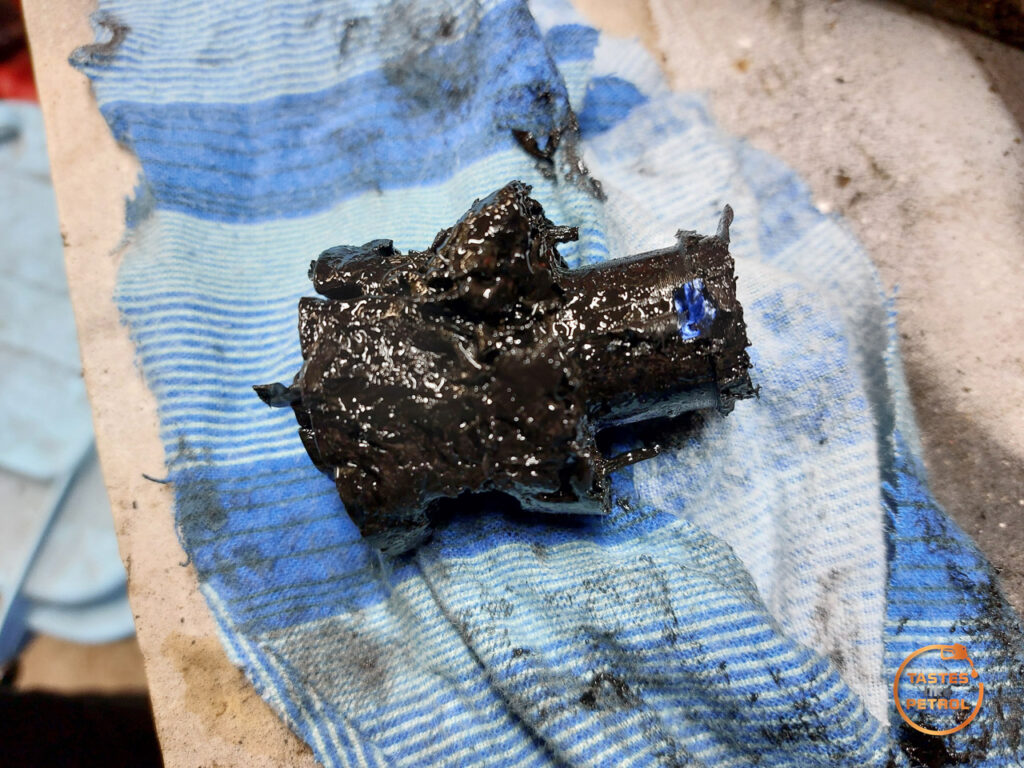
This knocked me back a little, it was so bad. Some of it was still liquid, all of it was sticky. My suspicion was that since the instructions say to add the black pigment to Part B before mixing with Part A, it was impossible to see the two parts of the poly mix as it was all black (normally you can see the yellow mix with the clear), I didn’t completely mix it 100%. I may have also used too much pigment, as I didn’t realise how little I needed.
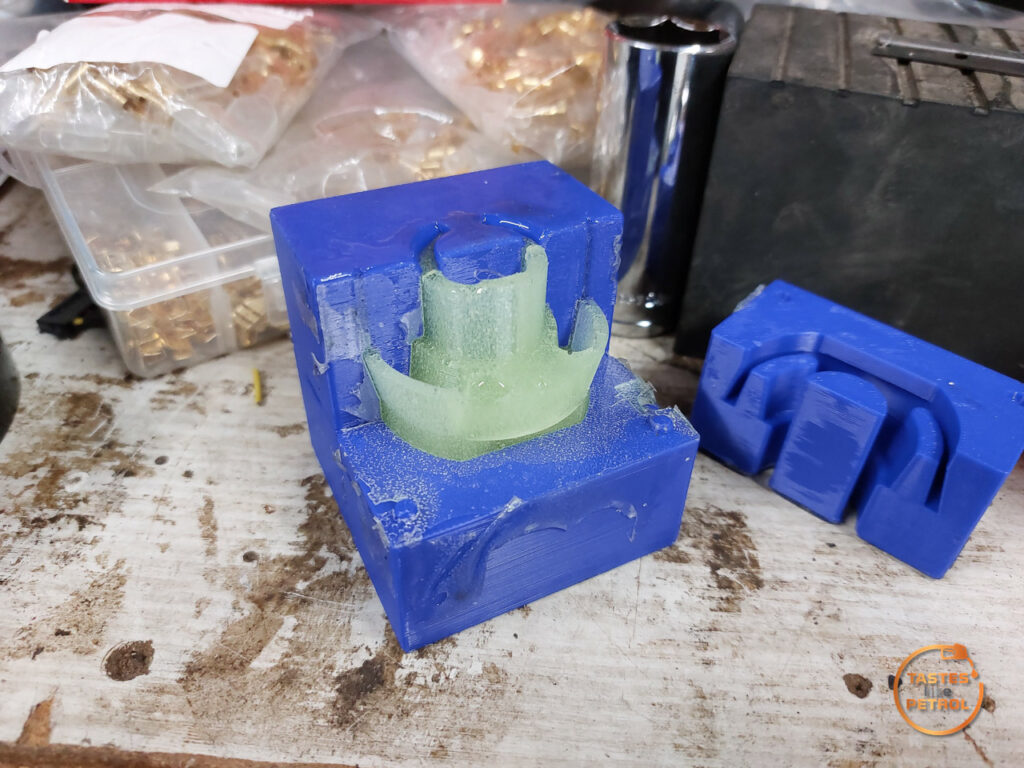
With some little tweaks to the mould, and my process (adding the pigment once A and B were already mixed), I set up another mould and let it cure. This time, I had more success.
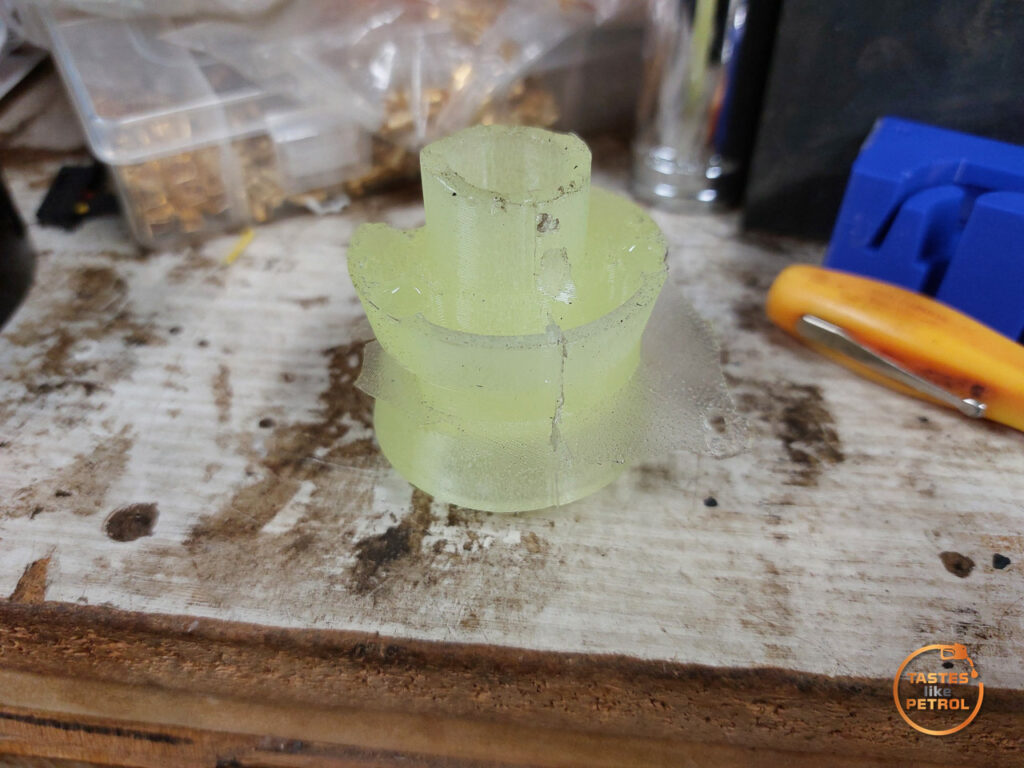
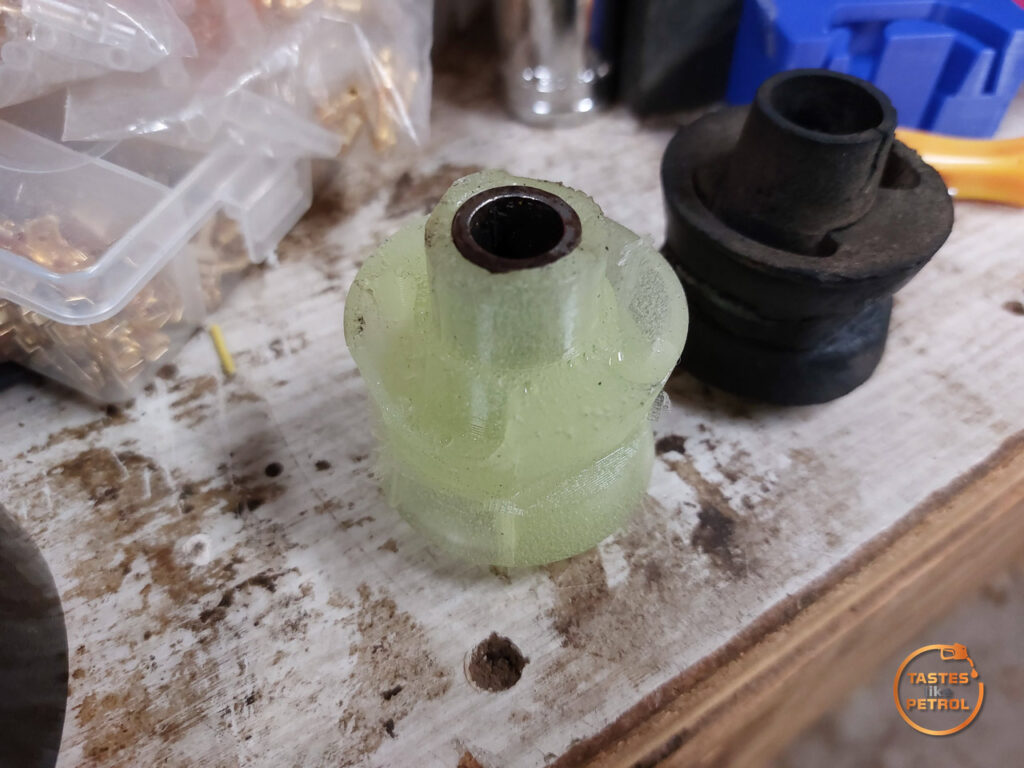
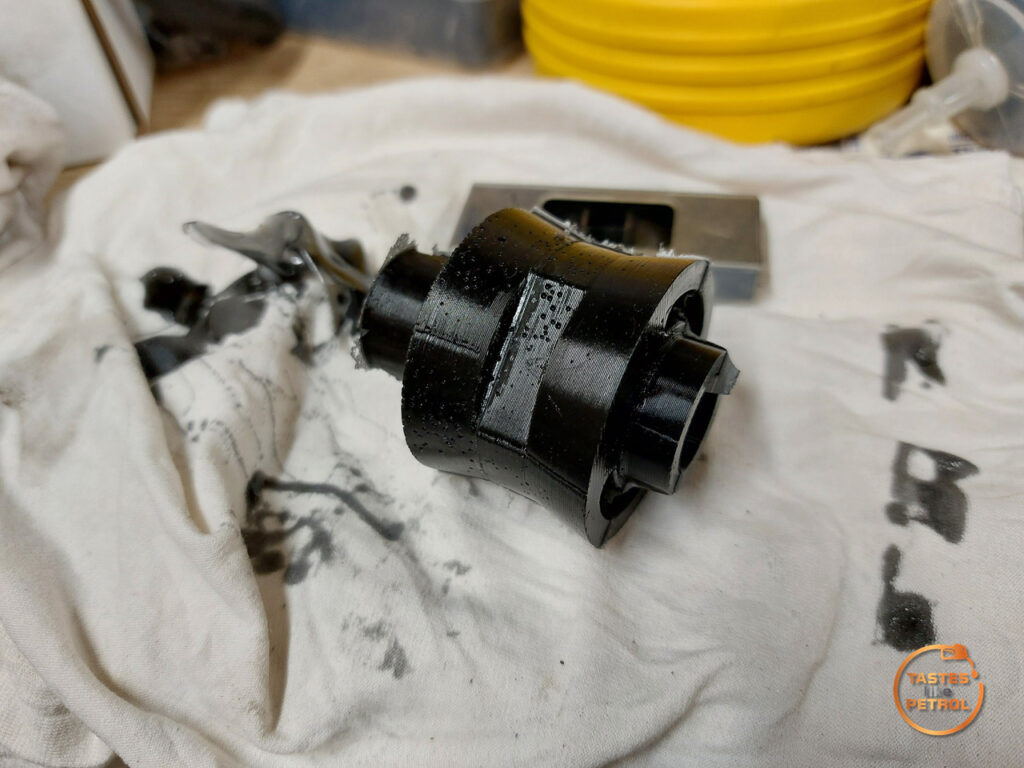
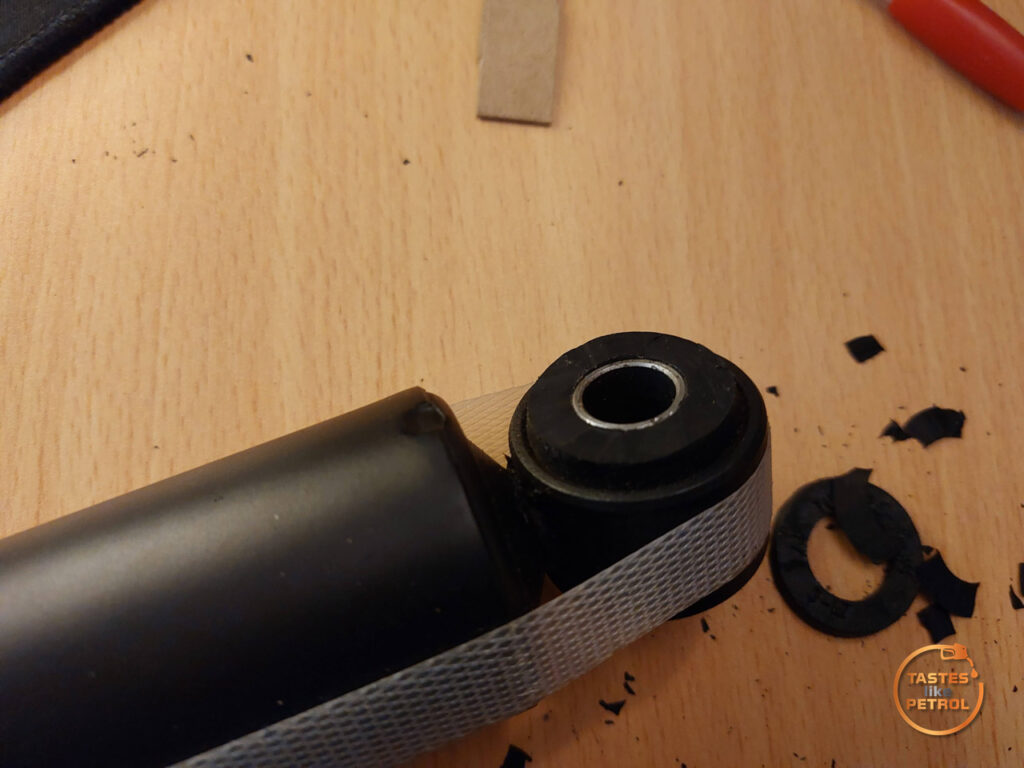
Completely demoulded, and I’ll be damned, that is actually a bush
Compared to the first bush. You can see the smaller voids in the new one
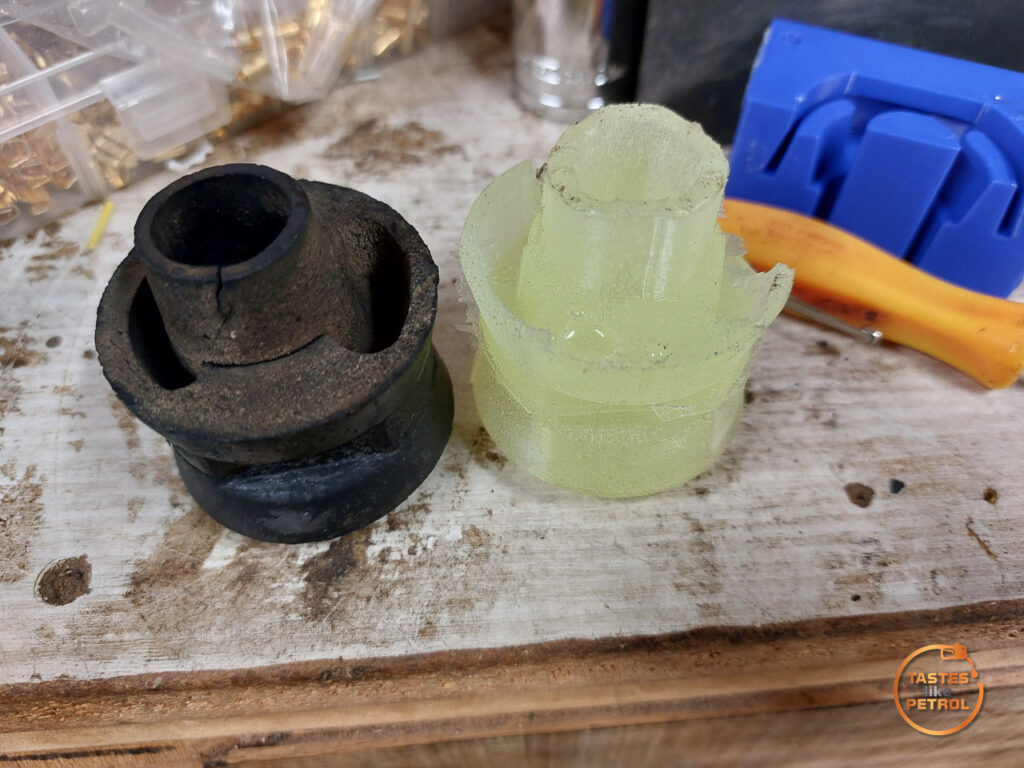
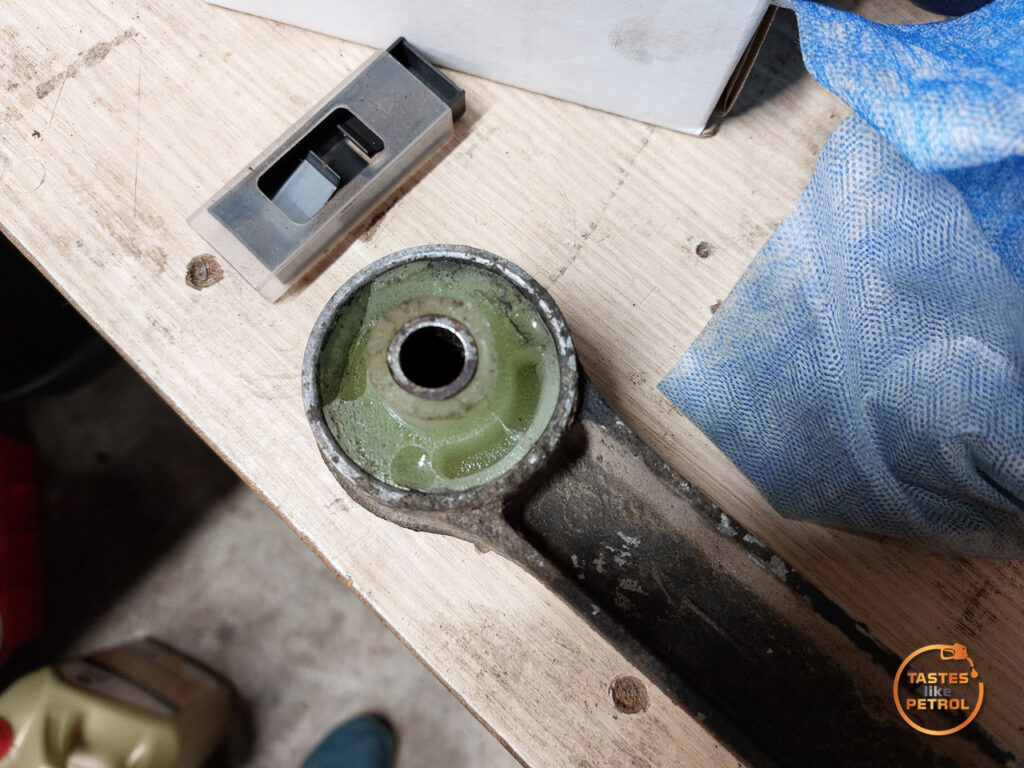
After lubing it with some leftover polybush lube, it’s a perfect fit in the arm too
The other side is a little uglier since I had to trim off the excess around the tube from where the filler holes were, but that’s a 100% usable polyurethane bush for a Morris Marina.

Now all I had to do was make another one just as good. Easy, right?
I mixed the resin, degassed it, poured it and waited
It’s not as perfect as the first one, I think I used too much mould release this time in my efforts to make it easier to demould, hence the surface bubbles, but otherwise it’s also very usable.
Once again, a perfect fit in the arm, which also had the wire brush and rattle can rebuild at some point in this process
Interestingly, because I only measured the one bush and its tube, and both bushes are the same part number, I never noticed that the tube on the front end of the arm is actually longer than the rear one (as also mentioned in the workshop manual). It wouldn’t matter, since the standard bushes were obviously designed for the shorter tube, but when they aren’t cut shorter, my new bushes actually cover the whole tube with some minimal trimming.
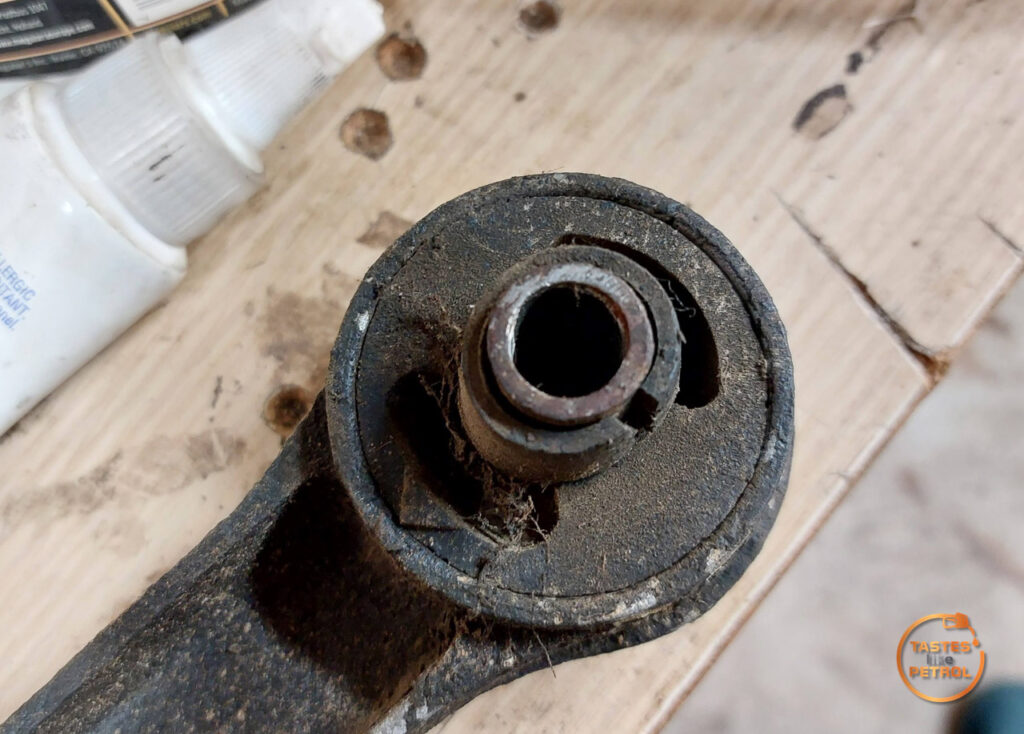
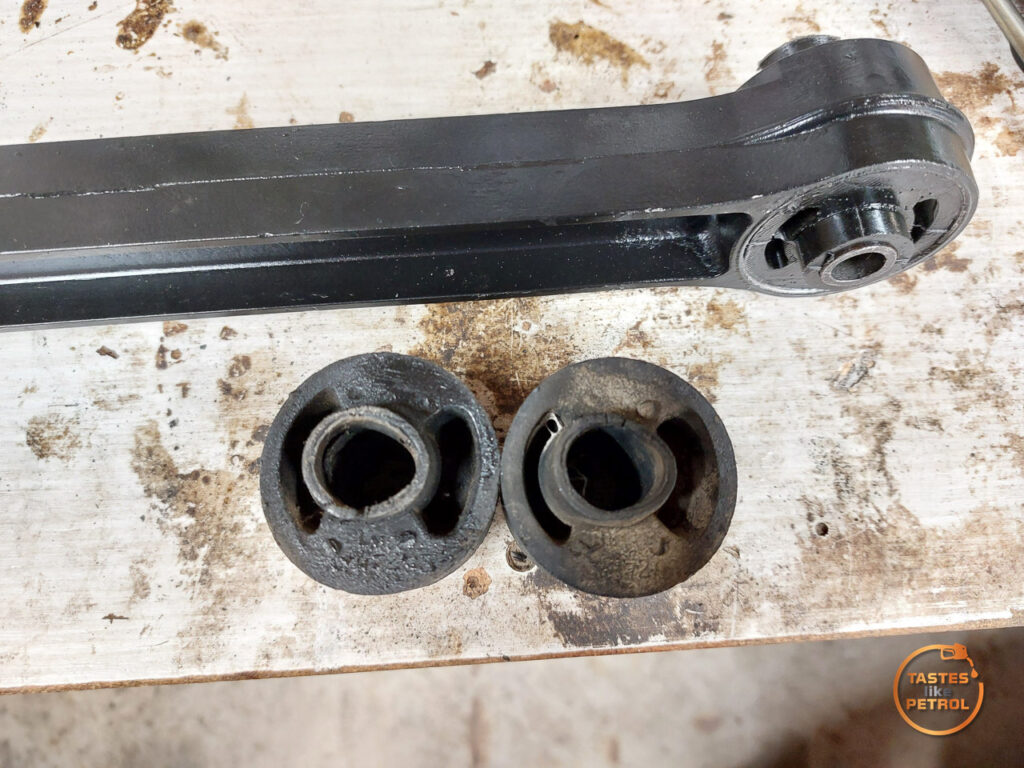
For record, these are the old bushes from the arm. Sitting around for 25+ years doing nothing did them no favours
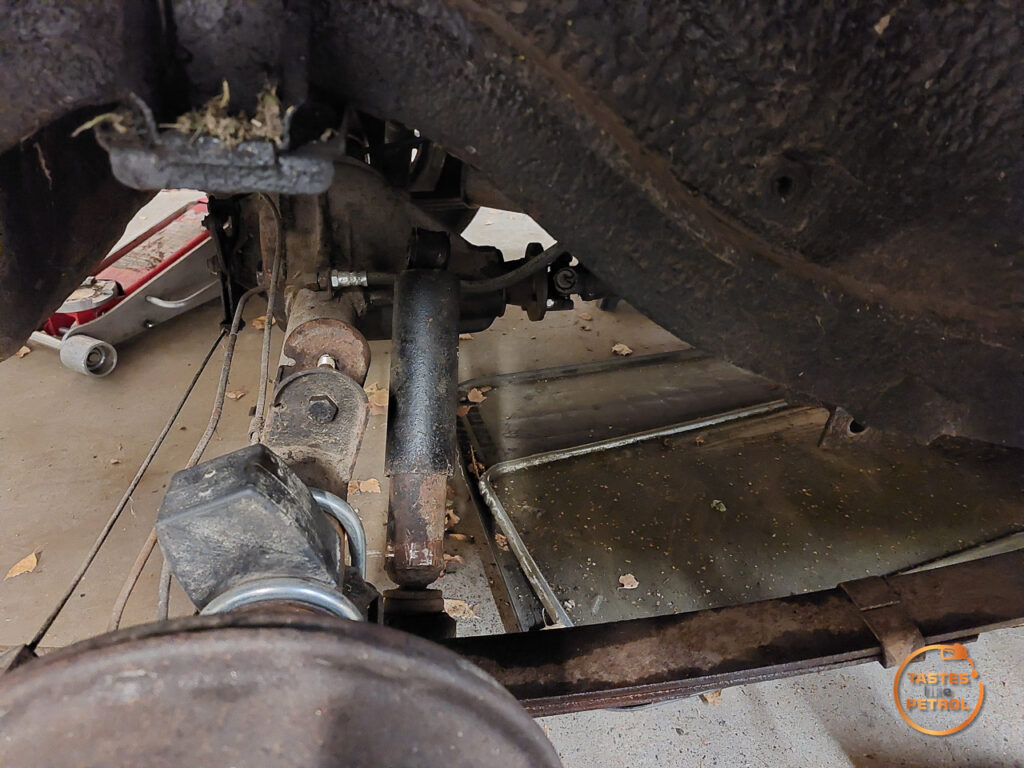
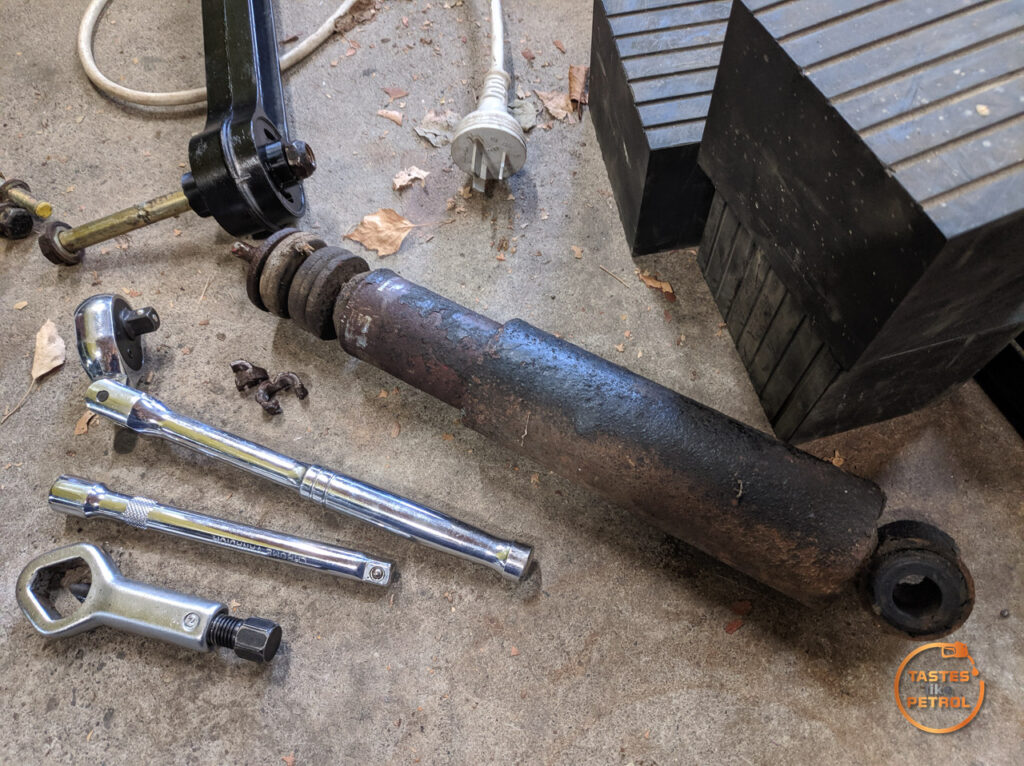
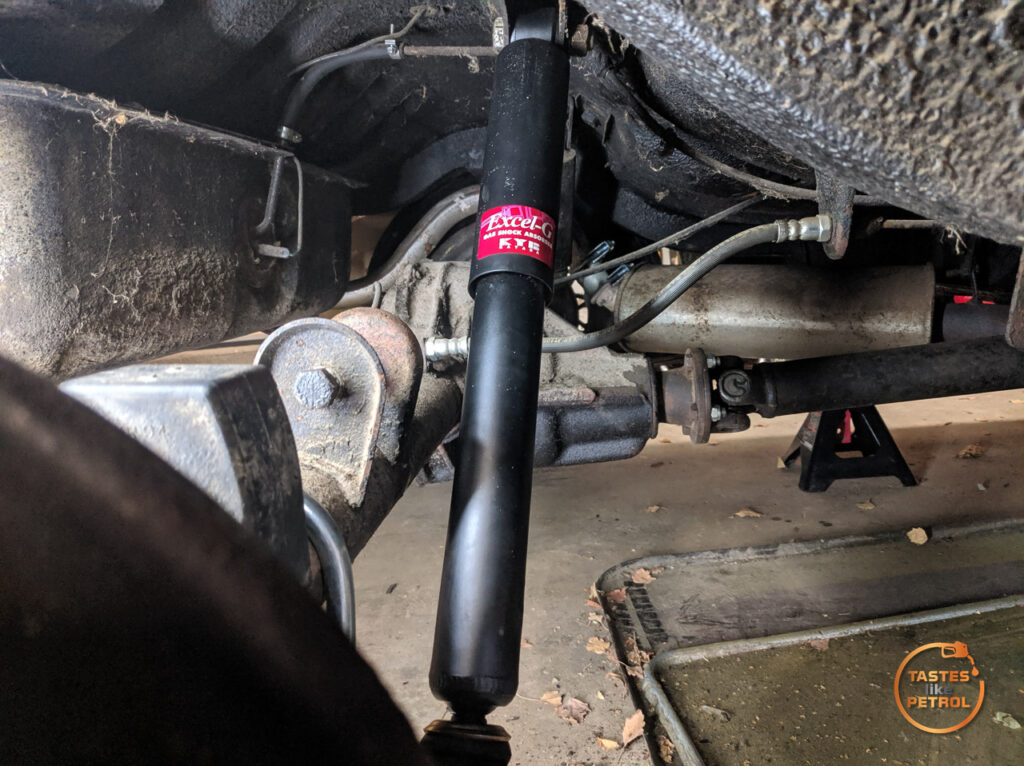
Before I could refit the arm with the flash new bushes, I also wanted to replace the rear shocks. Ages ago, after much research, A fellow Marina weirdo (thanks Bryan) came across some KYB shocks from a Toyota LiteAce van that were very similar in spec to what the Marina takes, so I took a punt and bought a pair.
I tried to remove the old shocks when I took the arm out of the car, but got stuck at rusted nuts on the lower fitting
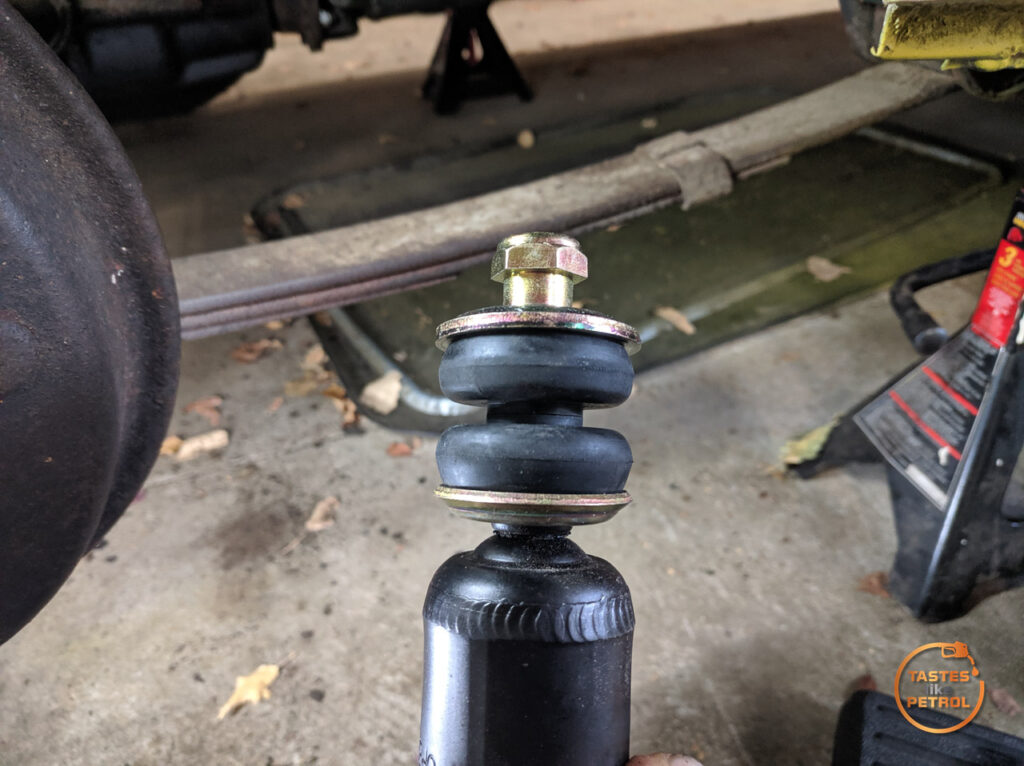
Having been able to remove the top mount though, I could see what difference the top mount on the KYBs had. It turns out, the only difference is that the bush is too wide. The sleeve from the original shocks transferred over fine. I searched high and low for a replacement bush that would meet my needs, but nothing was available off the shelf.
So, with a new razor blade I carefully cut the bush down, taking the same amount off each side
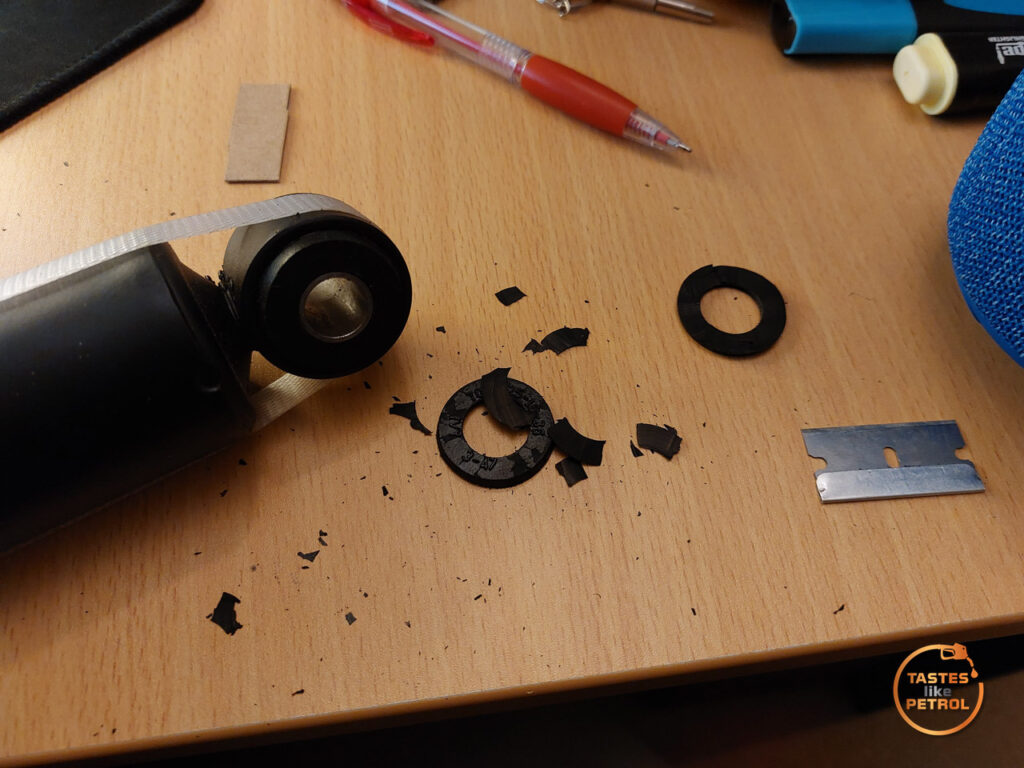
It ain’t pretty, but it’s functional. The shock now fits the top mount perfectly.
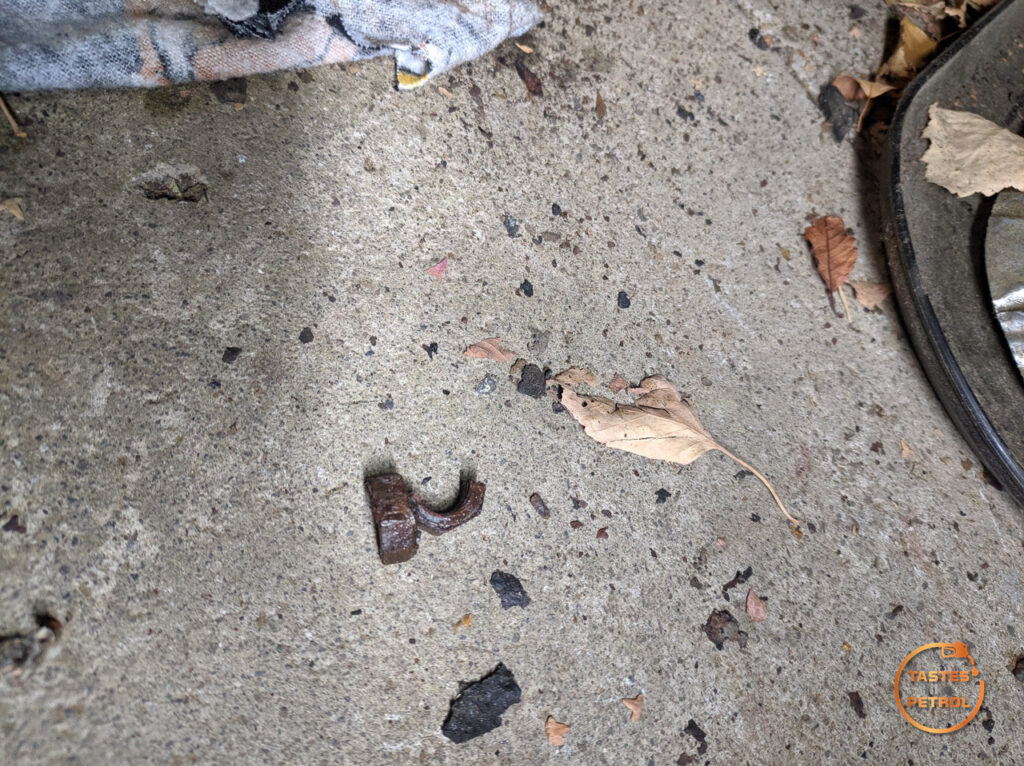
I gave up asking the nuts nicely if they would please undo, and got out the nut splitter instead
Did the job
The old shocks offer zero resistance when compressed. Both totally blown.
The new shocks came with some generic bushes, but I opted to use some Triumph ones that were recommended on the Marina group
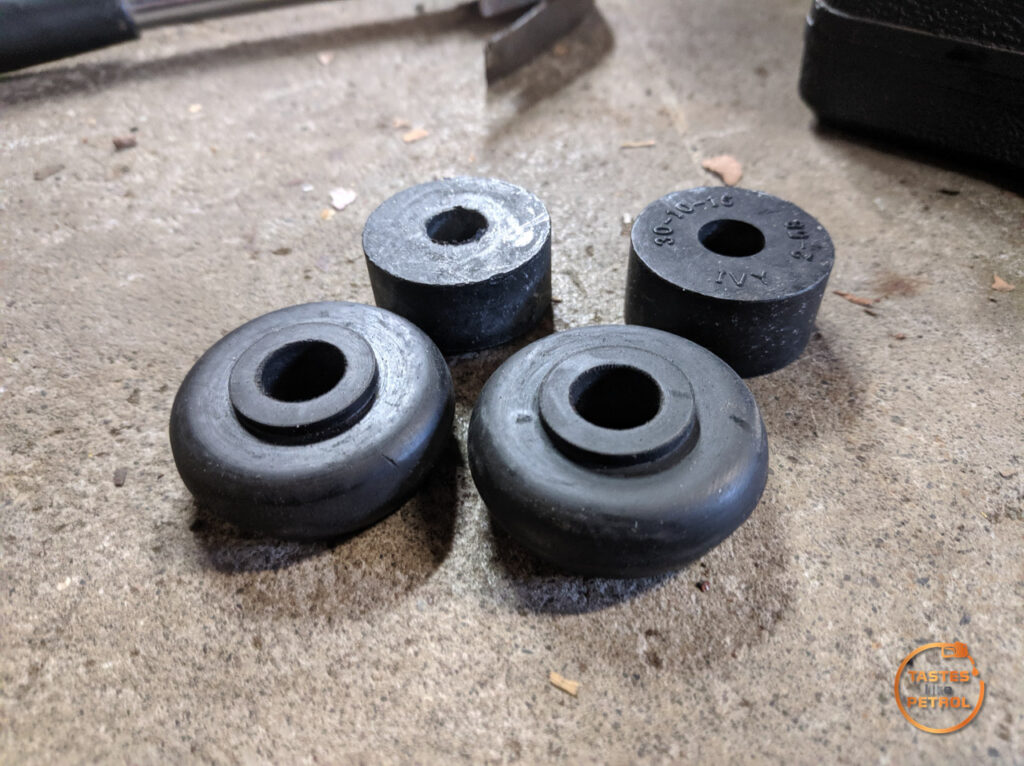
The Triumph ones are wider, and have that little step in the middle to help locate in the lower mount
The new shock went in place with minimal effort
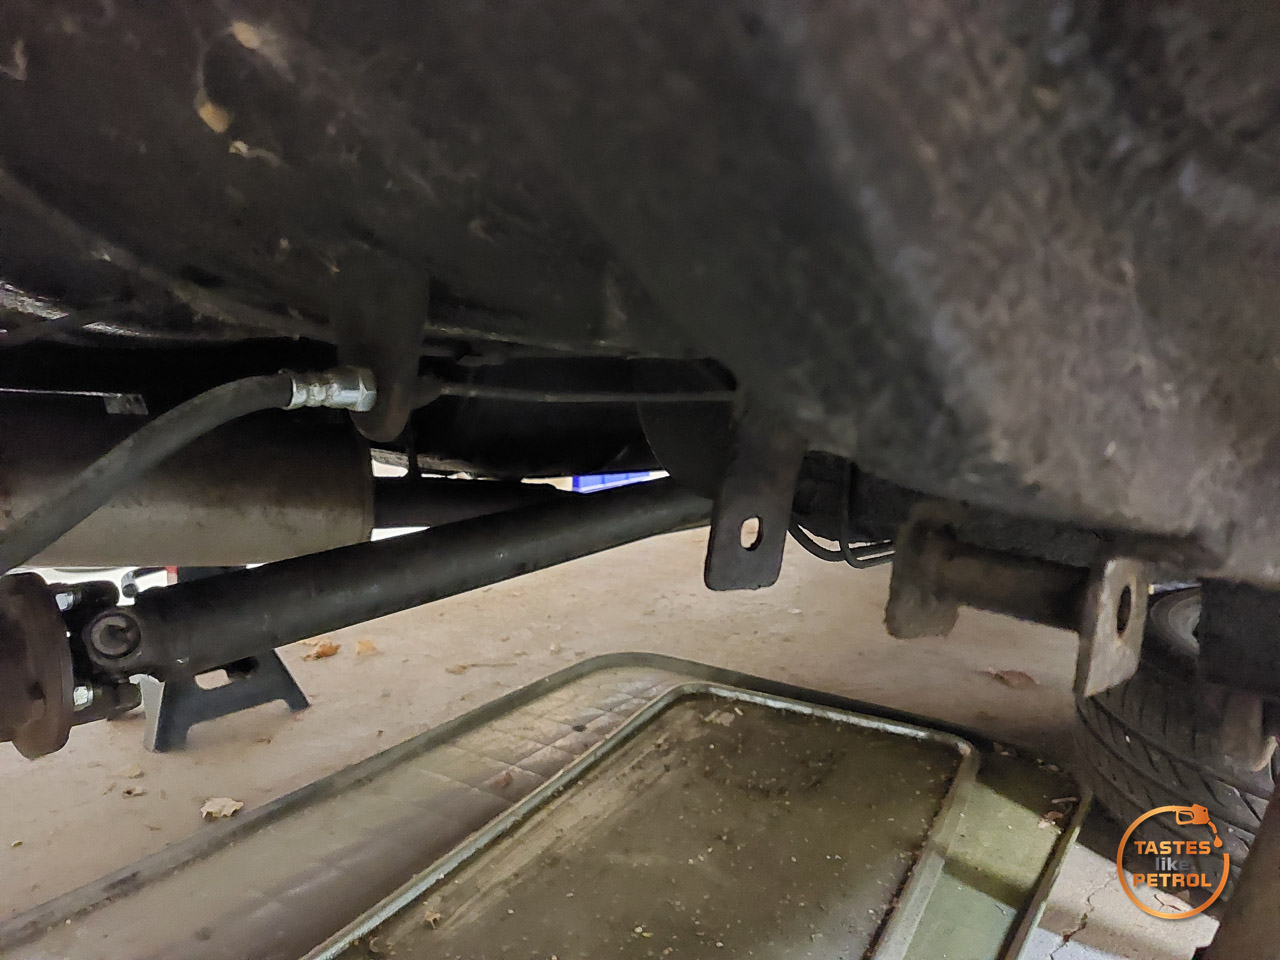
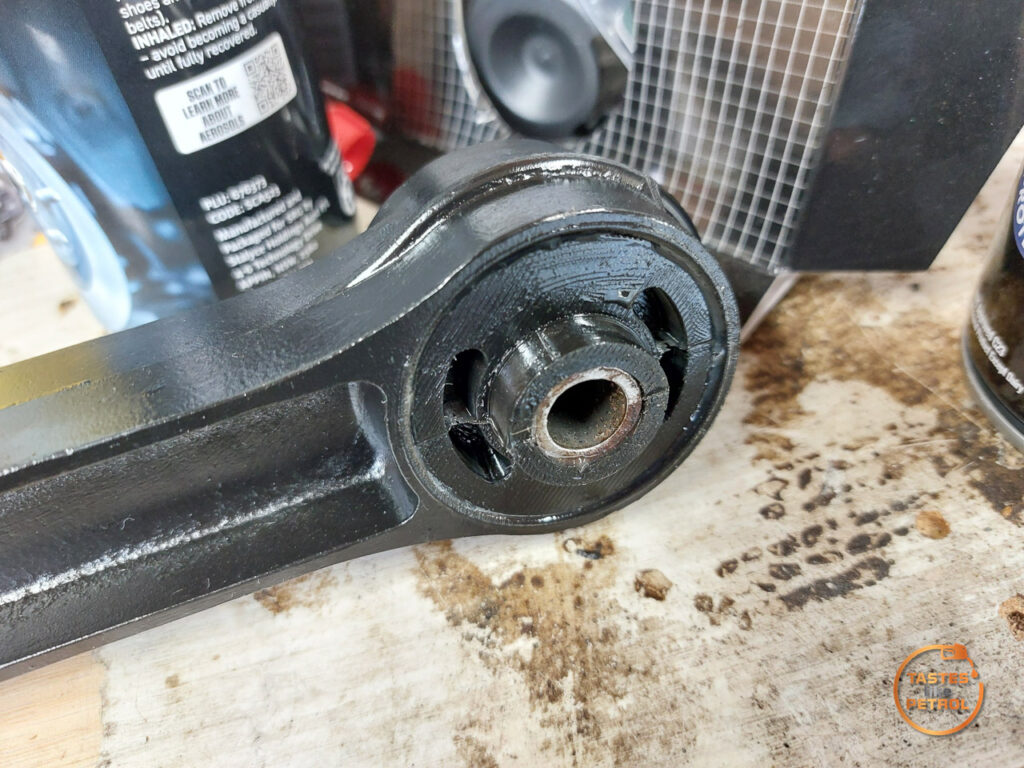
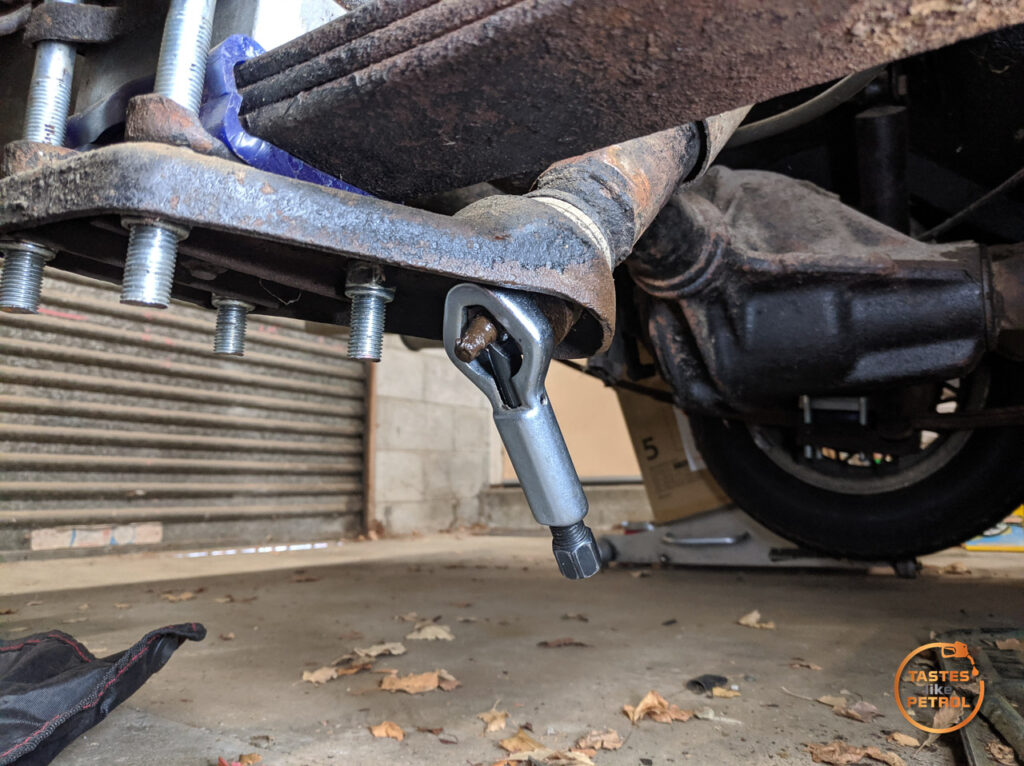
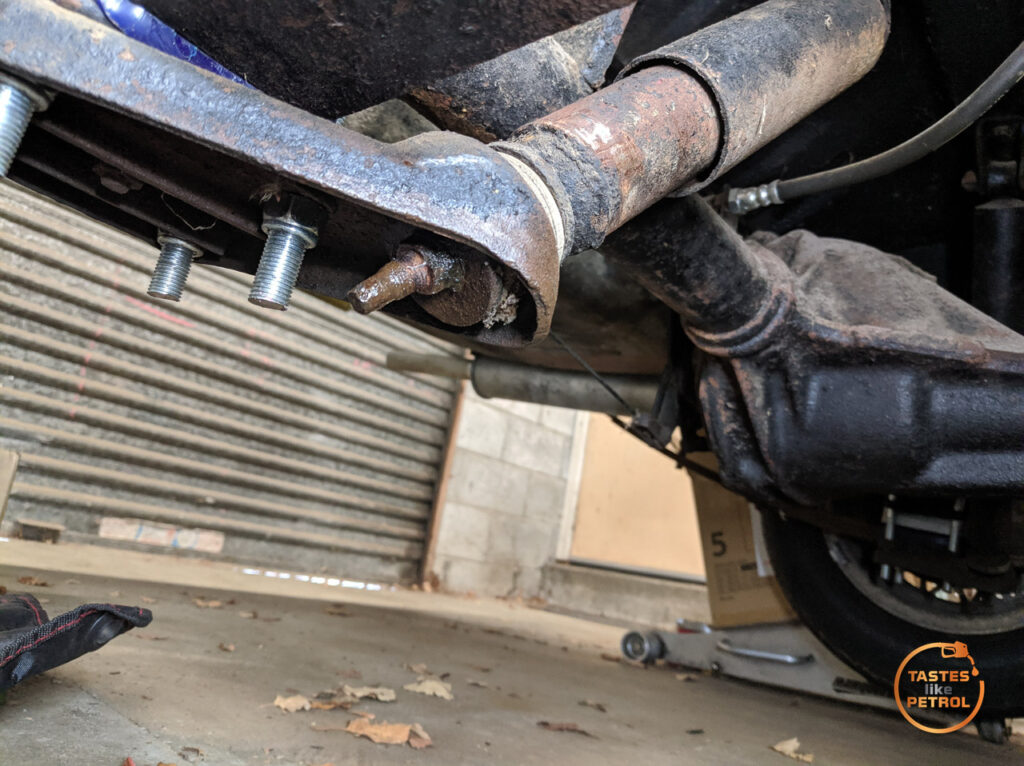
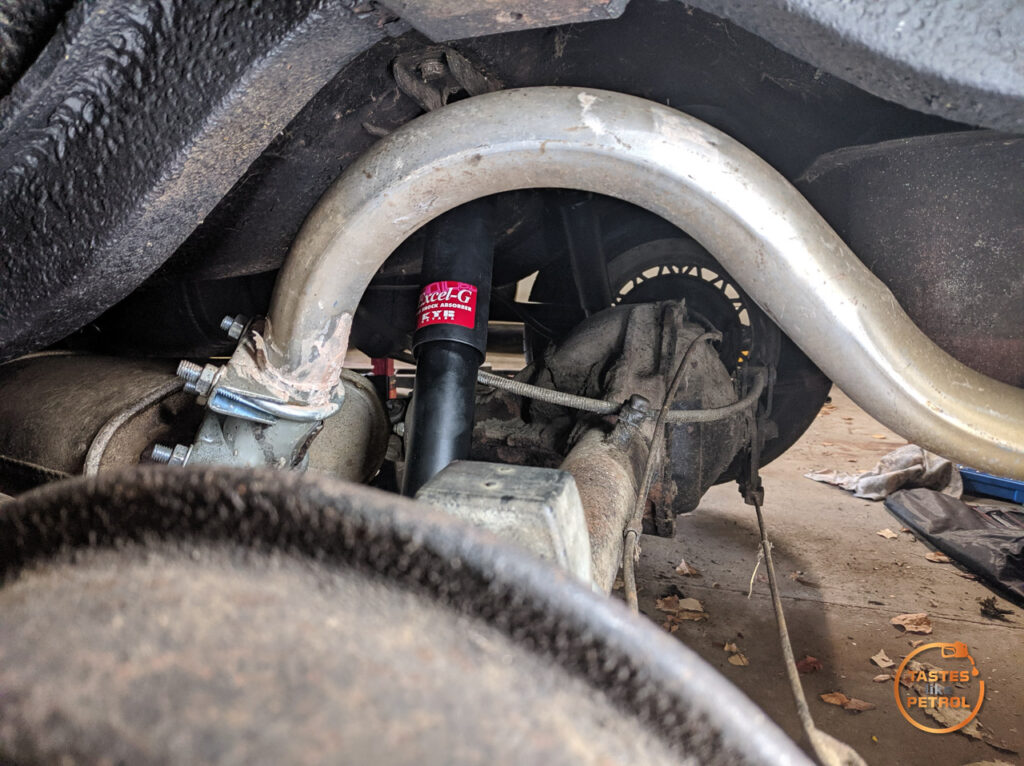
Since the new shock was in place, I could install the radius rod
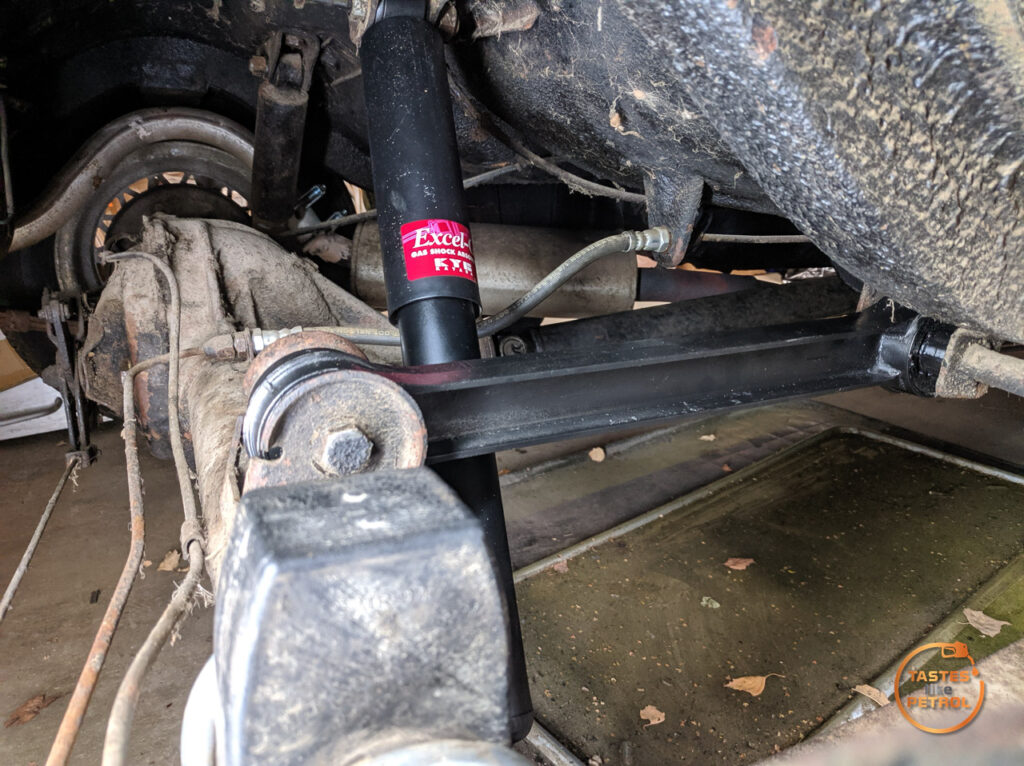
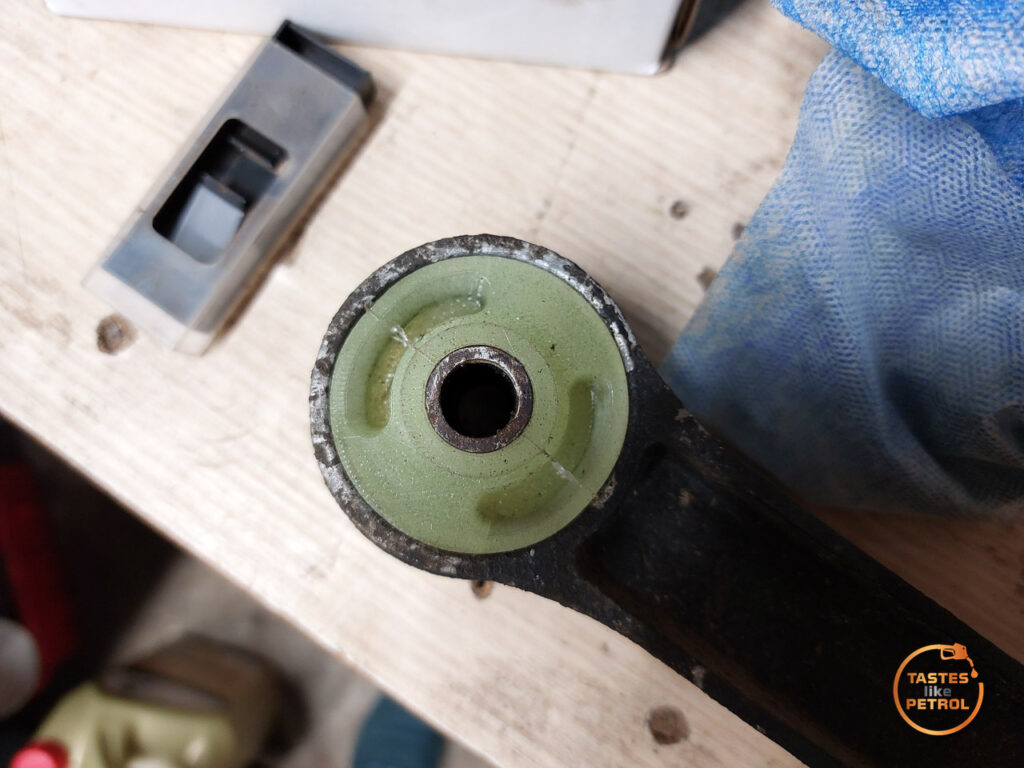
One of my new bushes, doing bush things
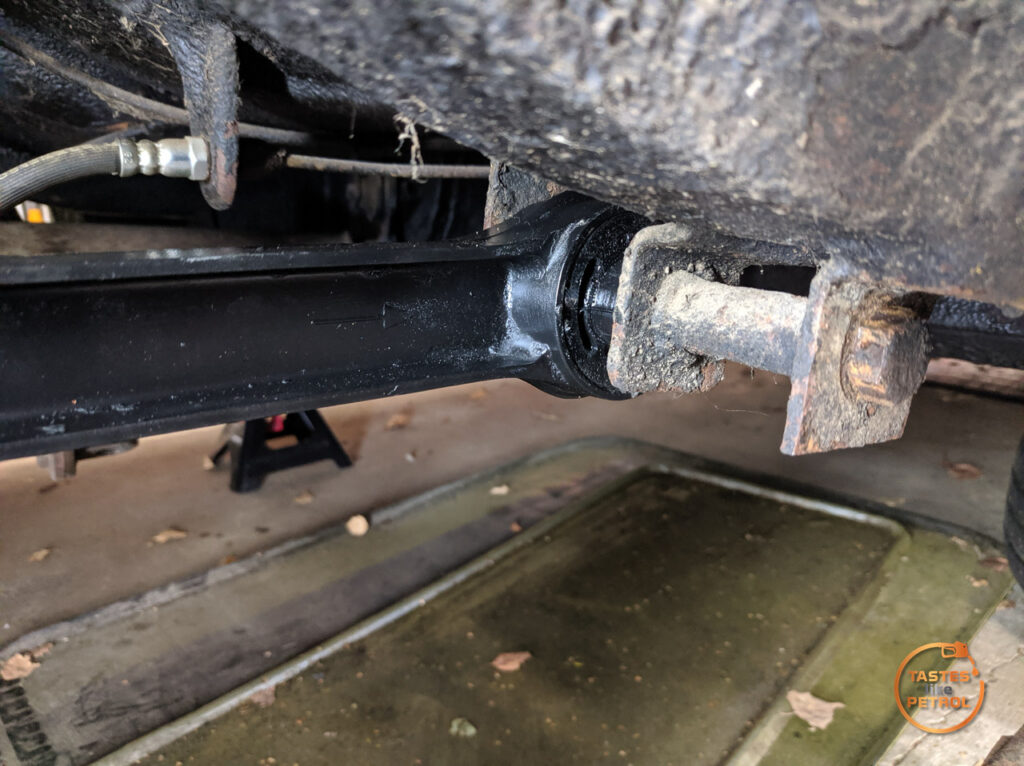
Pretty chuffed with that. Fits like a bought one. I jacked the axle up and down to check articulation of the bushes and all seems good, the bushes didn’t twist in the arm, and they flexed fine as the axle twisted.
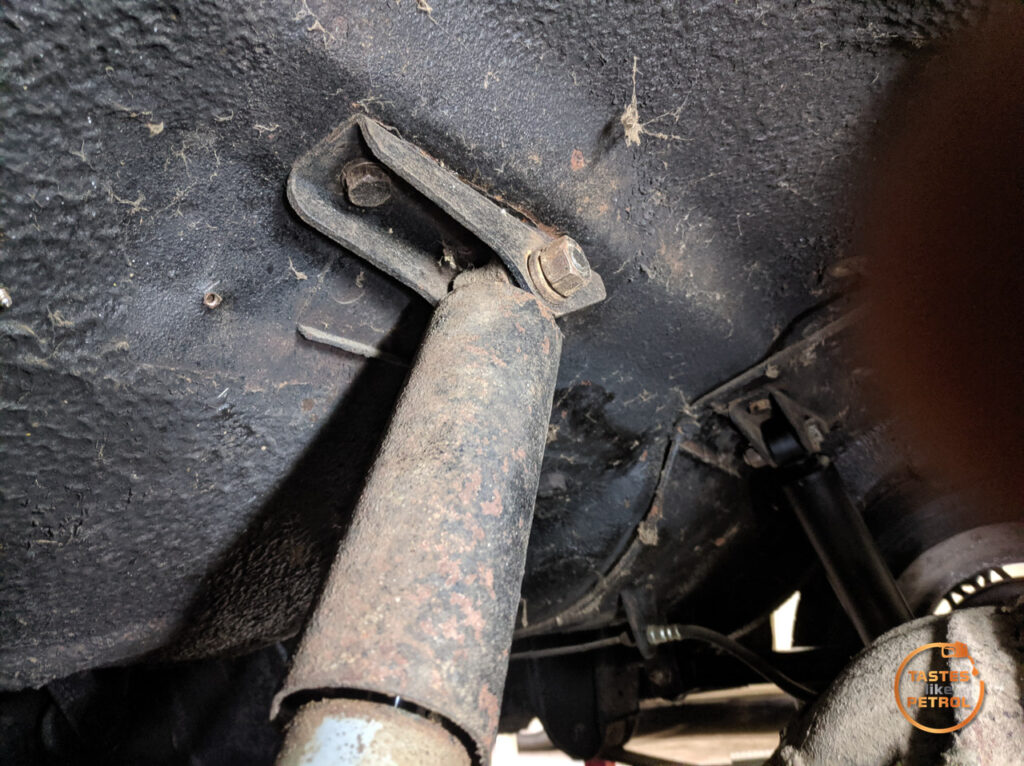
Moving to the other side, it was the same deal for the shock, with the added bonus of having the exhaust and handbrake cable in the way. Some monster installed the top shock bolt this way around though, forcing me to remove the whole mount to remove that bolt
Otherwise, it was a straight forward install
Once the wheels were back on, I could finally take the car off the axle stands it’s been sitting on for a couple of months. I hate having cars up on stands, it really takes it from a “car” to being a “project”.
A quick bounce test on the rear quarter immediately shows the car controls rebound significantly better. Since the car has no WOF currently (although with the new WOF changes just announced, since the Marina is a “vintage” car, from Sept it’ll now get 12 month WOFs, which I look forward to), I couldn’t take it for a decent drive to test everything, but I did quickly visit the NZ version of Mexico and could tell the rear feels more planted, less wayward, and handles bumps better. No idea how much of that is the new shocks (most of it, I suspect) or the new bushes in the arm, but either way, it’s a success.
I want to test the bushes for a couple hundred Ks to see how they fare, but once I’m confident they are going to last I will make a couple more sets and offer them out to fellow Marina owners to buy. Since they are still only 65A shore, they wont be a huge “performance” upgrade, but should still be better than old perished rubber bushes.
Next is to test fit the front telescopic shock prototype mounts and see how all that fits, and if it’s good, get some steel laser cut. I really want the front to feel as good as the rear does now, and currently it’s far too soft.
Parts Used
KYB 343267 – Rear Shocks 2x
Triumph 21A860 – Rear Shocks Lower Bush 4x
Please note these parts are specific to my car and may vary. Please check before ordering.
Awesome work on the bushes!
A can do attitude, with know how.