Since I’m still waiting on the block to return from machining (again), I moved on to fixing some other small issues.
One of them was that the shifter looked haggard. Very rusty, floppy and neglected. I ordered a full set of genuine bushes for it and set about stripping and fixing it.

Since the center console is still removed from the car, it was easy to remove the four bolts from the top and drop the shifter out of the bottom of the car

Up close, it didn’t look any better


I marked the directions for reassembly and took some reference photos as I stripped it all into bits

After removing the lower rod, the bush on the bottom of the shift lever didn’t look terrible, but it was as hard as plastic

The whole assembly is just a sandwich of parts. It all makes sense when you look at it, but together it looks like a mess

I removed the upper rod from the assembly, removed the nuts from the two bolts in the middle, carefully pushed the boot through the plate and then I could wiggle the shift rod through the plate

Next, I used a hammer and a punch to knock out all the old bushes


All the bushes were very hard, perished and had suffered from sitting around.
With all the bushes removed, I hit everything with a wire brush to get the loose stuff off, and then spray bombed them with some black zinc paint. This should protect it a bit better, and it looks 100x better than flaky old rust.
Reassembly is literally the reverse. Before fully assembling, I thoroughly cleaned and greased the pivot ball on the shift lever. The ball rides between two nylon cups. In hindsight, I should’ve ordered a pair of these and replaced them, as the ones I have are a bit rough, but with new grease they should still do the job.

I then reassembled the main shift assembly and pressed the new bushes into the bottom of the shift lever

It’s interesting to note that they are a different style bush to the green ones I removed.
The upper rod has a single-piece rubber bush, and there is a steel sleeve that also goes through it

The transmission end of the lower rod is a bit more unusual. It has a pair of rubber tophat bushes

, and into those press a pair of plastic inserts

I lubed the bushes and pins up with rubber grease and reattached the lower rod


Annoyingly, someone had obviously lost one of those pivot pins, as on the trans end of the lower rod, where it has a cross joint, an ill-fitting bolt had been used instead. I have a new pin on the way to replace it, as that’ll be as sloppy as anything with the bolt there.
The last bush actually resides in the gearbox shift rod

Again, this is one of the green bushes, the same as the bottom of the shift lever (same part). Notice how it’s slightly recessed around the center hole.
The replacement bushes are a harder compound, and flat on the faces

The original parts guide shows that for each of these bushes there should also be an o-ring. See my expert MSPaint cutaway drawing below, showing one end of the tube the bushes are in.

Orange is the bolt/pin, green is the green bush, black is the o-ring, and the grey on the left is the plate that the pin squishes against the bush.

The new bush does away with the o-ring and the recess and presses the steel right against the faces of the bush. I knew the part number had been superseded, but wasn’t sure why, so now I have a set of surplus o-rings. Oh well.
Anyway, the shifter should be all new and fresh now, and hopefully shifts nice and direct. It’s currently sitting in the boot of the car, with all the other parts.
Moving along, in a kinda shifter related task, next was to eliminate the inhibitor switch that had just been clicked into Park and tucked up behind the battery to allow the car to start.

I unplugged it and took it to the bench

After reading the workshop manual and checking the wiring diagrams, I knew which wires I didn’t need anymore, so I unwrapped the bundle

Cut the switch off and depinned all the wires I don’t need from the plug

Leaving me with two wires for the Park position (black/red & black/yellow – which connects the ignition switch to the starter) and two wires for the reverse lights (red & yellow)

I cut the two thick wires, the black/red and black/yellow, shorter and soldered them together. This shorts the Park wires together and will allow the car to start.

I left enough to be able to heat shrink them

Next, I crimped a connector for the reverse light switch on. I would’ve liked to use an OE connector, but I didn’t have one for this end of it, only the one on the reverse light switch


Which also meant cutting the connector off the reverse light switch and crimping a matching connector on that

I then wrapped my little harness in fabric tape

and finished off by plugging the empty holes with a light smear of sealant to help keep moisture out

It looks much better than having a stupid inhibitor switch hanging around

I did, of course, test it

I was pleasantly surprised to hear it also had a cute little reverse beeper in the car, to tell you you’re going backwards.
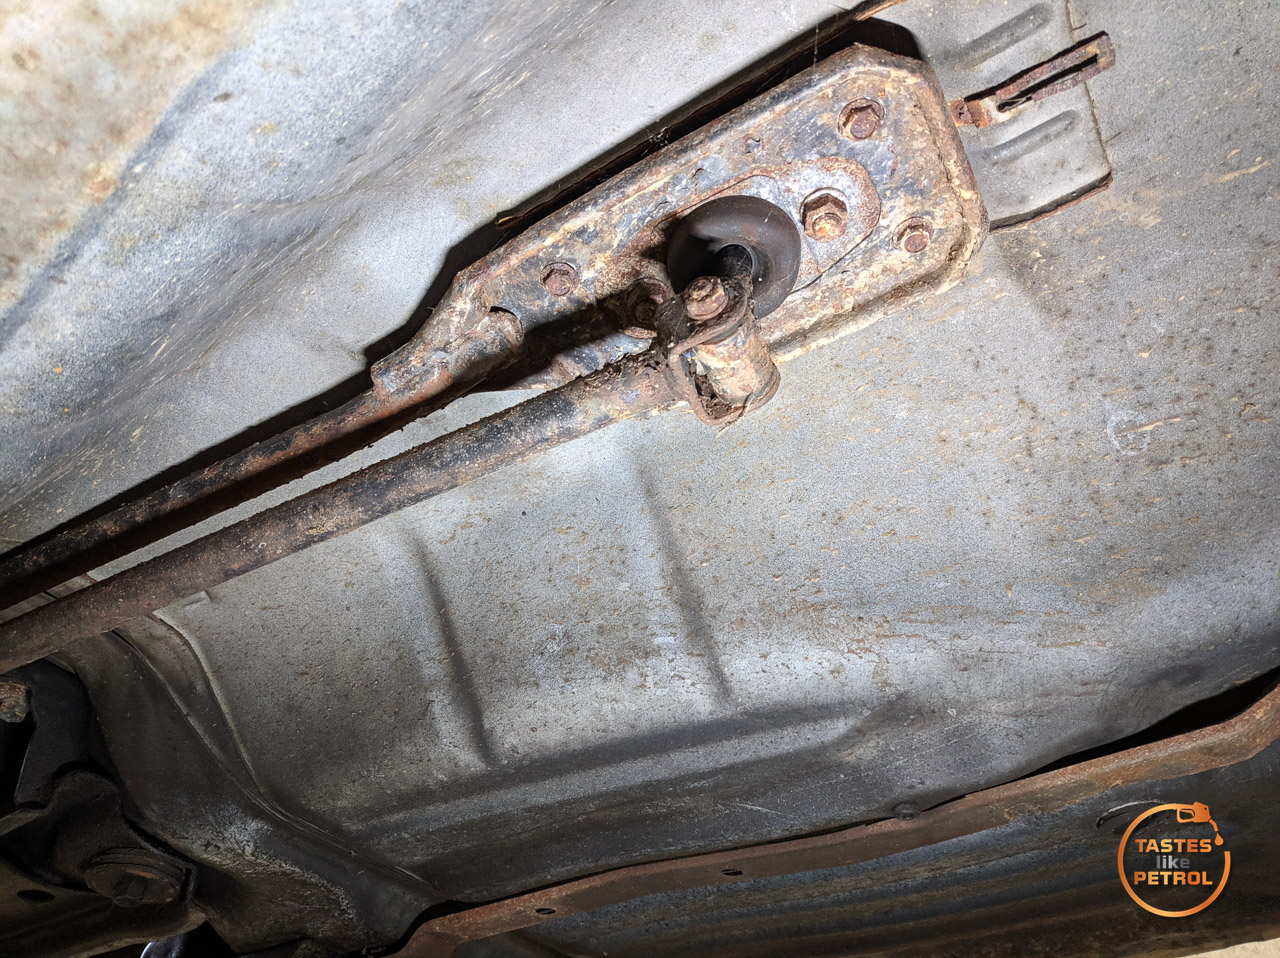
In a typical ADHD flurry of random progress, next on the hit list was to remove the trans mount and replace the bush with an uprated Monster Sport one.

I knew by touching it that the bush was very soft and floppy. I removed the single bolt through it and removed it from the car

Interestingly, it had these “stoppers” on each side of the bush

There isn’t a heck of a lot to the bush at the best of times

And when it’s cracked and flogged out, it offers almost no resistance to movement

The Monster Sport bush is still rubber, but a harder compound and a far more substantial build


I marked the orientation of the bush so I could get the new bush in a similar place, and then, using a reciprocating saw, cut through the sleeve of the bush until I could use a hammer and punch to knock the bush out


And then it was as easy as finding the right size socket to use to press the new bush into place, making sure to align it as the old bush was

Nice new uprated bush ready to go

Because of the design of the new bush, you cannot fit the stoppers on each end now, but I guess it doesn’t need them

I also have the rest of the Monster Sport engine mounts to fit when the engine goes back in.
As you can see in the above photo, I also replaced the stock rubber bush on the clutch cable with a Cusco one from an HA36S Alto Works. It was a straight fit, other than having to remove the rubber boot to fit it, as I couldn’t get the bush over the metal collars that retain the boot. The outboard collar slipped off with the boot and could be reused, but I had to cut the inner collar off and replace it with a small ziptie.
What else. Oh, yeah, the ground cable. I recall from viewing the car at the auction that something was funky with the battery ground cable

There wasn’t one. It was a bare stub of a cable bolted to the inner guard. Cool.
So I raided Pick A Part and, after digging around some different cars, found this from a Daihatsu Sirion

Which turned out to be perfect

It’s nice not have to use jumper cables to ground the battery whenever I want to liven the car up.
So that’s all for now. I will hopefully have the block back this week, but I’m still sans genuine conrod bearings as the supplier in Japan is being… slow.
In the meantime, enjoy this sneak peek of the future

Parts Used
Monster Sport Engine Mount Set – 647500-2000M
Shifter Bushes – 2823160B10 x4, 0930514006 x1, 0930612009 x2, 0932014018 x2 (and o-ring 0928012014 x4 not used)
Please note these parts are specific to my car and may vary. Please check before ordering.