Last trackday was so I could try the car out as close to stock as I could handle. Now that was done, it was time to throw some more bits I had been holding onto, onto the car.
The first to go were the front brake pads. I quickly found the limits of the Dixcel ES pads at the last track day, with them turning my friction material into smoke and not a heck of a lot of stopping power.

I took the RH side pads out first and although certainly glazed and shiny, they didnt look too bad

I was interested to note that the fancy copper brake grease the pads came with was all gone, leaving just a hard clump of gunk I had to scrape off the clips the pads are meant to slide on

After much research, the general consensus for 86/BRZ owners that track their cars much harder and faster than I will, was to use Endless MX72 Plus pads, so I grabbed a set from Japan.

On paper, the specs arent that different to the Dixcels, other than being able to go up to 750c instead of 600c. Little did I know the two are worlds apart.
Annoyingly, the Endless pads do not come with shims, so unless I wanted to risk them squealing and being annoying, I needed to steal some shims from other pads – in this case, the Dixcels.


I fit them with plenty of the ceramic grease the RDA pads come with, and made sure the sliders were still greased and moving freely

The left-hand side is where it gets a bit more interesting. This is the side that was smoking hard after every session. I’m guessing due to the circuit being a lot of right-hand turns, the left front brake is having to take more weight and force.
It had gotten hot enough to cook the coating on the shim


Again, all the brake paste was cooked into hard sludge. Removing the pads showed that I had well and truly overheated them


What was shocking to me was that just using my finger, I could crumble the edges of the friction material like it was made of plaster. Compared to the other side, the pad surface was very rough and crumbly.
Nice clean and new Endless friction material

Fitted to the car with some new ceramic paste, and some shims I stole from the pads that came in the car when I got it (since the Dixcel ones were cooked on this side).

The rear pads were fine, with plenty of meat and the grease still present

With the brakes all set to go, I moved onto the suspension.
I got lucky on Facebook Marketplace shortly after buying the car, and ended up with a cheap set of Cusco Touring-A damper adjustable shocks. Designed as OE replacements, but giving 40 steps of adjustment from soft to firm, I wanted to give them a try and see if I could tune the suspension a bit.
I started with the fronts. The shocks I got had a pair of fronts already assembled with OE springs, so I could build them up on the bench with the new STI top mounts I bought, and not have to disassemble the stock ones on the car at all.

One of the main reasons to change the shocks out was that my front top mounts wouldn’t pass a WOF due to extensive cracking

It turned out the replacement shocks also had cracks in the top mounts, albeit not as bad

I had purchased a set of STI reinforced top mounts to replace them regardless, so it wasnt an issue

I removed the old top mount


Fit the new mount, and it was ready to fit to the car

Removal and fitting was pretty simple. Undo the lower bolts on the knuckle, undo the sawybar link, disconnect the brake hose and ABS wire from the strut, and then its three nuts on the top mount to make it drop out. I use a bungee cord to hold the knuckle/hub back and stop it flopping down.


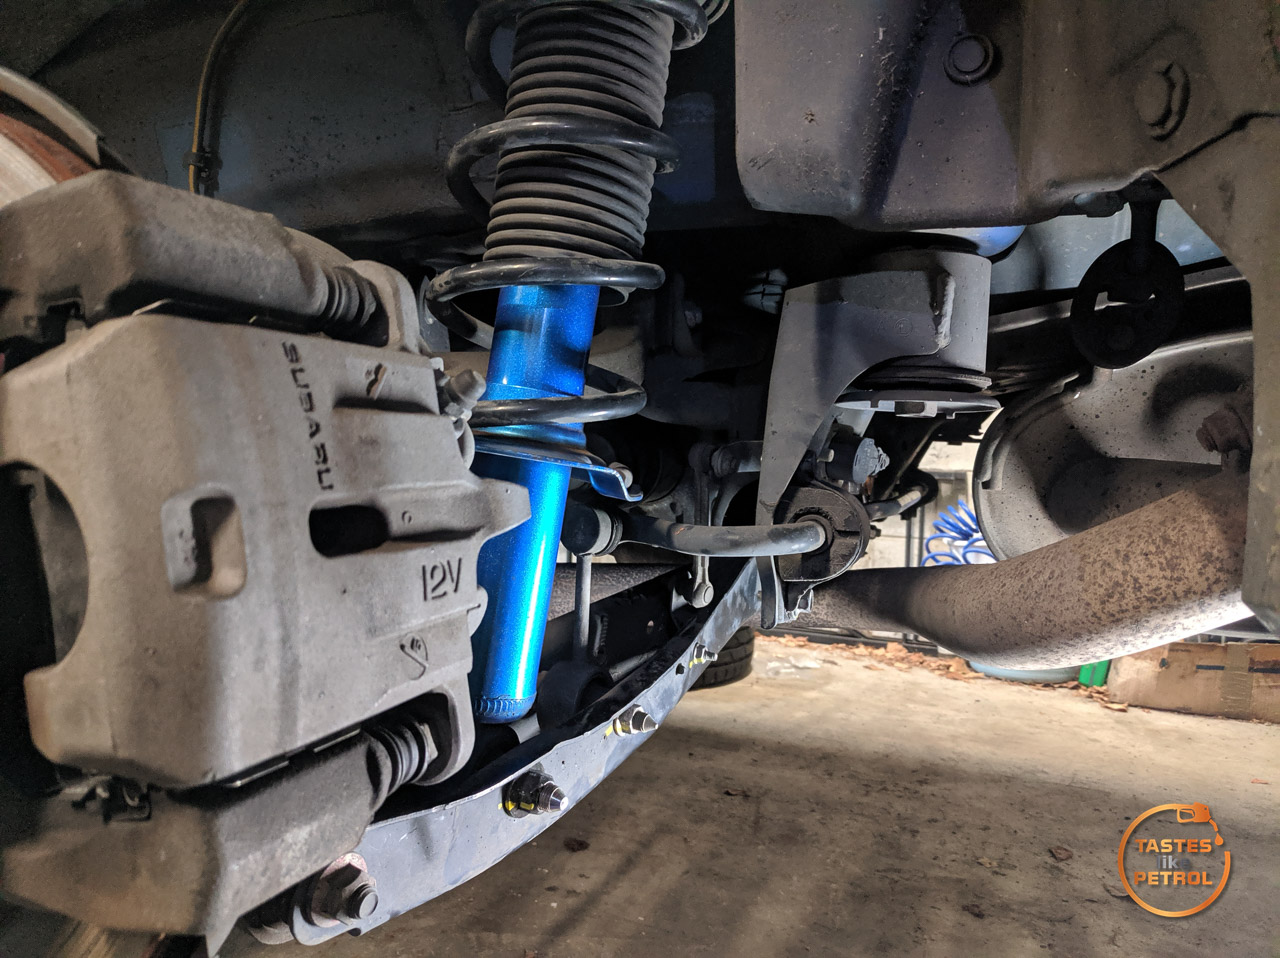
The replacement just bolts in, including another small upgrade, a Whiteline camber bolt, set to maximum negative camber (1.5 degrees, as confirmed by the alignment afterwards)

Whilst in the general area, it was also quite easy to swap the front subframe bolts out for the uprated “TS” (Tuned by STI) bolts. Two on each side

The new bolts have a thicker flange on the head, but otherwise appear the same. I probably wouldn’t bother with these

I swapped them one and at a time, torquing them to spec as I went, so as not to disturb the subframe alignment.

With one side done, I repeated the same work on the other side, subframe bolts and all

Once done, I moved to the rear. These were bare shocks, so I had to remove the old ones first.
I first removed the boot lining so I could access the top mounts for the rear shocks


To drop the shock out, you need to lower the arm by disconnecting the inner bolt where it mounts to the subframe

The LH side has the added bonus of the headlight adjuster link, make sure to disconnect this

Undo the subframe bolt, the swaybar link, and the bolt from the bottom of the shock and let the arm swing down. You do not need to disconnect the bolt on the hub end of the arm, leave that in and use it as a pivot (I removed it because I’m a fool)

With the shock removed, I disassembled the strut and swapped the spring and top mount to the Cusco shock

It helps to take note of the alignment of the spring and top mount when moving it from the old one to the new shock, so you know which way to reinstall the strut.

It helps to use a jack to lift the inner end of the arm up whilst you wrangle the shock into place, and then again to lift the hub so you can torque everything at ride height.

I also used uprated bolts for the lower shock mount. Once again, thicker flange but otherwise the same.

The adjuster for the damper sticks a fair way into the boot

I cut a small slot in the lining on each side for the adjuster to poke through, so that I could still access the adjuster knob on the top

Finally, I installed the front STI upper and lower rear subframe stoppers. Normally, there is a big gap between the subframe and the body of the car, which allows the subframe to move up and down when power/torque is applied. The stoppers fill that gap with polyurethane rings, to reduce movement without increasing the NVH too much.

For the top ones, I removed the bolt and slipped the top plate out. The stopper goes between the bush/subframe and the plate


The lower one goes between the subframe and the lower brace


After an alignment, the car was feeling very good on the road, so all that was left to do was take it to the track.
Parts Used
Endless MX72 Plus Front Brake Pads – EP386MXPL
Cusco Touring-A Front Shock – 965 65T F
Cusco Touring-A Rear Shock – 965 65T R
STI Front Strut Mount – ST2031055001 x2
TS Front Subframe Bolts – SU003-05212 x4
TS Rear Lower Shock Bolt – SU003-05213 x2
TS Rear Lower Shock Nut – SU003-05235 x2
STI Upper Stopper – ST20176AS000 x2
STI Lower Stopper – ST20176AS010 x2
Please note, these parts are specific to my car and may vary. Please check before ordering.