I haven’t posted much recently, but things have been happening in the background, namely a slow but steady engine rebuild.
To start us off, I got the block back from the machine shop. This time I had the crank machined, so the main bearings were within tolerance, and the new +0.25mm oversize (undersize?) bearings fitted. They also checked the crank thrust run out, which was well within spec with the new standard bearings.

This meant I could finally move onto the rebuild proper. Unfortunately, like everything on this car, I got quickly stopped in my tracks.
I thought, hey, it’d be cool to check the weights of the rods and see if they need any work to balance them and get them close to the same weight. I’m glad I did.
So I grabbed the kitchen scales, and placed the rods on one by one.
Cylinder 1 rod

Cylinder 2 rod

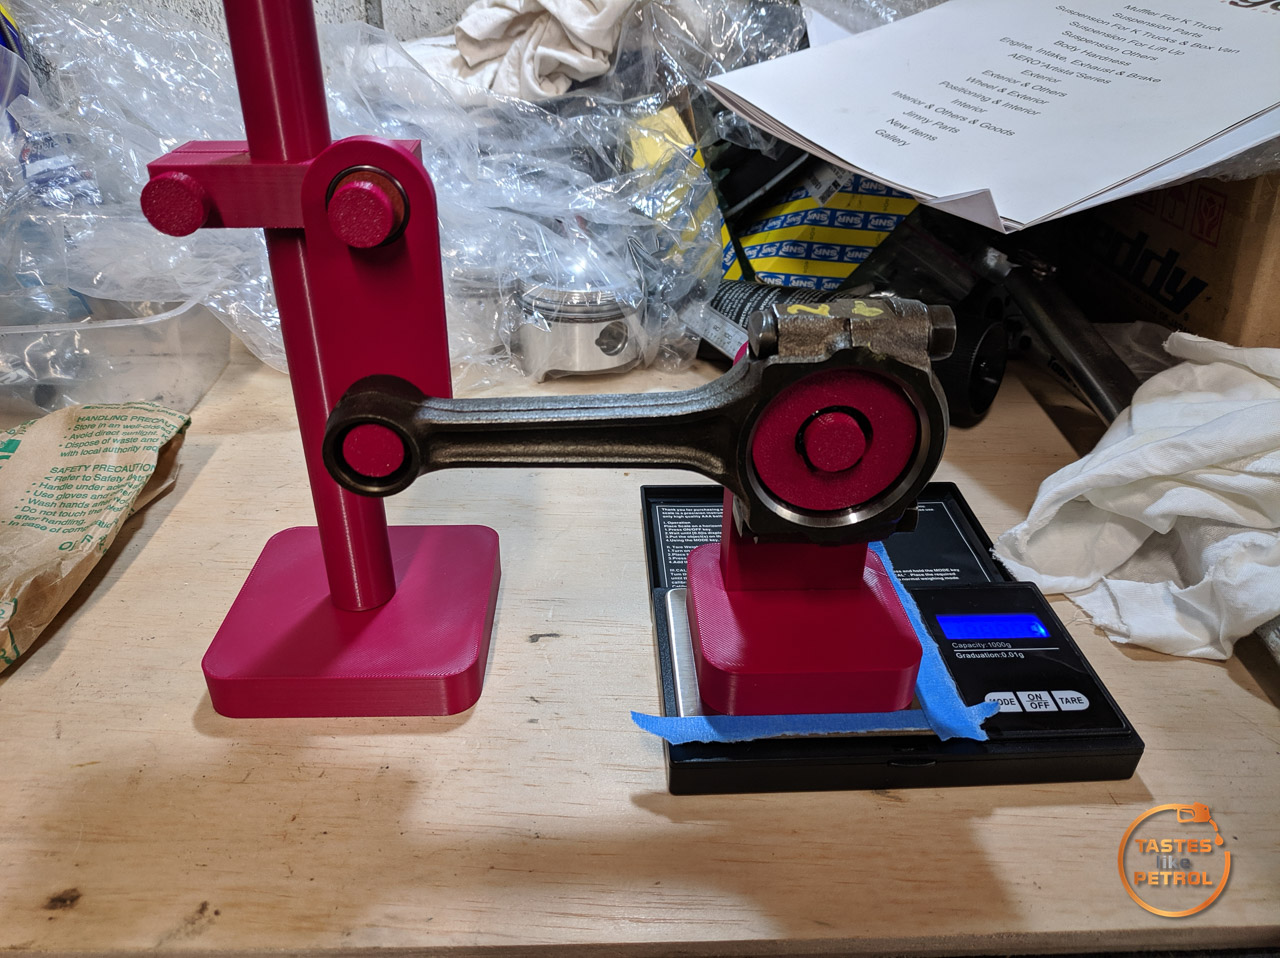
and the new genuine rod for Cylinder 3


Ideally, if you’re balancing the rods and matching them, you want them within around 1 gram of each other. The two stock rods were already 2g apart, but the brand-new rod was a further 7g heavier. That made it 9g heavier than the lightest rod and that is way too different for an engine that will be turning to 9000RPM regularly.
For reference, this is the old Cylinder 3 rod that has damaged by the cracked piston pin and had to be replaced

Basically the same as Cylinder 2. Interestingly, despite being the same part number, and looking visually identical, this is one of the rods from the original Alto engine

All of these were way too gone to reuse, but it’s interesting to note regardless.
As a side note, the Greddy pistons were all identical at 182g each

Moving along, so what’s the deal with the new rod?

It turns out Suzuki superseded the conrod to the later K6A rods, which have a couple of pretty major differences. The first is that the oil squirter is no longer just a hole in the side that vaguely shoots oil somewhere

it’s now a bigger, raised area at the base of the rod which points the oil jet upwards

The second major area is in the middle of the rod, where the text is. Its now on raised platforms.

So what do I do? I could replace the other two rods, at nearly $300 a piece, but since they’re heavier I would then need to have the crank balanced to match.
Or, I could go full caveman with tools, and make it match.
I chose option 2. Make it work.
Now, I didn’t realise it until I went deep into the rabbit hole, but you can’t just take material off anywhere on the rod until the total weight matches, you need to know which end the weight is on, and take it from there. This is because the top of the rod only really goes up and down, whilst the bottom of the rod has rotation inertia. The weight at the bottom of the rod is the most important, but it all matters.
To do this, you need a tool that hangs the rod and lets you precisely measure the weight of each end, without the other end affecting it. Normally, you’d pay hundreds for a tool to do this, but because of the advancements in technology, I have a perfectly capably 3D printer sitting at home, and for a small fee I could buy the plans for a tried and tested jig to use. These guys made a great video on how to use it, and sell the files you need to print it. https://2trackmind.com/products/connecting-rod-balancer-jig-3d-print (not sponsored, it’s just good)
After some tweaking because my rods were too small for the adaptors, and about 7 hours of printing, I had a tool

I set the jig up and hung a rod off it

There are a lot of variables, and every little thing can change the results, so later on I actually taped both the jig and the scales to the table so I could get repeatable results. I also replaced the kitchen scales with much more accurate scales (for illicit items, according to the guy at the brewing shop, who totally believed me when I said they were for weighing car parts) that can measure a fraction of a gram.
This is the big end of rod 1

and rod 2

They’re pretty darn close. Close enough I won’t bother to change them.
The new rod 3 though…

It certainly ate all the pies.
I then flipped the rig around and tested the little end of the rods

Cylinder 1 and 2


and rod 3

5 grams heavier than the other rods. That’s a lot of weight to take out of the little end.
With a bastard file, a power file and a Dremel with a grinding stone, I got to work cutting the weight out. Now, there are rules about how and where to take off the weight. It must be smooth, and ideally either in dead weight like casting lines, or places that won’t impact the strength of the rod.
In my case I started by shaving down the sides of the big end/bearing cap, where there was some extra material, but it wasn’t until I started to shave down the casting marks down the sides that I really got the gains. This is what I ended up with

I also carefully smoothed down the text in the middle of the rod. I didn’t want to go too deep as that could impact the strength

The bearing cap got a slight tickle too

After a ton of measuring and going back and forth from the messy area

I got the new Cylinder 3 rod identical to the Cylinder 2 rod

The little end was still about 2.6g heavier than the other rods, but I was out of material that I was comfortably to remove from there, so I opted to take it from elsewhere on the rod.
So the new rod now matches both the current Cylinder 2 rod, and the old Cylinder 3 rod, which is good enough for me.
After a real thorough clean, it was time to install the fancy Greddy forged pistons
These little retaining clips for the pistons pins were a pain to install

I have no idea if It’s what It’s for, but the cutout in side left side and the slight notch on the right side of the hole made installing the clip easier

I placed the clip in the notches, and then using my fingers pushed the open end of the clip down, which got it mostly into place

A gentle poke with a pick and it would pop into the groove. As per the workshop manual, the opening in the clip needs to either be at the bottom, or top, not the side. After lubing up the piston pin, and installing it and the piston on the rod, the other clip gets installed.

I then installed the new big end bearings. I used a genuine set ordered from Japan for these. Make sure the area the bearing sits in is clean and free from any oil and then the bearing just snaps in place.


The cap then got placed back on, ready to be installed on the crank. Take note to install the cap the right way around, it should match the piston. In most cases, the cap and rod bearing tangs will be on the same side too, which is an easy way to remember.


I now had a full set of pistons and rods ready to go

I install these shortly, but unfortunately the rebuild kinda stalled a little after that thanks to the next curveball thrown my way.
I stripped the two oil pumps I have, one from the Alto, and one from this Cappuccino engine
The Alto one was trashed, despite being suspiciously clean on the outside


So much scoring. It must’ve had a lot of metal go through it


It really does go to show, there are no good parts on the old Alto short block, and it was a good idea to get a donor.
Sadly the Cappuccino oil pump didn’t completely avoid damage either


It’s significantly better, with no damage to the housing, but I noticed this on the gears. Minor indents where something has gone through the pump


The good news is that you can still buy new genuine pump gears, so I have a set of those, and a rebuild kit for the relief valve on their way from Japan. It shipped about 20 mins ago, so should be here after the weekend. Once that arrives, I can push forward and really make up some time on building the engine.
Parts Used
Greddy Piston Set 65.5mm (+0.50mm) – 13596605
Taiho Main Bearing Set +0.25mm – M658A025
Suzuki Big End Bearings STD – 12181-54A50-0A0 x6
Suzuki Thrust Bearings STD – 12300-60840
Please note these parts are specific to my car and may vary. Please check before ordering.
Wow! That’s some serious work!