Moving on from the bodywork and engine for a bit, I thought I would have my first look at the brakes.
I knew from when I first looked at the car that the brakes were in dire need of work, the rotors looked like they had lived under the sea, and the fluid was old and dark. By some miracle, they still worked when the car was delivered, but the RH front locked on soon after.

So I ordered some bits from Japan and set about rebuilding the calipers
The first job was to remove the calipers. These are quite a simple design; the whole caliper is held to the knuckle with two bolts, and that’s it. No bracket, so separate slider pins, just the two bolts


Before I could remove the caliper, I had to remove the pads. This is done by pulling out the little spring pin and knocking the locking block out of the side of the caliper

The pads should slide out after that’s removed

BTW, the manual is very strict about not touching the “pentagonal bolts” which hold the front of the caliper to the rear. It’s the first time I’ve seen something like this used. I believe these are thread-locked in place too.

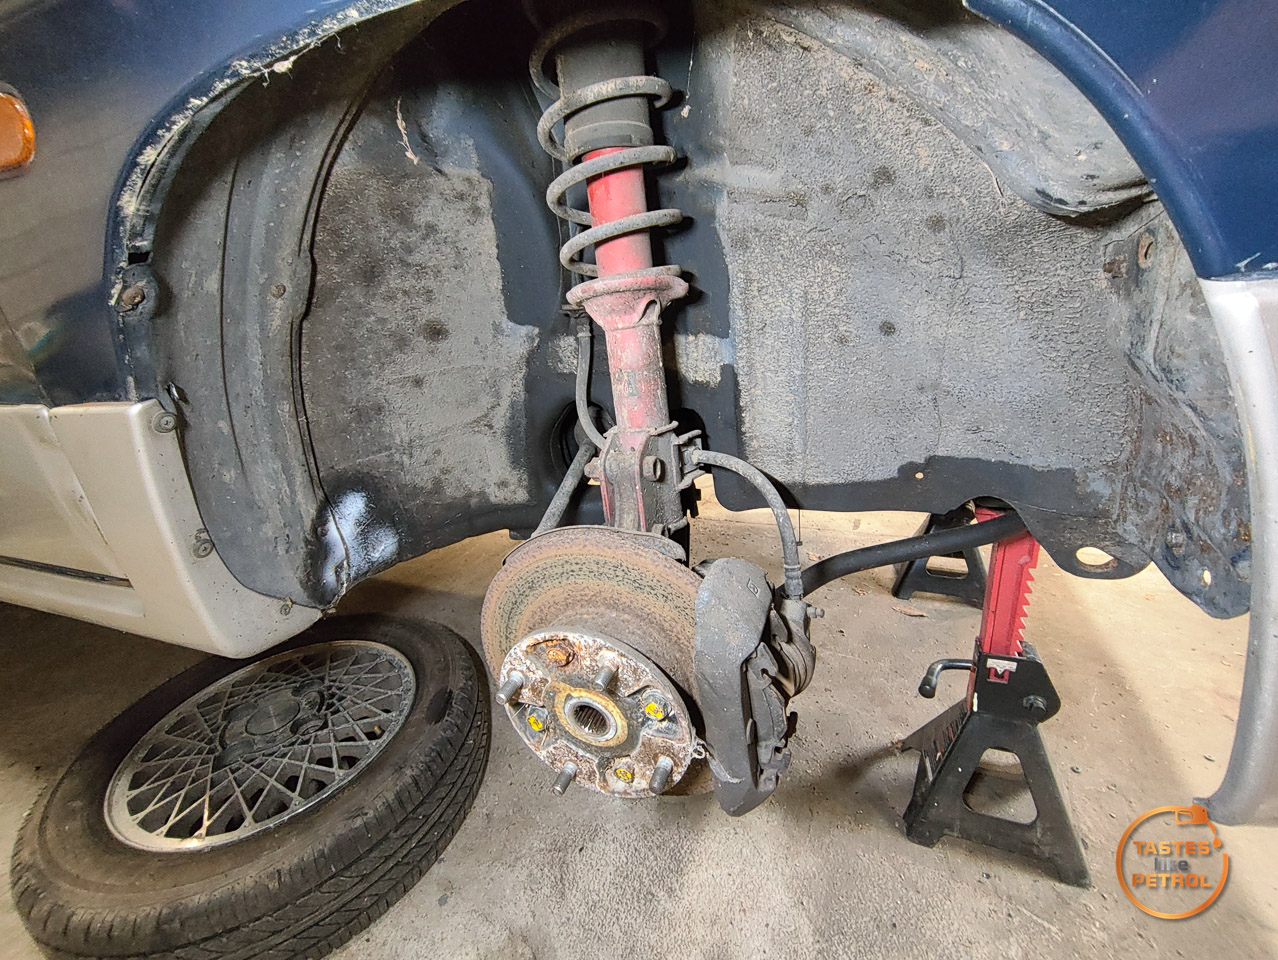
Now the brake hose can be disconnected and removed. These little hose blocking clips come in handy again.

The two bolts in the rear of the caliper can be removed now, and the caliper removed from the car. This really highlights the dire state of the rotors. No amount of skimming would save these, so hopefully the replacements I ordered are right.

As a small note, the manual mentions it, but obviously whoever touched these brakes last didn’t read it, as this retaining plate on the rear only fits one way. One side was right, but this side had it upside down, which made it interfere with the pin on the rear of the caliper. They just sent it anyway.

The calipers were looking a bit worse for wear.

Being such a simple design meant they were quite easy to strip down. First, I used my tyre pump air compressor to slowly push the pistons out. The RH side, being the sized caliper, took a bit of back and forth to push the piston out, but eventually it came out with a bang.

Always use a block of wood or something to catch the piston, particularly if it’s stuck, as it will come out with a lot of force. Also, make sure to use PPE; no one wants to catch a face full of brake fluid (again)

To my surprise, the pistons are aluminium, which means they have some surface oxidation, but no rust.

Using CRC as a lubricant, the oxidation was quickly removed using a scotch pad.


The bore inside the caliper had some gunk built up inside it, as well as some oxidation of its own. A quick clean and gentle scrub had the bores looking good again.

Next was to remove the two slider bushes. Both of these, on both calipers, were seized and required hammering to remove

These slide inside a bore that has a pair of o-rings inside, with grease between them

All the seals were removed next.


Now it was time to clean them up, ready to paint. I soaked the main body of the caliper in the ultrasonic for a bit, and they came up pretty good, but the fronts, which is where I was painting, were too big for my ultrasonic so were wirebrushed and brake-cleaned.

Being an Alto werido, I wanted to spice the calipers up a bit, and give them a bit of a forward homage (if that’s such a thing) to the brakes of the later HA36S Alto Works, which come factory red.

So out came the rattlecans
First coat

Second coat

Having actually read the instructions for once, I noticed that there was an “IMPORTANT” step, which involved baking them at 93c for an hour to cure the paint, to make it more durable and solvent resistant.
So after three coats, and the required drying time beforehand, out came the BBQ for the first time this season.

After an hour of baking and then cooling off, the calipers were looking pretty good.


Now it was time to build the calipers back up again. I started by cleaning the slider bushes.

The new piston seal was next. Grease it up good, and then slip it into the groove, being careful not to twist it.

The piston comes next. This should be fairly easy to press into place by hand and slide smoothly.

The piston boot takes a bit of wrangling to get into place, but I found careful use of a pick helps a lot to get the lip into place and then using the back of the pick to push the lip into the groove.


Now the o-rings for the slider bushes can be fitted. Once again, grease them up good and slip them into the grooves. I found it easiest to use a finger from one hand to keep the bottom of the o-ring in the groove and then push the top of the o-ring into place with the other hand.

The channel between the o-rings is just a groove to hold grease, so stick a greasy finger in and pack it.

Now the slider bushes can be pressed into place. They take a bit of a push to get through the o-rings, but otherwise should slide pretty freely and smoothly.

Next up are the boots for the slider pins. These are a bit of a pain to fit and very fiddly. It also helps to notice that there are two different-sized boots, as the retaining groove on the calipers is bigger on one side than the other.

Each side has its own boot, one with a narrow lip and the other with a wide one.

After much faffing about, I got all the boots on. Once again, careful use of the pick helps get them in place, along with lots of pulling and squishing by hand. I found it easiest to push the slider bush flush with the body of the caliper on the side I was working on, get the boot in place, and then push the bush through the boot and clip the boot into its groove; otherwise it just gets in the way.

And there we have it, one rebuilt caliper ready to refit

Rinse and repeat with the other caliper, and that’s job done. This caliper needed a quick tickle with a file and sandpaper to tidy up some burrs on the piston, which a previous butcher had made for some reason

But otherwise, it was exactly the same deal

Until I replace the rotors, hoses and wheel bearings, the calipers will just chill in the boot, with the rest of the parts I have collected.

As a quick note, I believe, other than the handbrake mech on the Cappuccino rear calipers, these are basically the same thing, and it’s the same procedure to rebuild them.
The seal kit I used was from Pitwork, which strangely, is a Nissan brand, and included Toyota rubber grease, to fit a Suzuki.

Parts Used
Brake Caliper Seal Kit – Pitwork AY600-KE009
Please note these parts are specific to my car and may vary. Please check before ordering.